
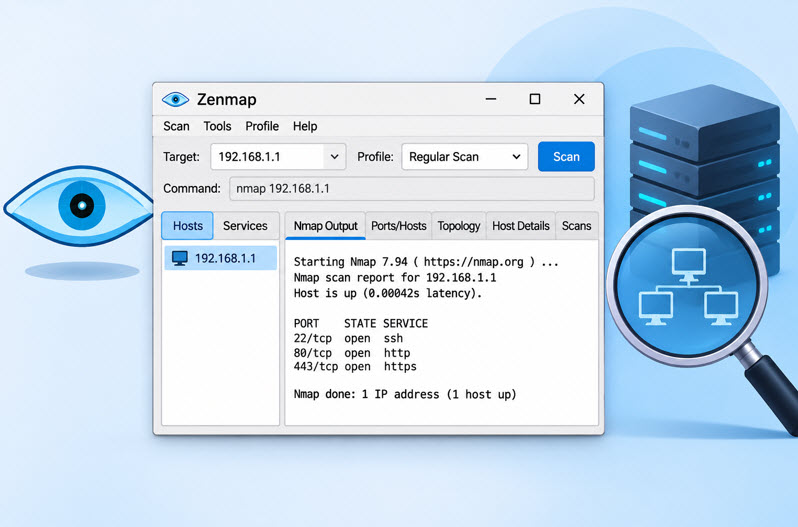
Zenmap is the graphical user interface (GUI) of the Nmap security scanner. It is a free, open-source network scanning tool that makes port scanning easier, especially for beginners who prefer using a graphical interface instead of running commands through the terminal.
With Zenmap, you can scan target IP addresses, identify open ports, discover running services, and view scan results in different formats. It also provides several predefined scan profiles that allow users to perform different types of network scans without manually writing Nmap commands.
In this tutorial, we will explore the Zenmap interface and learn how to scan a target IP address using its graphical interface.
Opening Zenmap on Windows and Kali Linux
In this tutorial, I have downloaded and installed Zenmap on my Windows machine.
If you want to learn how to install Nmap/Zenmap on Windows, check out the following tutorial:
Read more: How to Install Nmap and Zenmap on Windows
Zenmap is also available in Kali Linux installations that include the package. To open it, follow these steps:
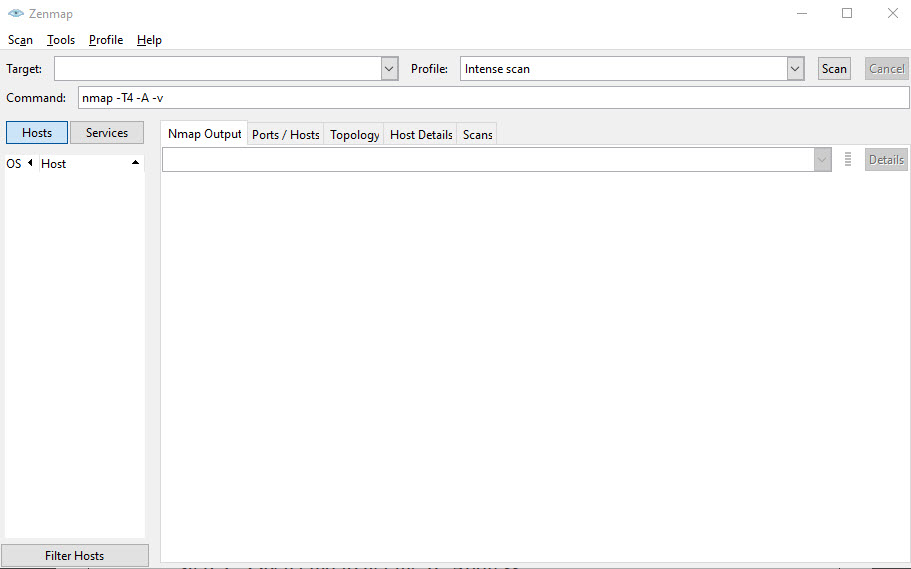
On Windows:
- Open the Windows Search box.
- Type Zenmap.
- Click on Zenmap from the search results.
- The Zenmap graphical interface will open.
On Kali Linux:
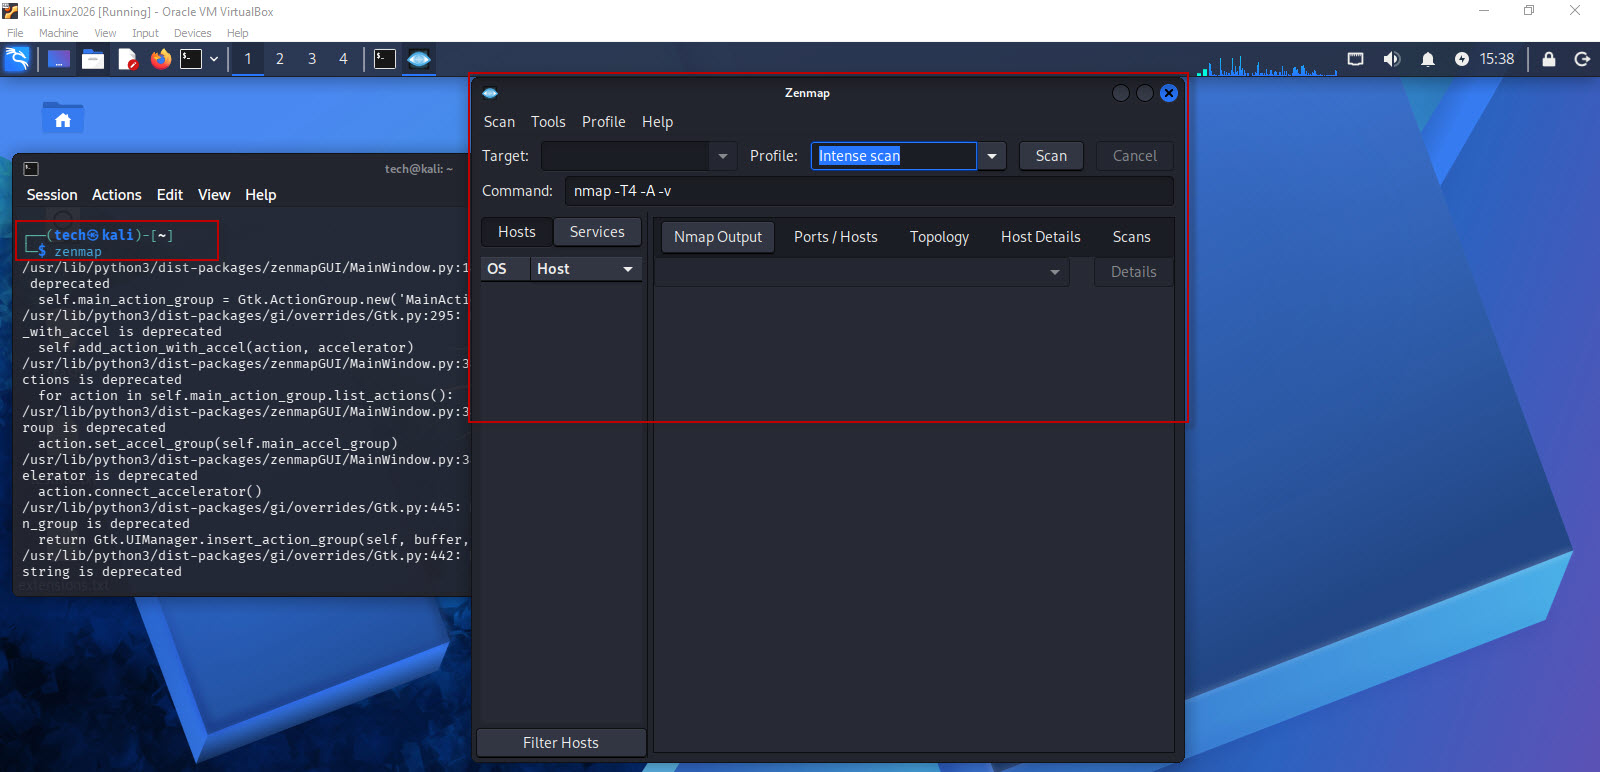
- Open the terminal.
- Type the following command: zenmap
- Press Enter to launch the Zenmap GUI.
How to Scan a Target IP Address Using Zenmap
Now that we have opened Zenmap, let’s understand its different fields and perform a basic network scan.
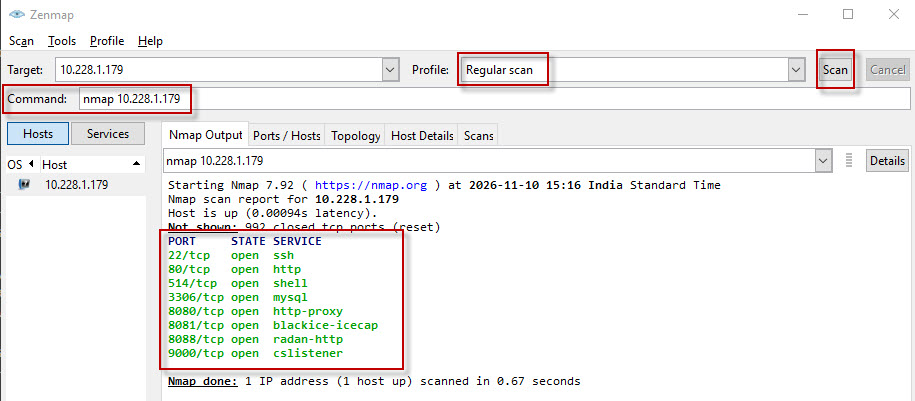
For this example, we will use a Regular Scan profile to scan a target IP address.
1. Target
The Target field is where you enter the IP address or IP address range that you want to scan.
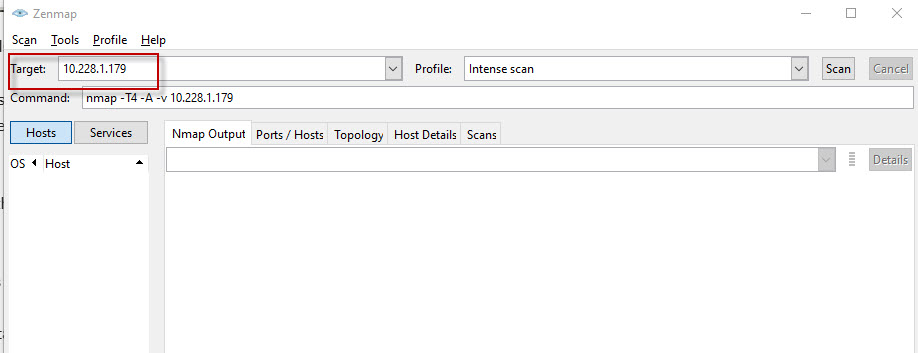
You can also specify multiple targets or an IP range depending on your scanning requirements.
2. Profile
The Profile section allows you to select the type of scan you want to perform.
Zenmap provides several predefined scanning profiles, making it easier to perform different types of scans without remembering Nmap commands.
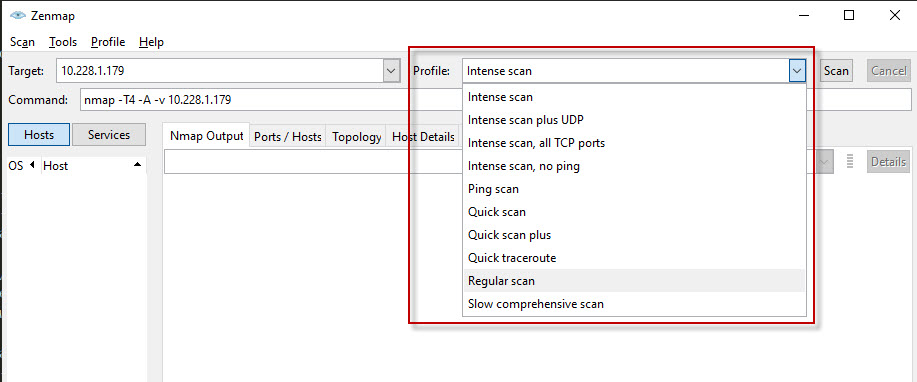
Some commonly used profiles include:
- Intense Scan: Performs a detailed scan to identify open ports, running services, service versions, and other host information.
- Ping Scan: Identifies live hosts on the network without performing a port scan.
- Quick Scan: Performs a faster scan of commonly used ports.
- Regular Scan: Performs a basic Nmap scan similar to running nmap followed by the target IP address.
You can select the profile depending on the information you want to collect from the target.
3. Scan
After entering the target IP address and selecting a scan profile, click the Scan button to start scanning.
In this example, we have selected the Regular Scan profile.
One useful feature of Zenmap is that it automatically displays the corresponding Nmap command in the Command field after you select a profile.
For example, when you select Regular Scan, you will see a command similar to: nmap 10.228.1.179
This helps beginners understand which Nmap command is being executed in the background.
Once the scan starts, Zenmap displays the scan results, including open ports, detected services, and other available information about the target.
Understanding the Zenmap Interface
Now let’s understand the different sections available in the Zenmap interface and how they help analyze scan results.
- Hosts : On the left side of the Zenmap interface, you will find the Hosts section.
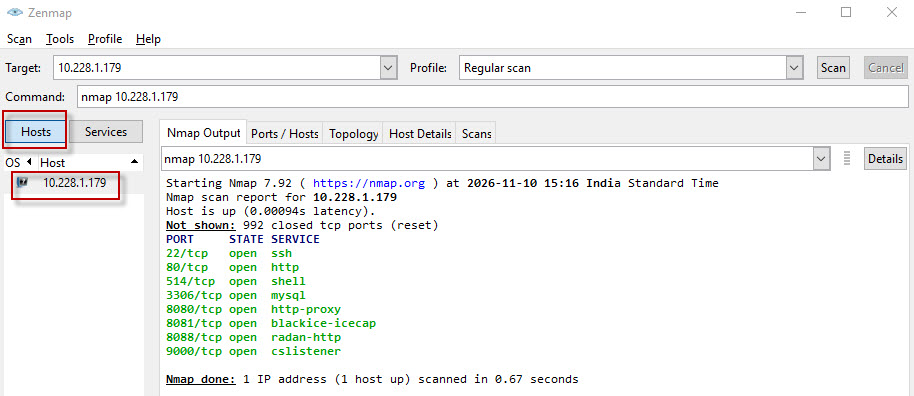
It displays the list of hosts discovered or scanned during the scanning process. When multiple IP addresses are scanned, you can select individual hosts to view their results.
- Services : Next to the Hosts section, you will find the Services section.
When you click on Services, Zenmap displays the services identified during the scan.
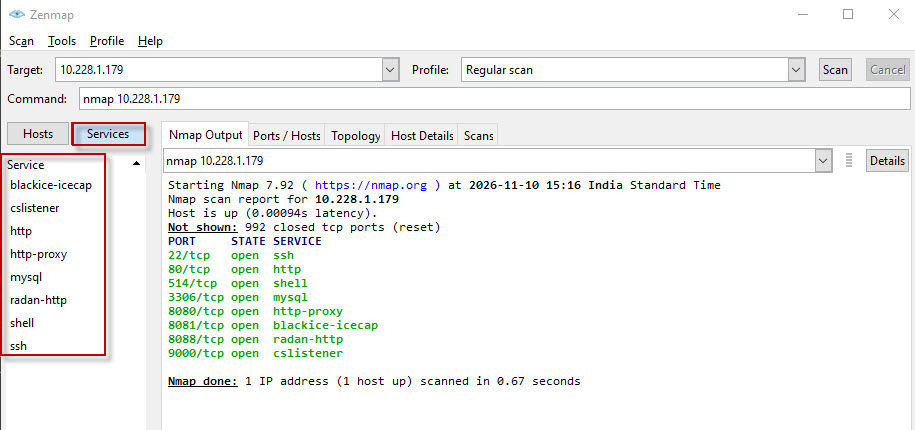
This information helps identify which network services are running on the target system.
Understanding the Zenmap Scan Result Tabs
On the right side of the interface, Zenmap provides different tabs to help you understand and analyze the scan results.
Let’s understand each of these tabs.
- Nmap Output : The Nmap Output tab is displayed by default when you perform a scan.
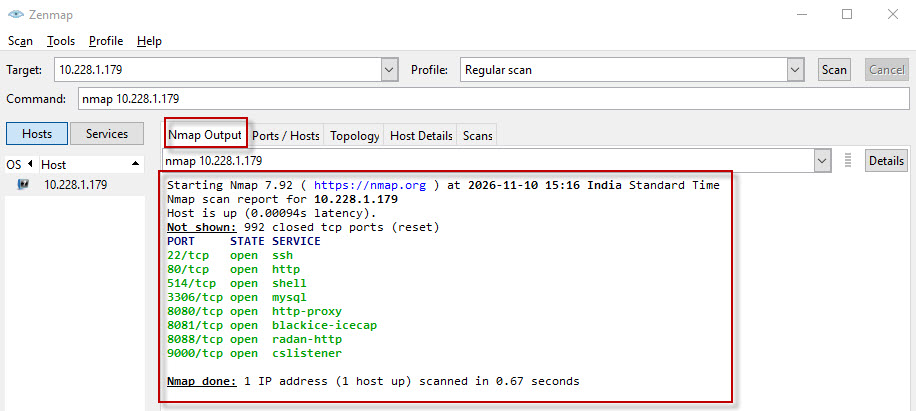
It shows the complete textual output generated by Nmap, including information such as scanned ports, port states, detected services, and scan completion details.
- Ports/Hosts : The Ports/Hosts tab displays the open and other detected ports along with their associated services.
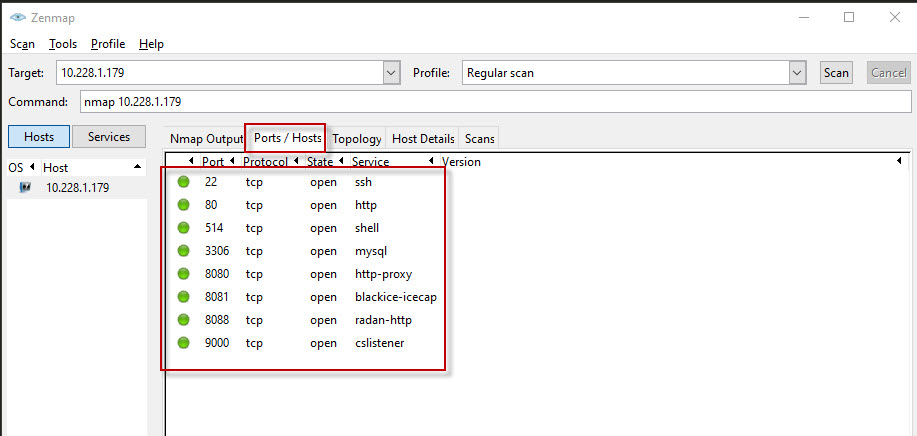
This tab is particularly useful during network security assessments because it provides a quick overview of the available services on the target host.
- Topology : The Topology tab displays a graphical representation of the scanned network hosts and their discovered relationships.
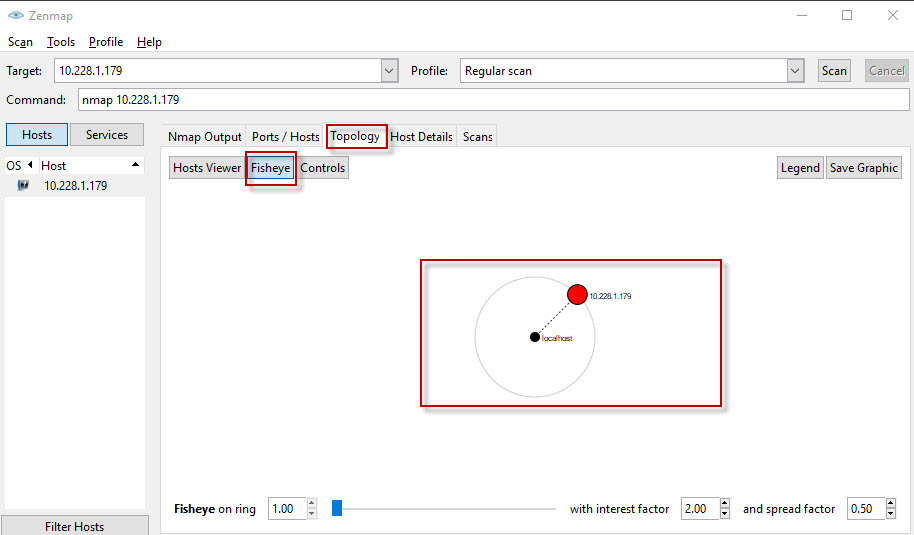
It helps visualize the network layout based on the scan information collected by Nmap.
You can use the Fisheye option to zoom in and examine the topology more closely.
- Host Details: The Host Details tab displays additional information about the selected host.
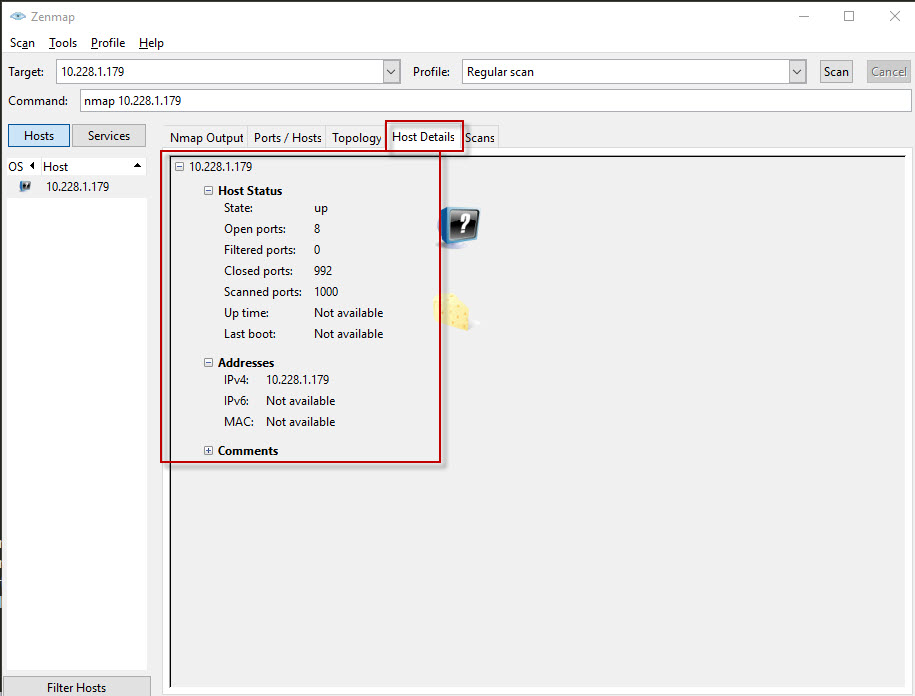
Depending on the scan options and available information, it can show details such as the host’s IP address and other scan-related information.
- Scans: The Scans tab displays information about the scans performed during the current Zenmap session.
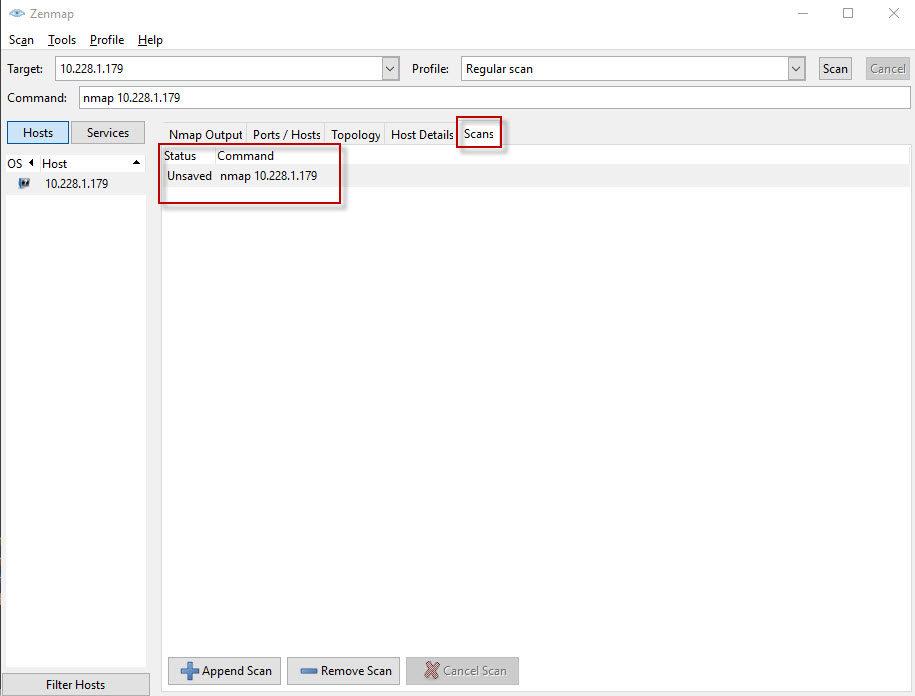
It is useful for reviewing previously executed unsaved scans .
How to Save Zenmap Scan Results
Zenmap also allows you to save scan results so that you can review them later without performing the scan again.
Follow these steps to save the scan output:
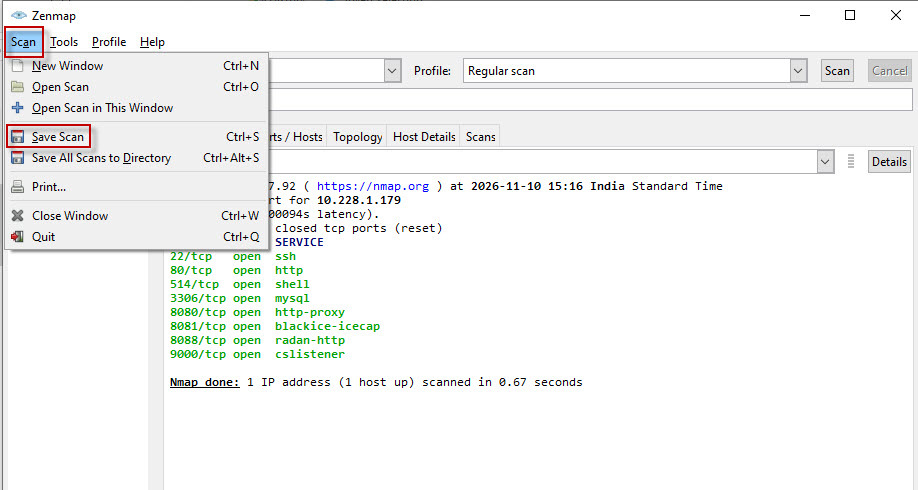
- After completing the scan, go to the top menu.
- Click Scan.
- Select Save Scan.
- Choose the location where you want to save the file.
- Enter a filename and select the required file format.
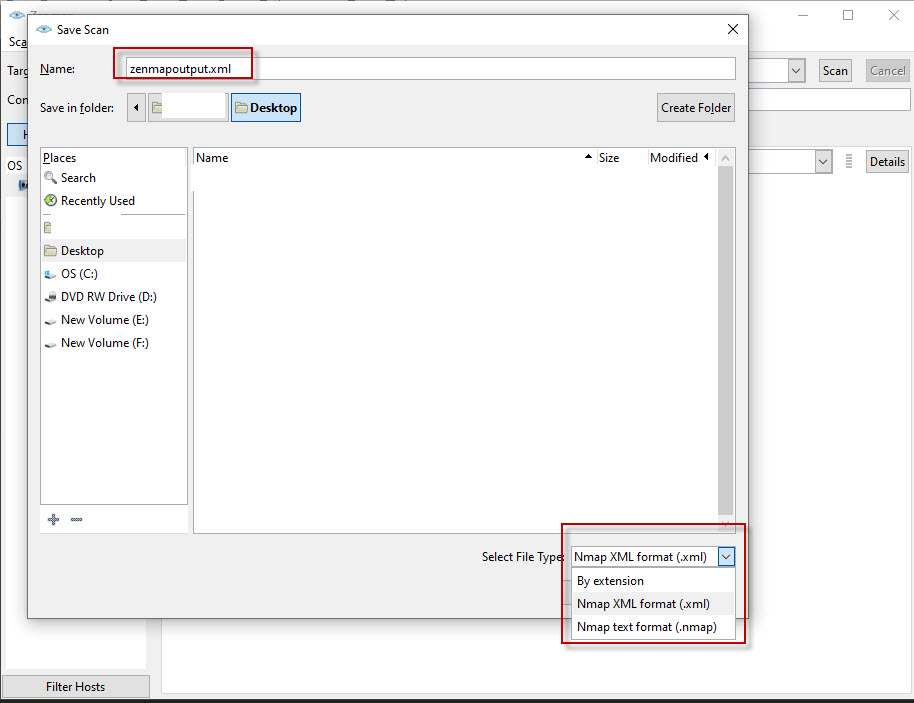
- Click Save.
Zenmap supports saving scan results in different formats, including Nmap XML and normal output. These saved results can be useful for future analysis, documentation, and comparison of scan findings.
Conclusion
Zenmap makes network scanning easier by providing a graphical interface for the Nmap security scanner. Instead of manually remembering different Nmap commands, beginners can select predefined scan profiles and perform scans with just a few clicks.
In this tutorial, we learned how to open Zenmap on Windows and Kali Linux, scan a target IP address, understand the different scan profiles, explore the available result tabs, and save scan results for future reference.
Zenmap is particularly useful for beginners who are learning network scanning and for security professionals who want a graphical way to review Nmap scan results.