Burp Suite Repeater is one of the most useful tools in Burp Suite for manual web application security testing. It allows security testers and penetration testers to capture an HTTP request, modify its parameters or headers, resend it to the server, and analyze the response.
Unlike automated scanning, Repeater gives you complete control over the request. This makes it useful for testing SQL injection, authentication issues, access control, input validation, and other web application security vulnerabilities.
In this tutorial, we will explore Burp Suite Repeater using Burp Suite Community Edition and Damn Vulnerable Web Application (DVWA) running locally on a Windows machine with XAMPP.
What Is Burp Suite Repeater?
Burp Suite Repeater is a tool that allows you to manually send HTTP requests to a web server multiple times while changing different parts of the request.
For example, you can change:
- URL parameters
- Form parameters
- HTTP headers
- Cookies
- Request methods
- Request body values
You can then compare the server responses to understand how the application behaves when different inputs are supplied.
Lab Setup
For this tutorial, the following environment is used:
- Windows machine
- Burp Suite Community Edition
- XAMPP
- DVWA installed locally
- A web browser configured to use Burp Suite as its proxy
Start XAMPP and make sure the DVWA application is running. Open DVWA in your browser and log in using the configured credentials.
For this demonstration, set the DVWA security level to Low.
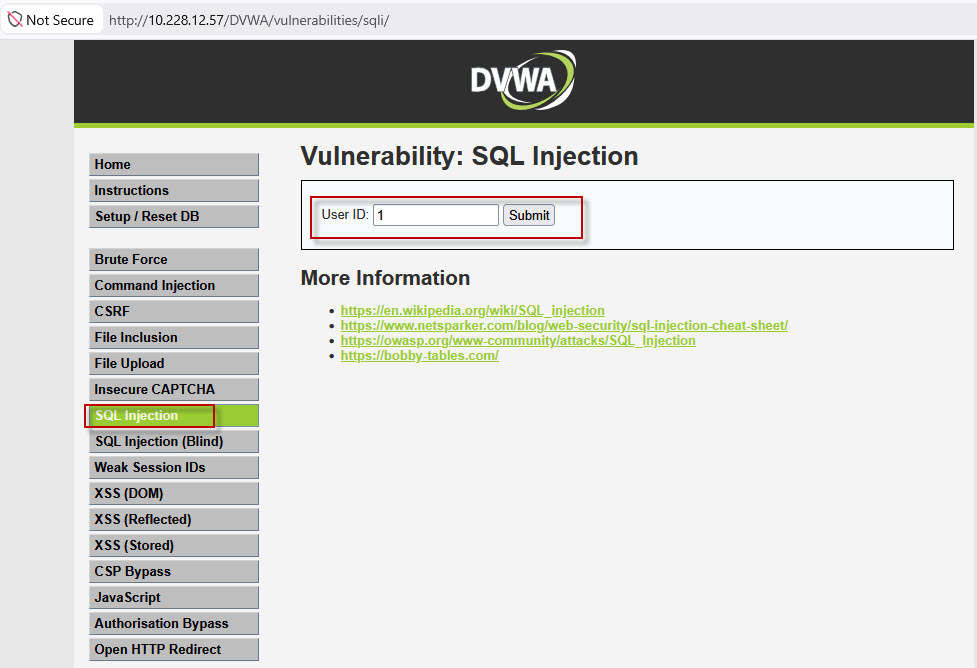
Navigate to the SQL Injection section from the DVWA menu.
Capture a Request in Burp Suite
Open Burp Suite Community Edition and configure your browser to send HTTP traffic through the Burp proxy.
On the DVWA SQL Injection page, enter a value such as 1 in the User ID field and submit the request.
Burp Suite will intercept the HTTP request in the Proxy tab.
The captured request contains information such as the HTTP method, requested URL, host, parameters, headers, and other request data.
Send a Request to Repeater
To send the captured request to Repeater, right-click the request in Burp Suite and select: Send to Repeater
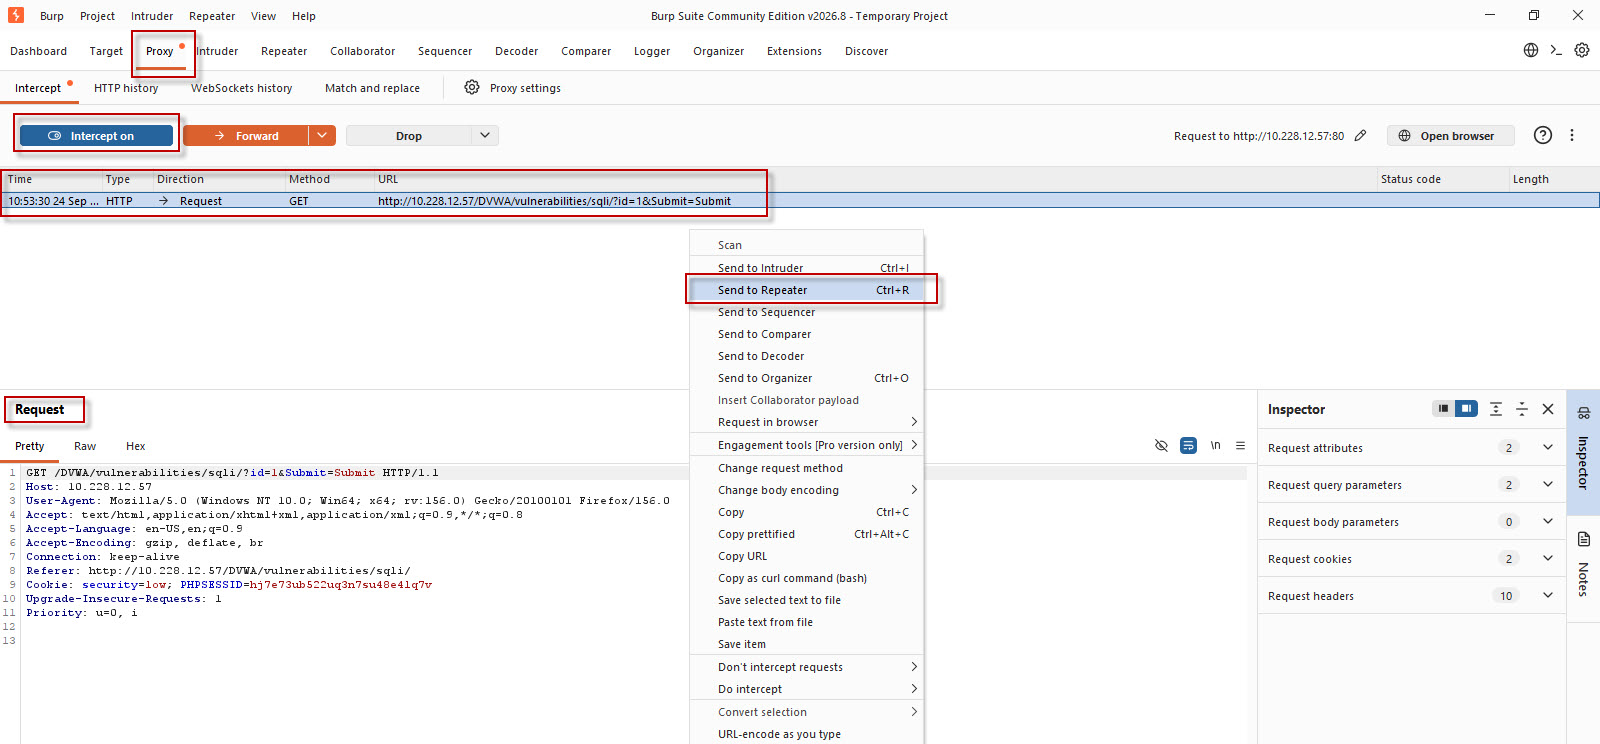
You can also use the available keyboard shortcut (CTRL+R) shown by your Burp Suite version.
Now open the Repeater tab. The captured request will be available there.
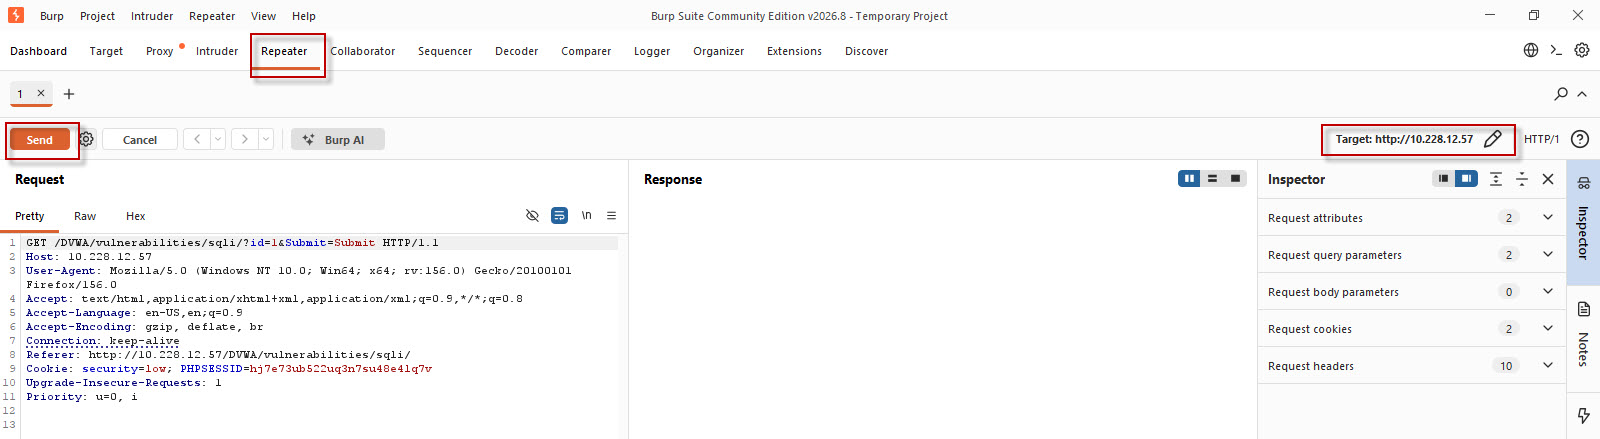
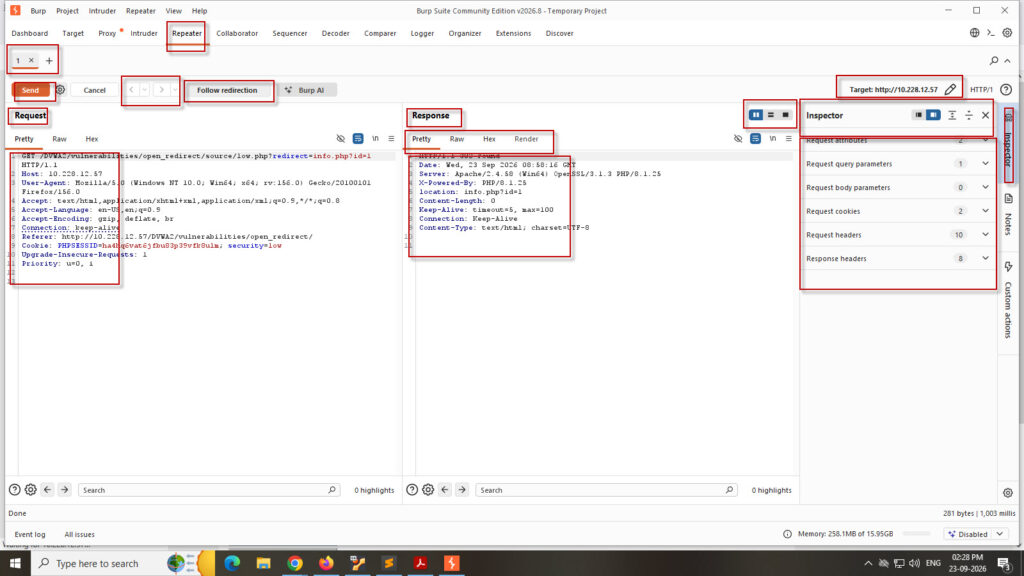
Burp Repeater mainly provides two areas:
- Request : Contains the HTTP request that will be sent to the server.
- Response : Displays the server’s response after the request is sent.
The request area also shows the target host or domain.
Click Send to send the request to the server. The resulting response will appear in the Response section.
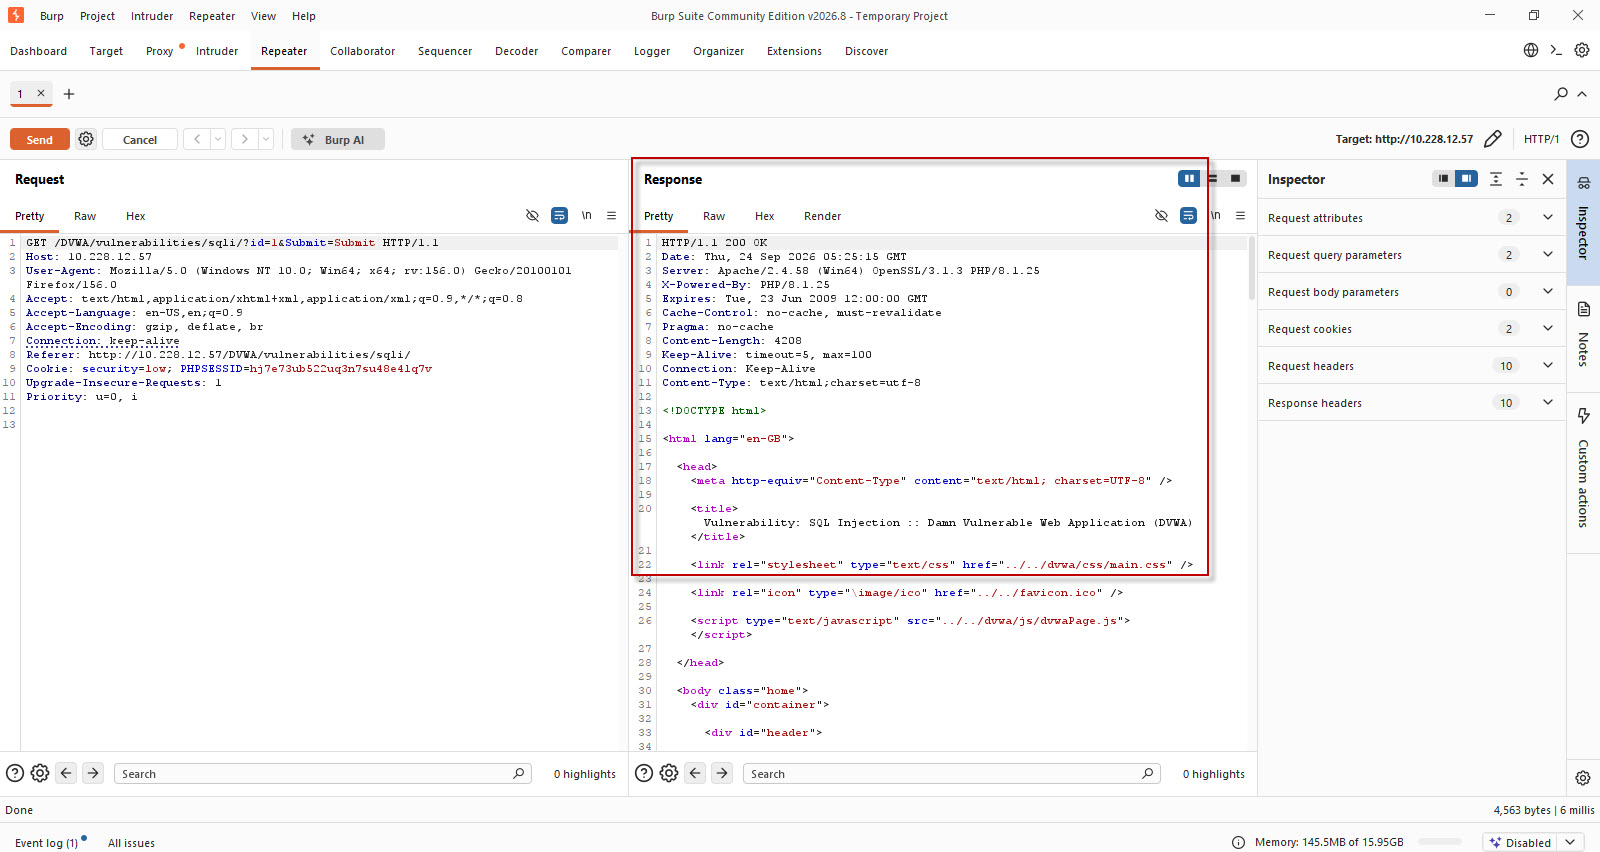
Understanding the HTTP Request
The Request section contains the information sent by the browser to the web server.
Depending on the application, it can include:
- HTTP method such as GET or POST
- Request URL
- Host header
- Parameters
- Cookies
- Referer header
- User-Agent
- Request body
- Other HTTP headers
Because the request can be edited before sending, Repeater is particularly useful for manually testing how an application responds to modified input.
Understanding the HTTP Response
The Response section displays the information returned by the server.
A response may contain:
- HTTP status code
- Response headers
- Cookies
- HTML content
- JSON or XML data
- Error messages
- Application responses
For example, a successful HTTP request may return a 200 OK status code along with the HTML content of the requested page.
Modify Parameters Using Repeater
One of the most important features of Repeater is the ability to modify request parameters.
Suppose the SQL Injection request contains the following parameter: id=1
Change it to: id=2
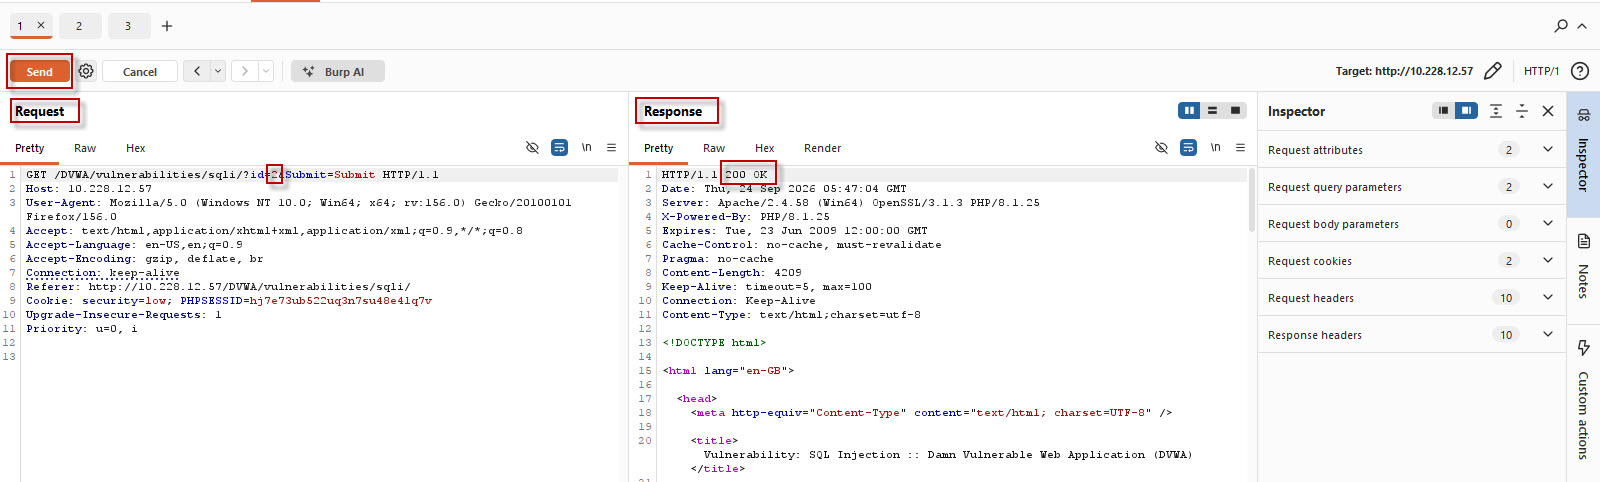
Then click Send again and observe the response.
You can repeatedly modify the parameter and compare the results without going back to the browser and submitting the form each time.
For SQL injection testing in the DVWA lab, you can also modify the parameter with a single quote and send the request.
For example: id=’
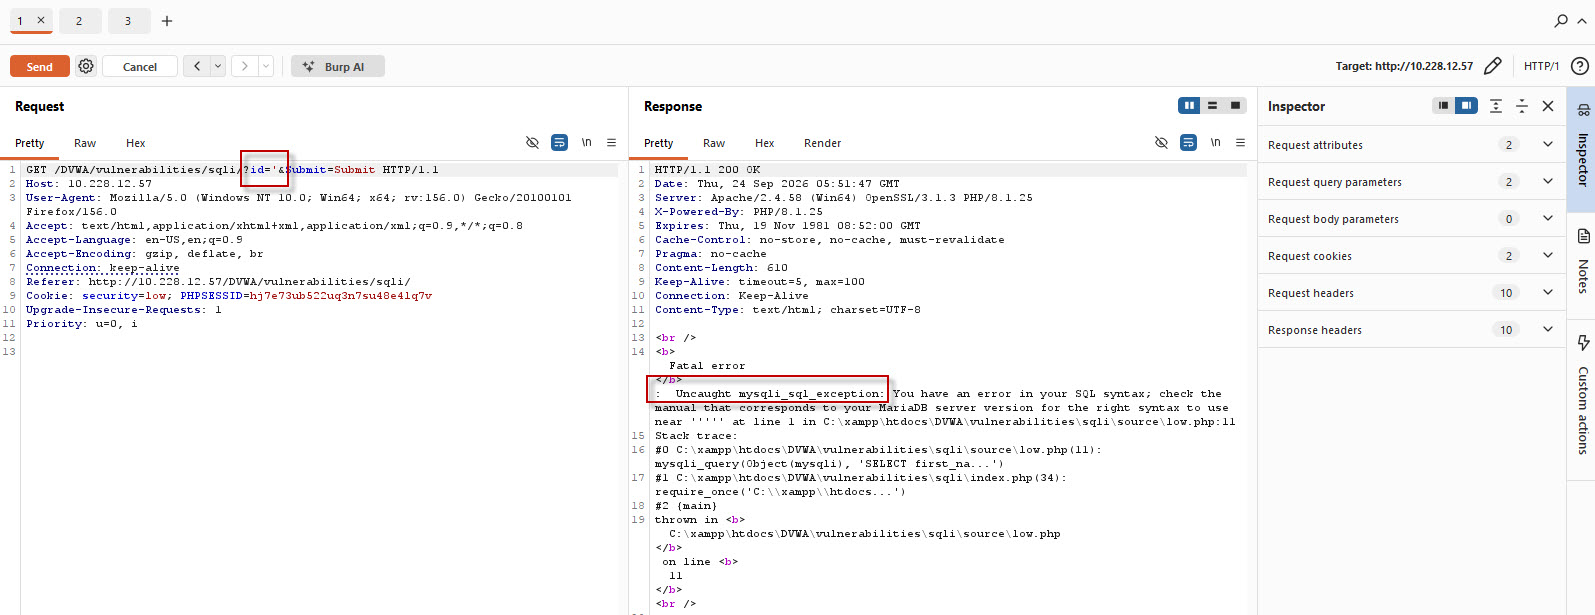
If the application is vulnerable, the response may expose a database-related error or other behavior indicating that the input is being interpreted by the backend.
This demonstrates why Repeater is useful for manual vulnerability testing.
Render the Response
Burp Suite Repeater can also display a rendered version of an HTTP response.
After receiving a response, select the Render option in the response area to view the response closer to how the browser would display the page.
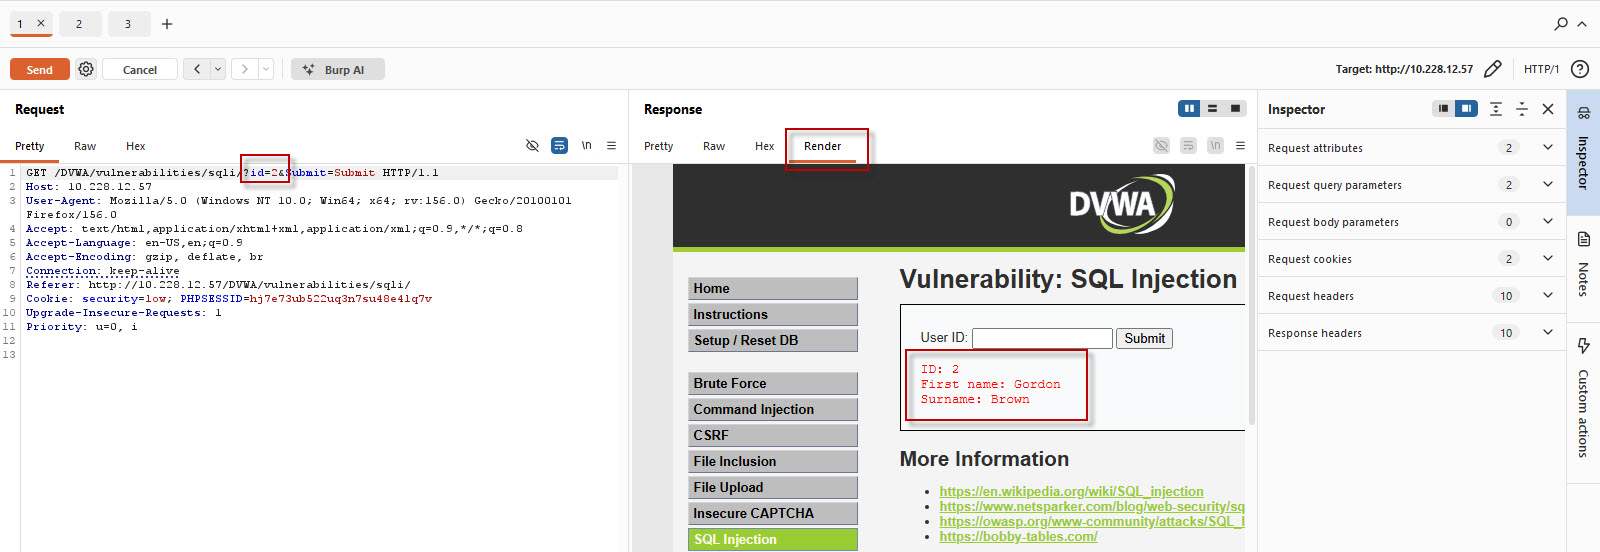
This can be useful when the raw HTML response is difficult to understand.
Send Requests from HTTP History
You do not have to send a request to Repeater immediately after capturing it.
Go to: Proxy → HTTP history
Here you can see previously captured HTTP requests.
Select a request, right-click it, and choose Send to Repeater.
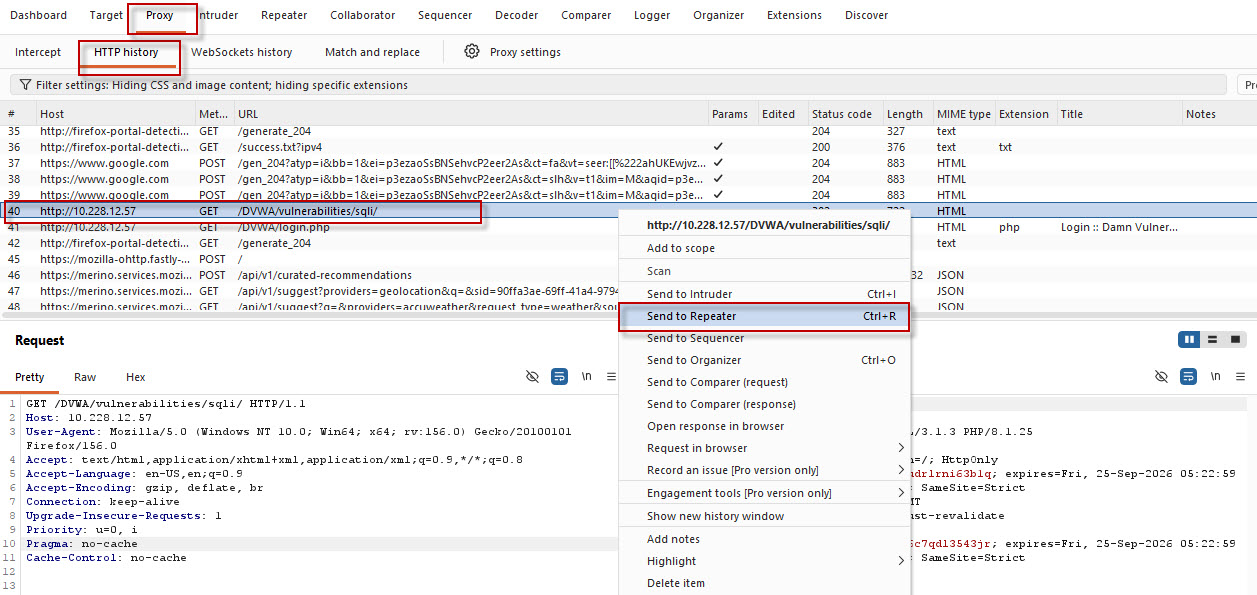
This is useful when you want to revisit an earlier request during testing.
Repeater Layout Options
Burp Suite Repeater provides different layout options for viewing requests and responses.
The default layout displays the Request and Response sections horizontally.
You can change the layout using the layout controls available in the upper-right area of Repeater.
Depending on the selected option, you can view:
- Request and Response horizontally
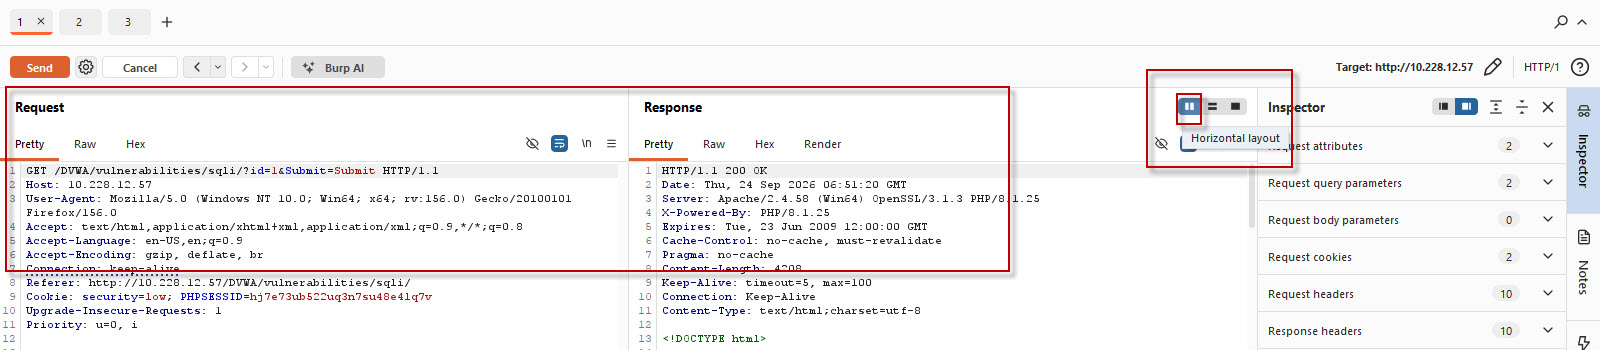
- Request and Response vertically
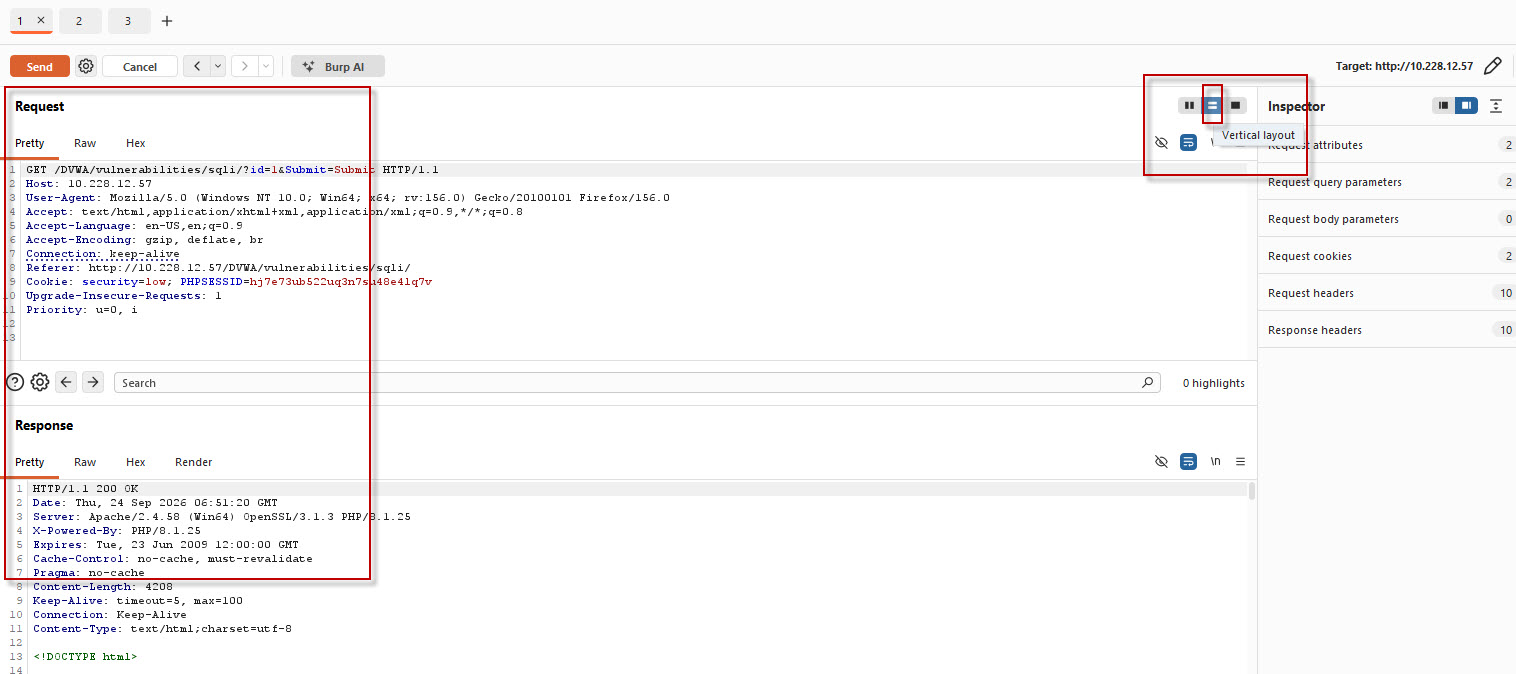
- A combined view.
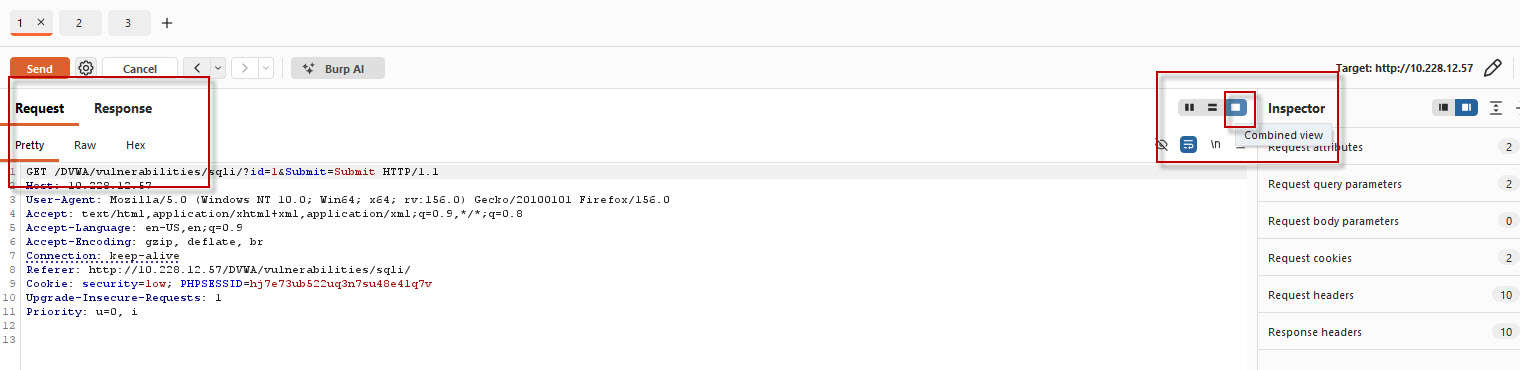
Choose the layout that makes it easier to compare the request and response while testing.
Rename Repeater Tabs
When testing multiple requests, it can become difficult to identify individual Repeater tabs.
You can rename a tab by right-clicking it and selecting the rename option. You can also double click the tab to rename it.
For example, you can name requests:
- SQLi
- Brute Force
- Login
- Access Control
- File Upload
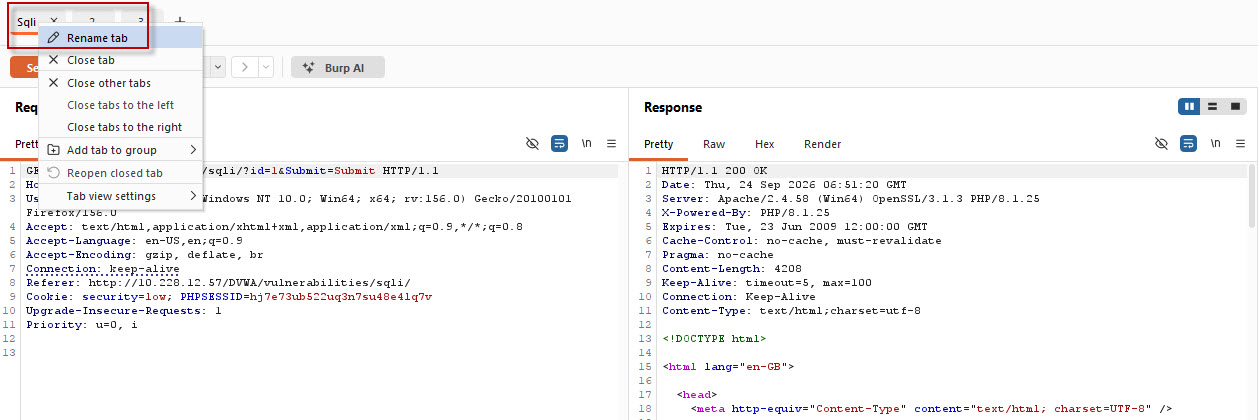
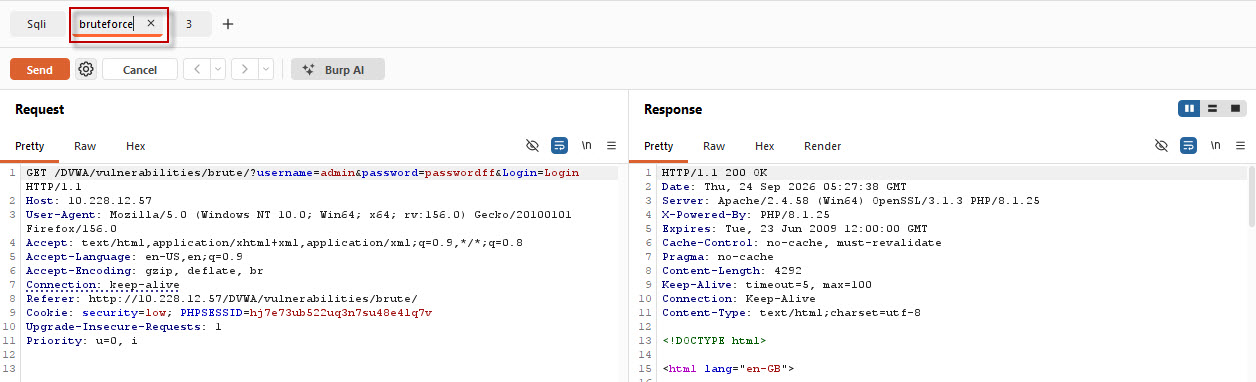
Meaningful names make it easier to locate requests during a larger testing session.
Reopen a Closed Repeater Tab
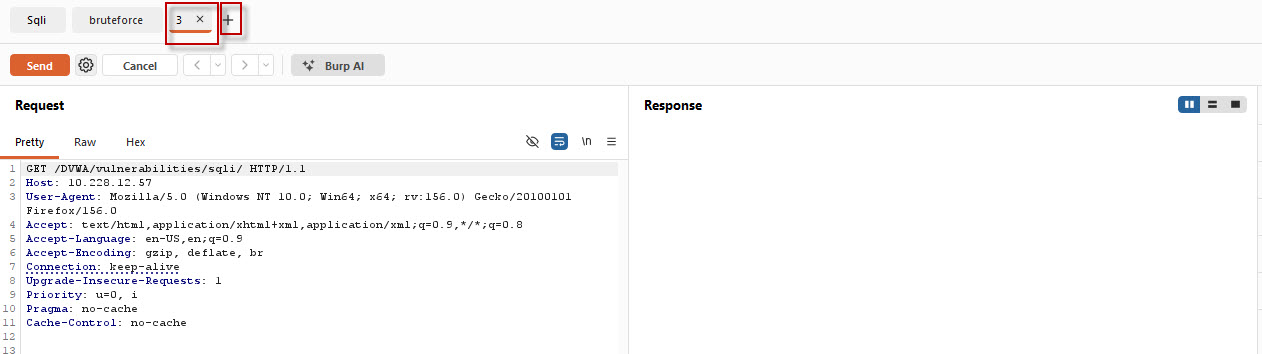
If you accidentally close a Repeater tab, you can reopen it using the + option in the Repeater tab area and selecting the option to reopen a closed tab.
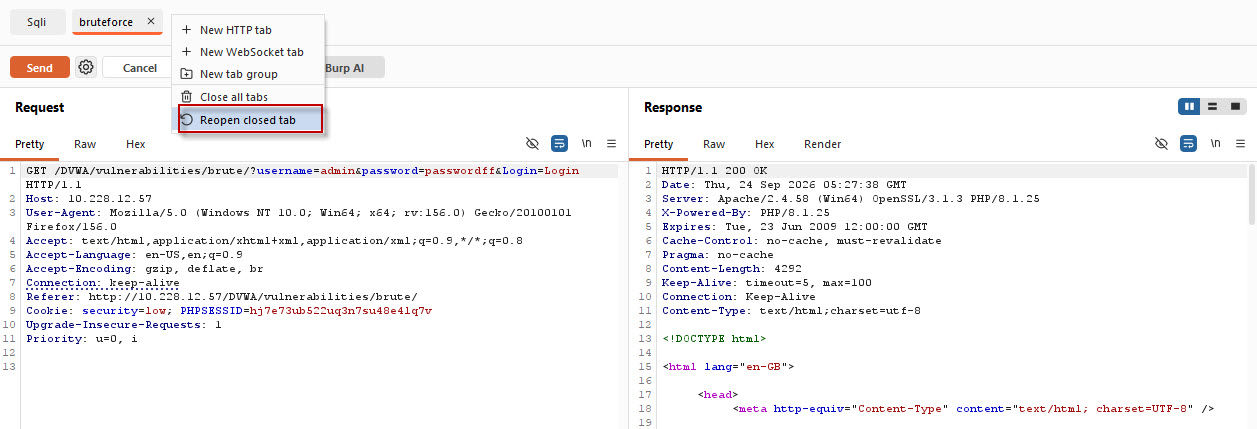
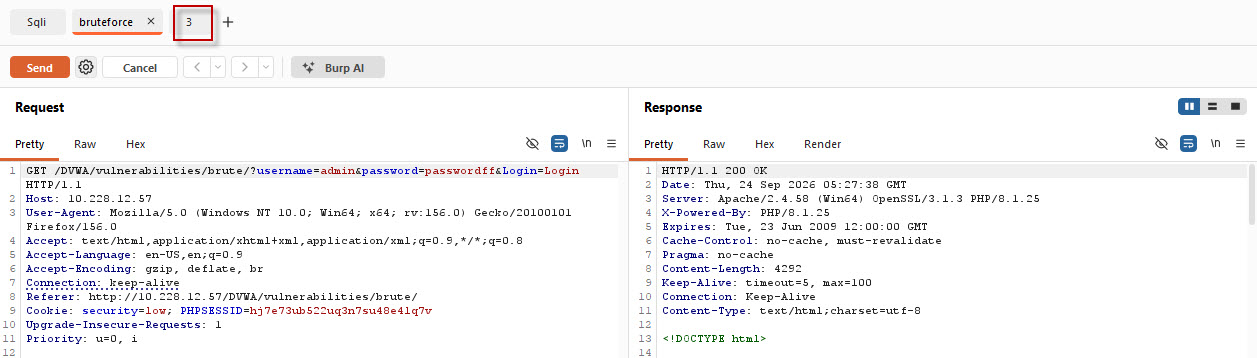
This is useful when working with multiple requests and accidentally closing one of them.
Create a New HTTP Request
Repeater also allows you to create a new HTTP request without first capturing it through the Proxy tab.
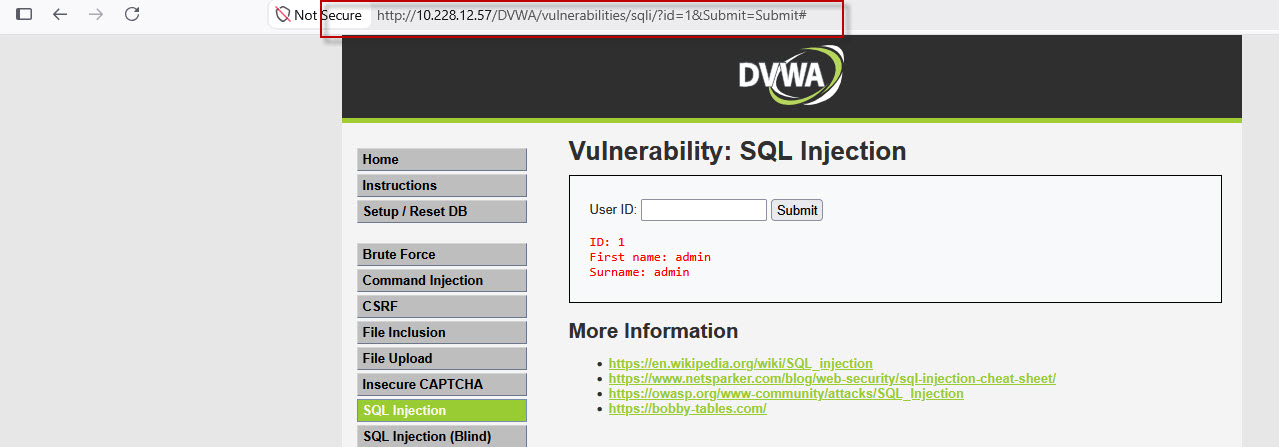
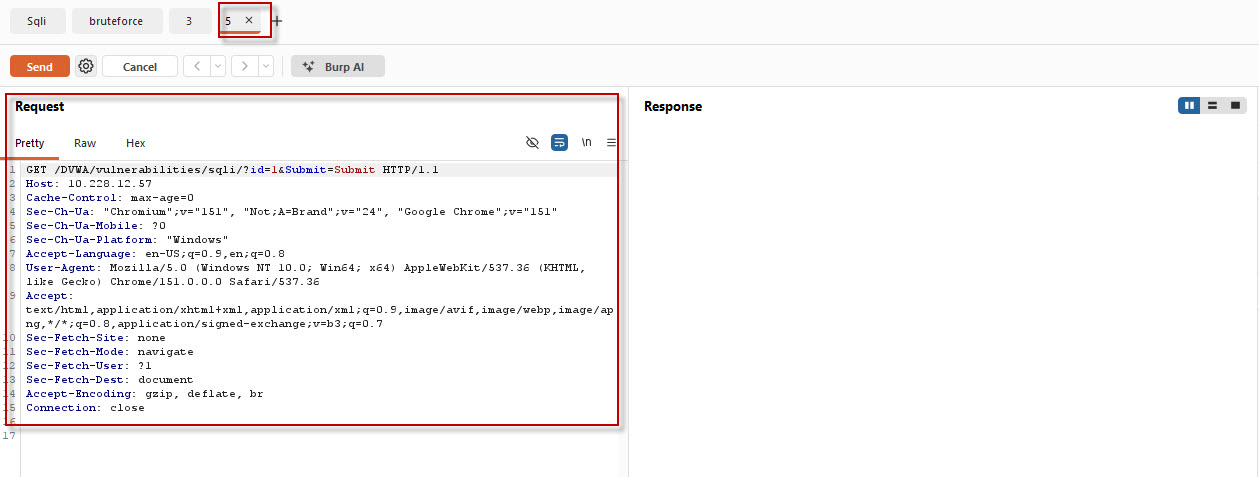
Copy the URL of the target application and use the + option in Repeater to create a new HTTP tab.
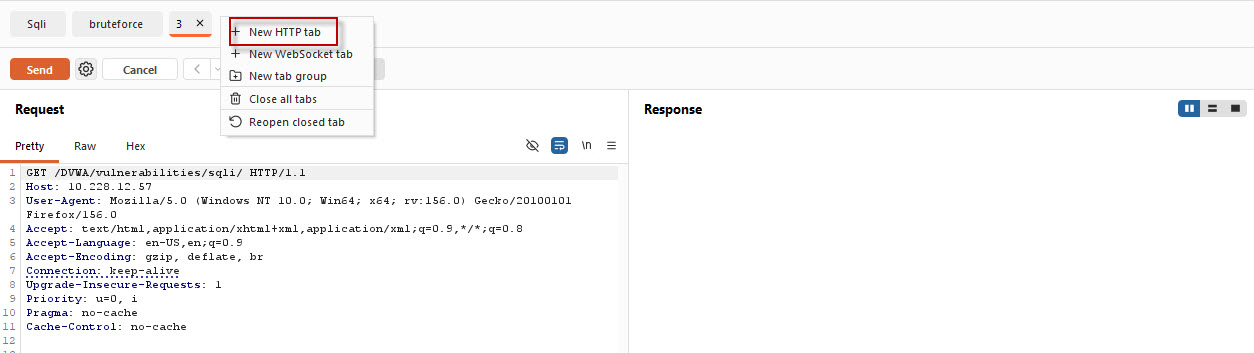
You can then use the option to paste the URL as a request. Burp Suite will create a request containing the URL and relevant HTTP information, which you can modify and send.
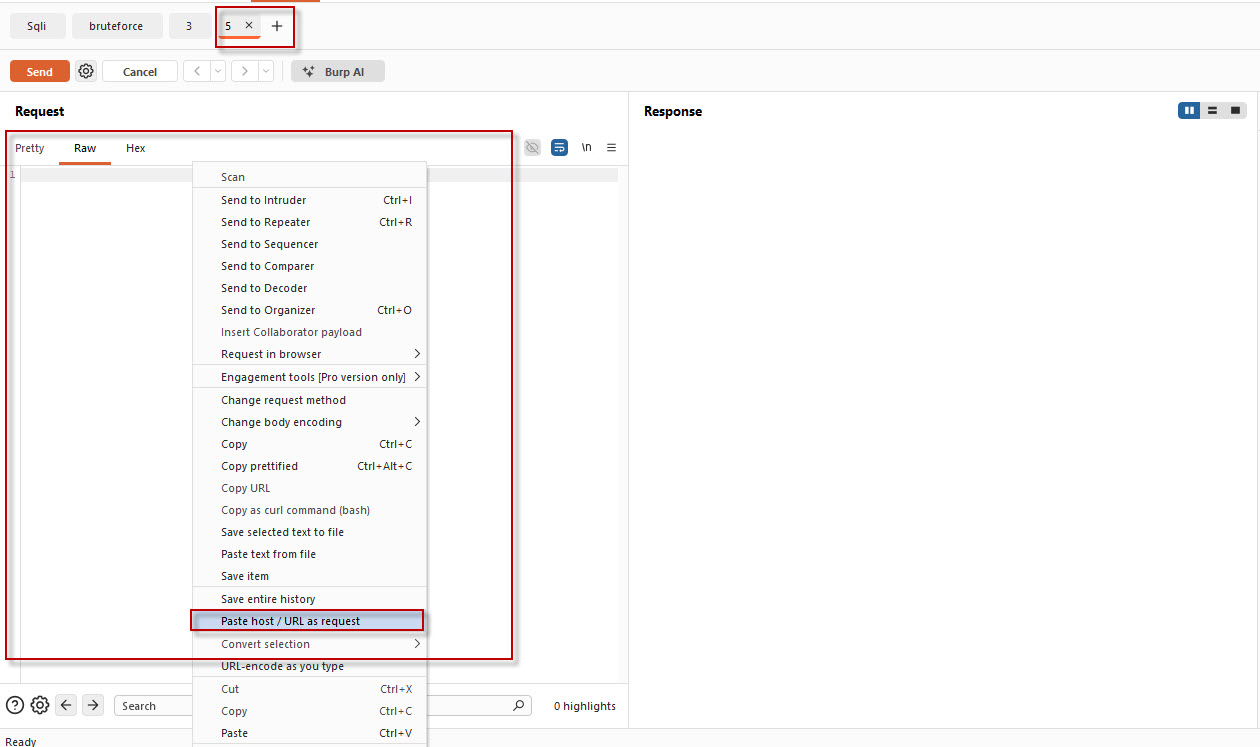
This is useful when you already know the endpoint you want to test.
Navigate Through Request History
Repeater maintains a history of requests made within a tab.
The navigation controls allow you to move backward and forward through previously sent requests.
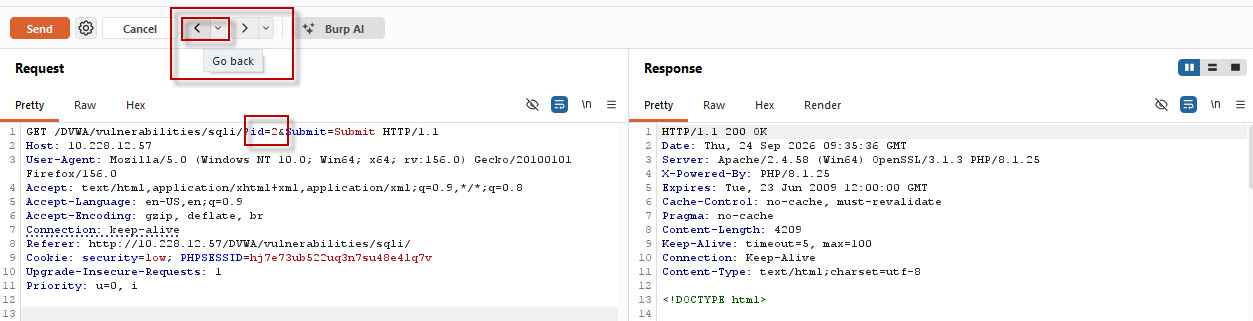
This makes it easier to return to an earlier version of a request after making several modifications.
Use the Inspector
The Inspector panel provides a structured view of different parts of the HTTP request.
It can help you inspect and work with request components such as parameters, headers, cookies, and other HTTP information.
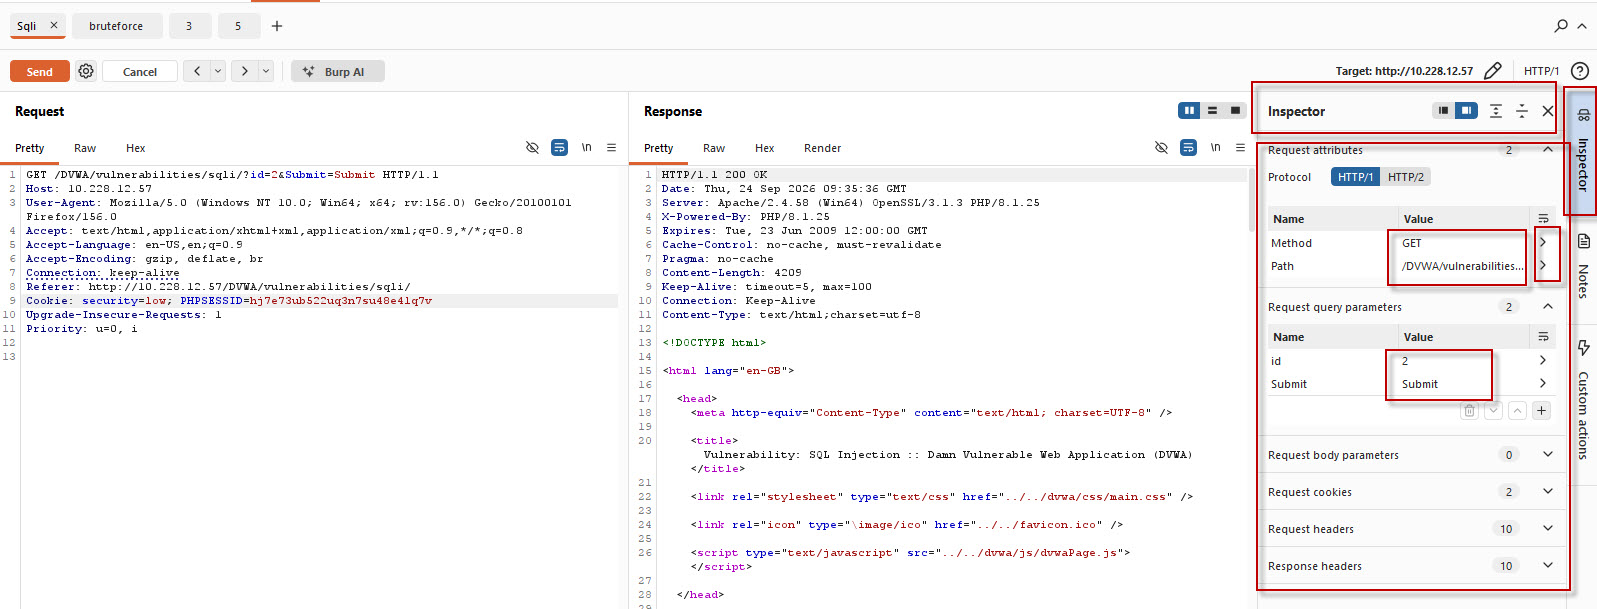
You can use this view when you want to understand the request structure and make changes without manually searching through the raw request.
Search Within Requests and Responses
Repeater provides a search option at the bottom of the Request and Response areas.
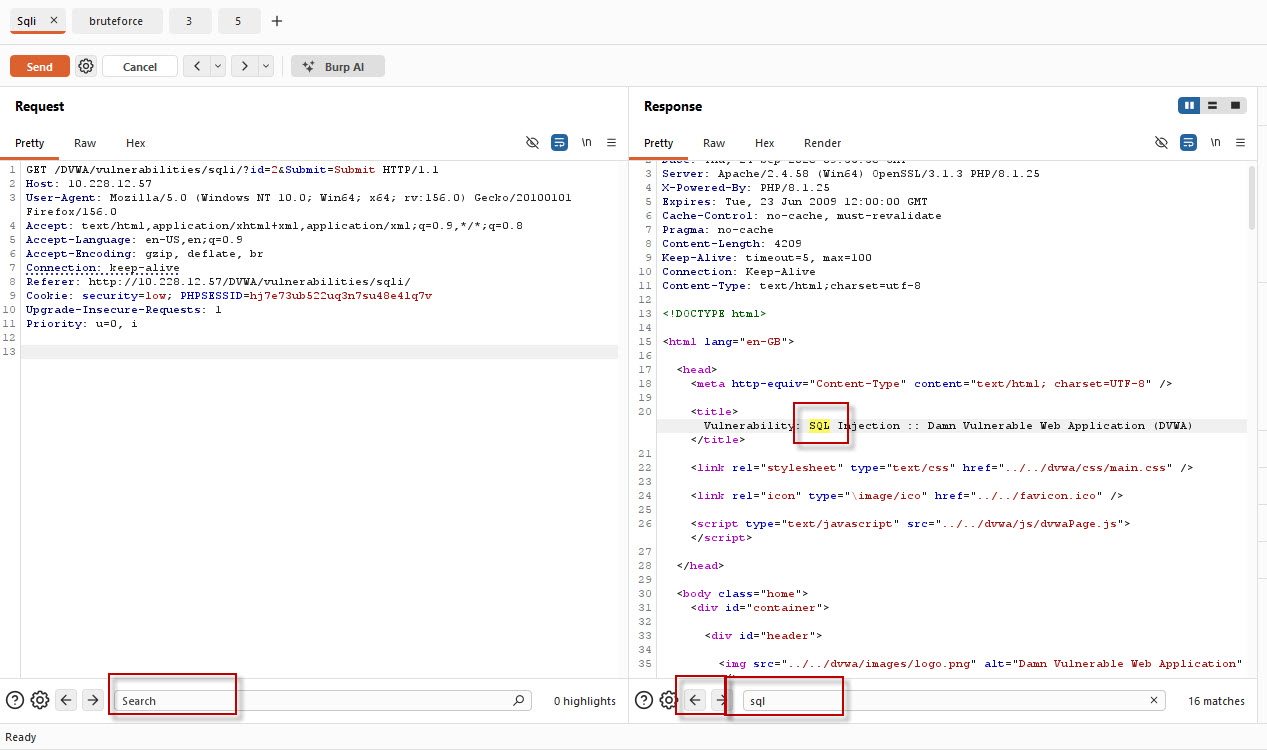
You can search for specific text such as:
- Error messages
- Parameter names
- Keywords
- Cookies
- Response values
- Security-related information
The matching text is highlighted, making it easier to locate information in long requests or responses.
Save Repeater History
Burp Suite also provides options for saving request and response history.
Right-click within the relevant area and use the available option to save the history. You can specify the file name, location, and supported format.
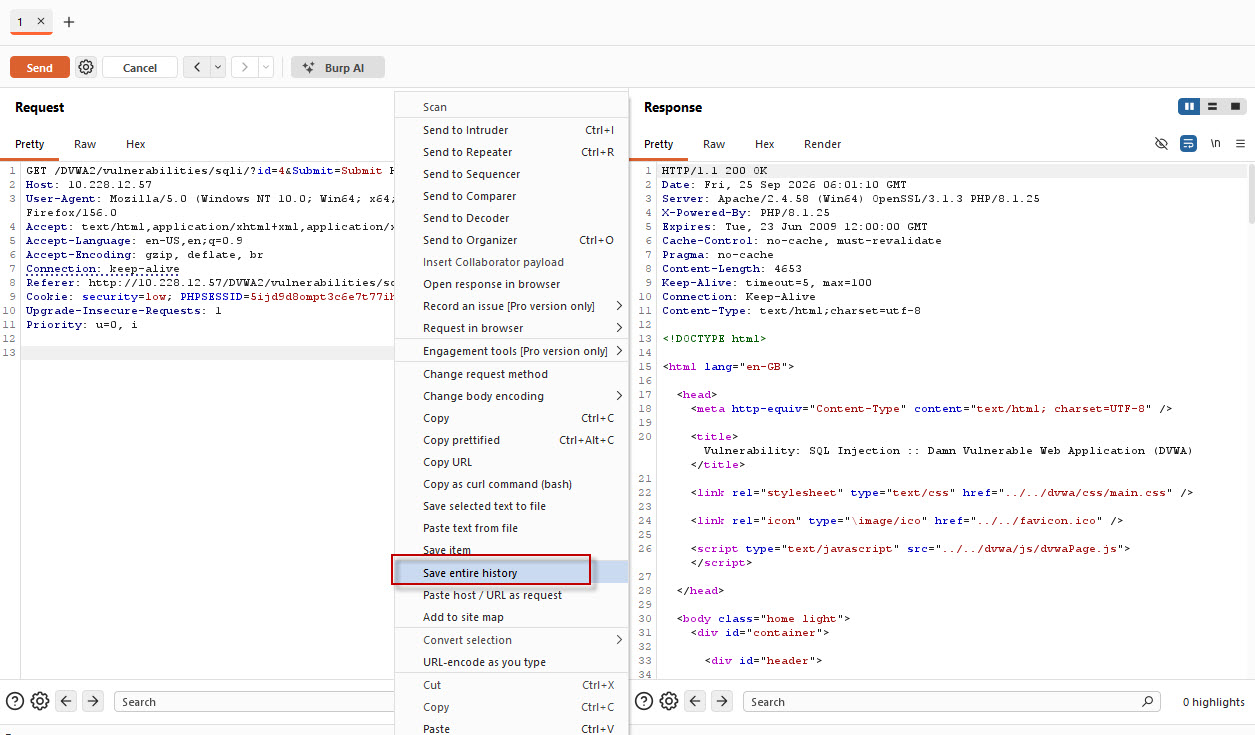
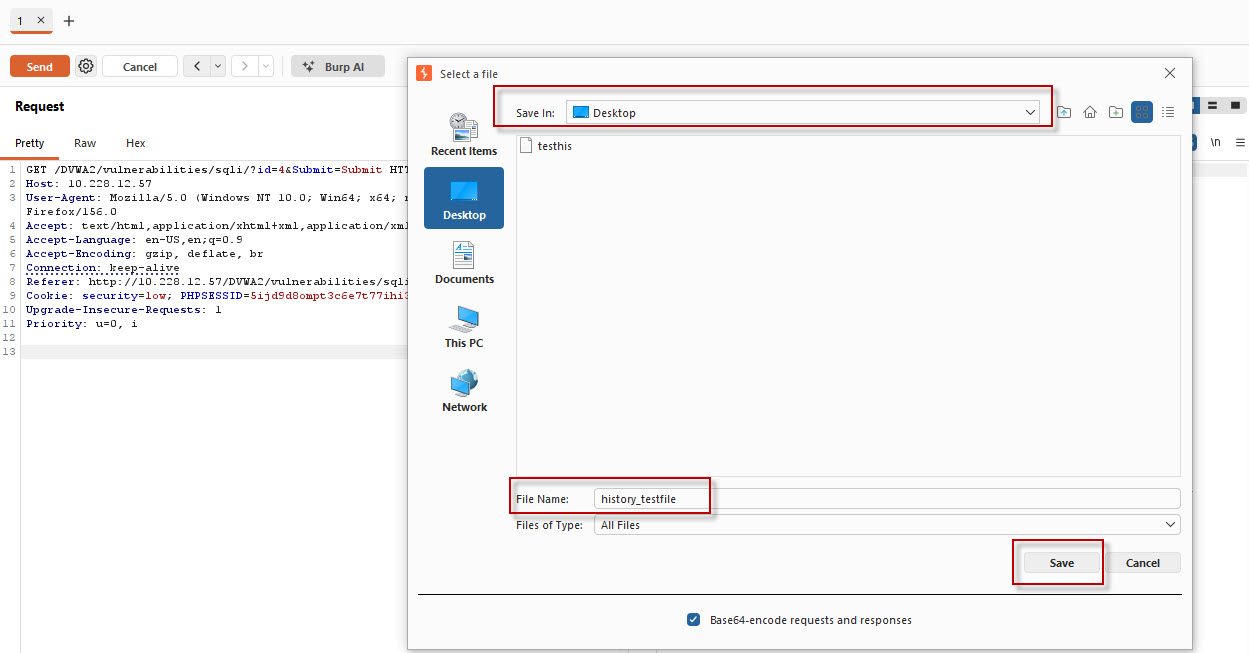
The saved file can later be opened to review the recorded requests and responses.
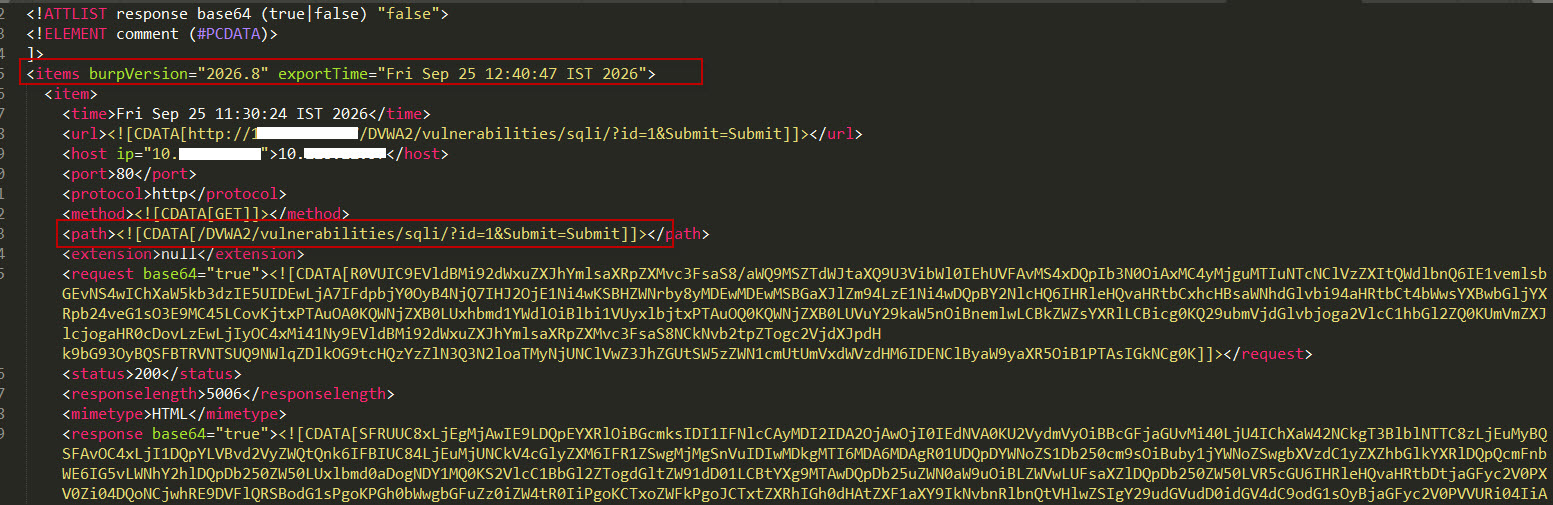
This can be useful for documenting testing activities or reviewing results later.
Why Use Burp Repeater for Security Testing?
Repeater is especially useful when you need to manually test how an application handles modified HTTP requests.
Common testing activities include:
- SQL injection testing
- Authentication testing
- Authorization testing
- Input validation testing
- Parameter manipulation
- Cookie modification
- Header manipulation
- Error handling analysis
- API request testing
- Access control testing
Its main advantage is the level of manual control it provides over HTTP requests.
Conclusion
Burp Suite Repeater is an essential tool for manual web application security testing. It allows testers to capture an HTTP request, modify different parameters or headers, resend the request, and carefully analyze the server response.
In this tutorial, we used DVWA with Burp Suite Community Edition to understand the basic Repeater workflow. We also covered useful features such as modifying parameters, rendering responses, using HTTP history, changing layouts, renaming tabs, reopening closed tabs, creating new HTTP requests, navigating request history, using Inspector, searching requests and responses, and saving history.
Once you become comfortable with Repeater, it can significantly improve your ability to manually investigate web application behavior and validate potential security vulnerabilities.