

In this tutorial, you will learn how to install OpenSSH Server on Ubuntu 26.04, configure the SSH service, and connect remotely to an Ubuntu virtual machine using SSH.
The example uses an Ubuntu 26.04 VM running in VirtualBox and a Kali Linux VM as the SSH client.
What Is OpenSSH?
OpenSSH (Open Secure Shell) provides a secure way to remotely access Linux and Unix-based systems over an encrypted connection.
If you want another computer to connect to your Ubuntu machine using SSH, the OpenSSH Server package must be installed and running on the Ubuntu machine.
Without an SSH server, you cannot establish an SSH connection to the Ubuntu system.
Prerequisites
Before starting, make sure:
- Ubuntu 26.04 is installed as a VirtualBox VM.
- Kali Linux or another Linux system is available as the SSH client.
- Both VMs can communicate with each other over the network.
- You have a user account and password on the Ubuntu machine.
Step 1: Update the Package List
First, you can refresh Ubuntu’s package information using:
sudo apt updateThe apt update command downloads the latest package information from the configured Ubuntu repositories. It does not install or upgrade packages.
This step is optional if the package lists are already up to date, but it is recommended before installing new software.
Step 2: Install OpenSSH Server
Open the Terminal on Ubuntu and run:
sudo apt install openssh-server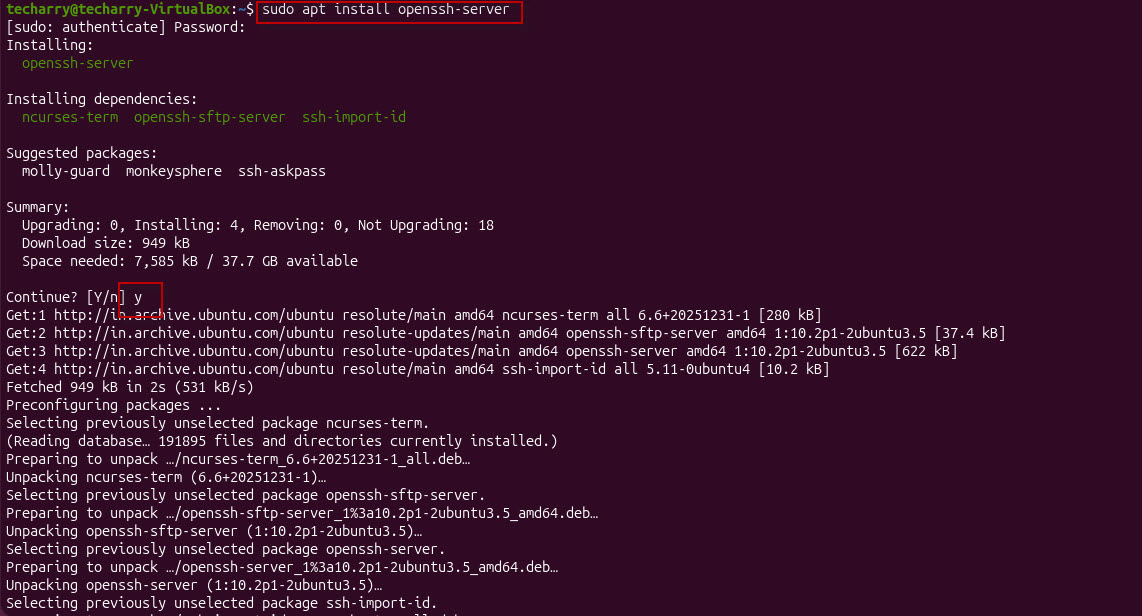
This installs the OpenSSH Server package and its required dependencies.
During installation, Ubuntu may ask you to confirm the installation. Type: Y
and press Enter.
Once installed, the SSH server can accept incoming SSH connections.
Step 3: Start the SSH Service
After installation, start the SSH service with:
sudo systemctl start ssh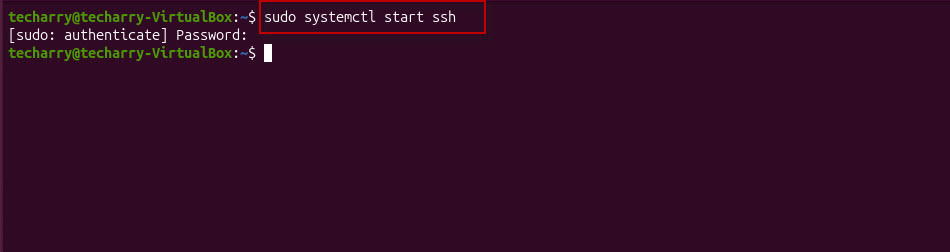
The sudo command runs the operation with administrative privileges. Ubuntu may ask for your current user’s password.
The systemctl start ssh command starts the SSH service immediately.
Step 4: Enable SSH at System Boot
To make sure SSH starts automatically whenever Ubuntu boots, run:
sudo systemctl enable ssh
This creates the required systemd configuration so the SSH service is automatically started during system startup.
This is particularly useful for a VM or server that you want to access remotely after every reboot.
Step 5: Check the SSH Service Status
You can verify whether the SSH service is running with:
systemctl status ssh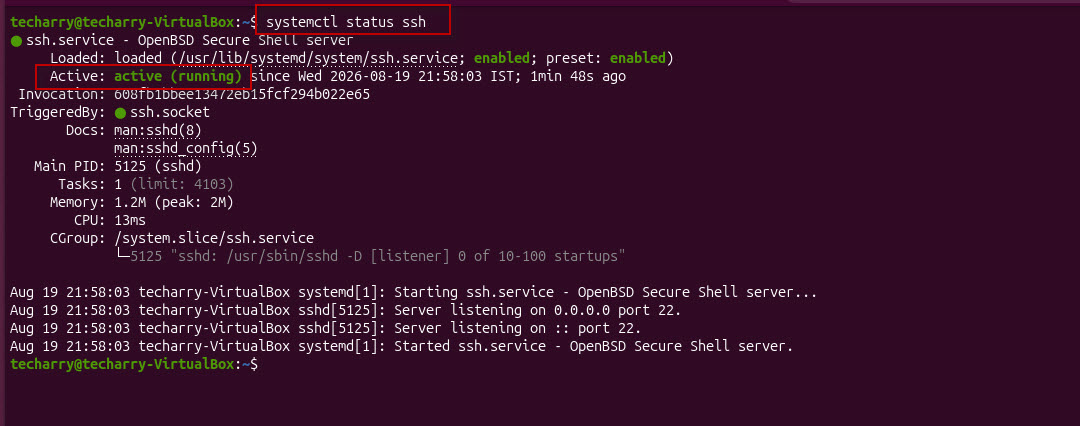
If the service is working correctly, you should see a status similar to: Active: active (running)
This confirms that the SSH server is currently running and ready to accept SSH connections.
Press Q to exit the status screen.
Connect to Ubuntu Using SSH
Once the SSH server is running, you can connect to the Ubuntu machine from another system.
The basic SSH syntax is:
ssh <username>@<IP-address-or-hostname>You can find the Ubuntu machine’s IP address using:
ip addr

or:

hostname -I
Live SSH Connection from Kali Linux
For this demonstration, assume:
- Ubuntu 26.04 VM: SSH server
- Kali Linux VM: SSH client
- Ubuntu IP address: 192.168.1.10
- Ubuntu username: techarry
Open the Terminal in Kali Linux and run:
ssh techarry@192.168.1.10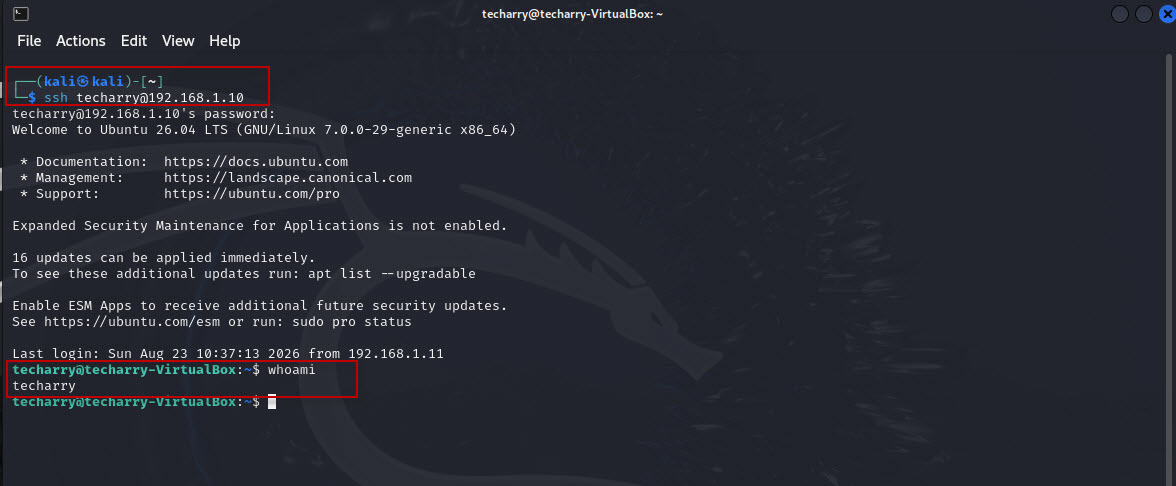
During the first connection, SSH may display a message asking whether you want to continue connecting to the host.
Type: yes
and press Enter.
SSH will then ask for the password of the techarry user.
Enter the password and press Enter.
If authentication is successful, you will be logged into the Ubuntu machine through SSH.
You can verify the currently logged-in user with:
whoamiThe output should be: techarry
This confirms that you are accessing the Ubuntu system as the techarry user.
Exit the SSH Session
To disconnect from the Ubuntu machine and return to the original Kali Linux terminal, run:
exitYou will then return to the Kali Linux shell.
How to Enable Root Login Through SSH
By default, allowing direct root login over SSH is not recommended because it increases the risk of unauthorized access.
For lab or testing environments, however, you may need to demonstrate root SSH access.
If you specifically need to enable it, modify the SSH server configuration.
Step 1: Open the SSH Configuration File
On the Ubuntu machine, run:
sudo nano /etc/ssh/sshd_configThe /etc/ssh/sshd_config file contains configuration settings for the OpenSSH server.
Find the following setting:
#PermitRootLogin prohibit-password

You can change it to:

PermitRootLogin yes

If the setting already exists without #, modify its value to:

PermitRootLogin yes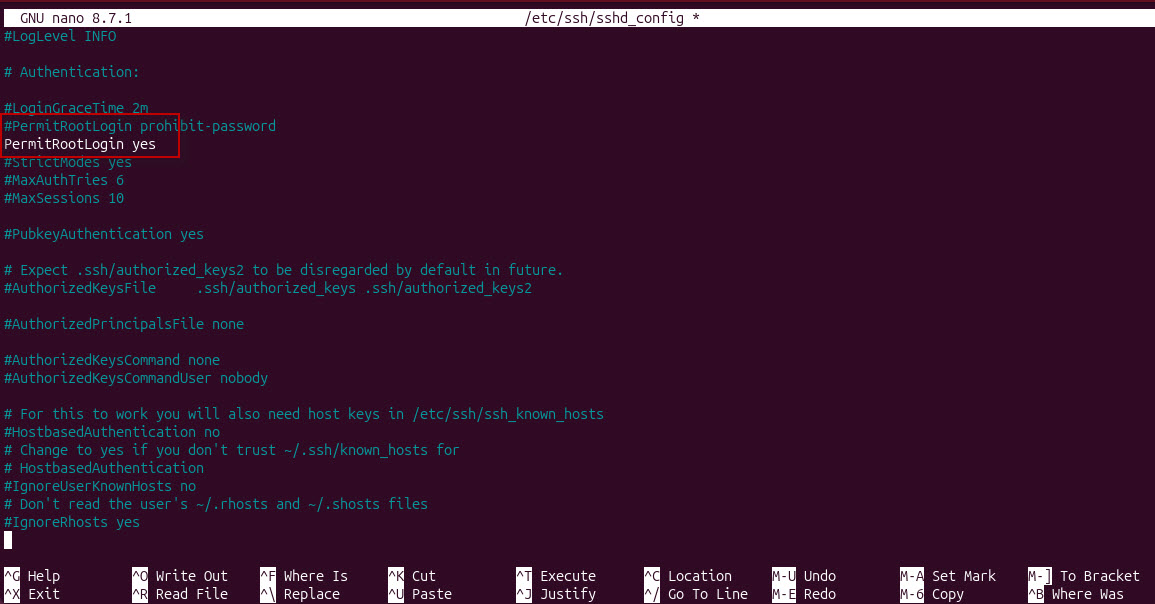
Save the File
If you are using Nano:
- Press Ctrl + O to save the file.
- Press Enter to confirm.
- Press Ctrl + X to exit Nano.
Step 2: Restart the SSH Service
After modifying the SSH configuration, restart the SSH service:
sudo systemctl restart ssh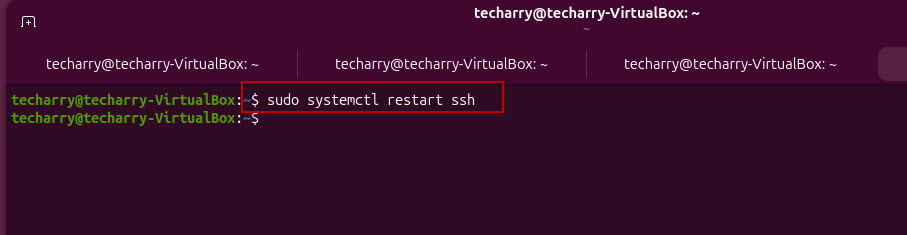
The new configuration will take effect after the service restarts.
You can verify the service again with:
systemctl status sshStep 3: Connect as Root
From the Kali Linux VM, you can now attempt to connect using:
ssh root@192.168.1.10Enter the root account password when prompted.
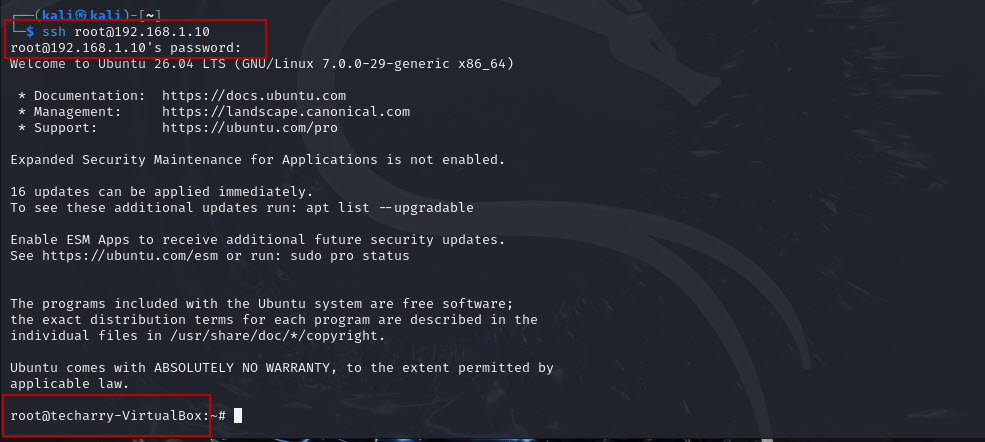
If root SSH login has been correctly configured and the root account has a usable password, you will receive a root shell.
You can verify it with:
whoamiThe output should be: root
In this tutorial, you learned how to install and configure OpenSSH Server on Ubuntu 26.04. You also learned how to start and enable the SSH service, verify its status, and remotely connect to Ubuntu from a Kali Linux VM.
The basic installation process is:
You also learned how to connect using: ssh username@IP-address
Finally, you learned how to enable direct root SSH access by modifying /etc/ssh/sshd_config. For real-world systems, however, using a normal user with sudo and SSH keys is the preferred and more secure approach.