

Learn how to install Ubuntu Desktop 26.04 LTS on Oracle VirtualBox 7 running on Windows 11 with this simple beginner-friendly tutorial.
Ubuntu is one of the most popular Linux distributions for developers, ethical hackers, students, and system administrators. Instead of installing Ubuntu directly on your computer, you can run it safely inside Oracle VirtualBox as a virtual machine.
In this tutorial, you’ll learn how to install Ubuntu Desktop 26.04 LTS on VirtualBox 7 using easy-to-follow steps.
Prerequisites
Before starting the installation, make sure you have the following:
- Windows OS (Host Operating System)
- Oracle VirtualBox 7 (Already Installed)
- Ubuntu Desktop 26.04 LTS ISO Image
Minimum Hardware Requirements
- Dual-Core Processor or better
- 6 GB RAM (Recommended)
- 25 GB Disk Space (50 GB Recommended)
Step 1: Download Ubuntu Desktop 26.04 LTS ISO
Download the latest Ubuntu Desktop ISO from the official Ubuntu website: https://ubuntu.com/download/desktop
Click Download beside the Intel or AMD 64-bit version to download the ISO image.
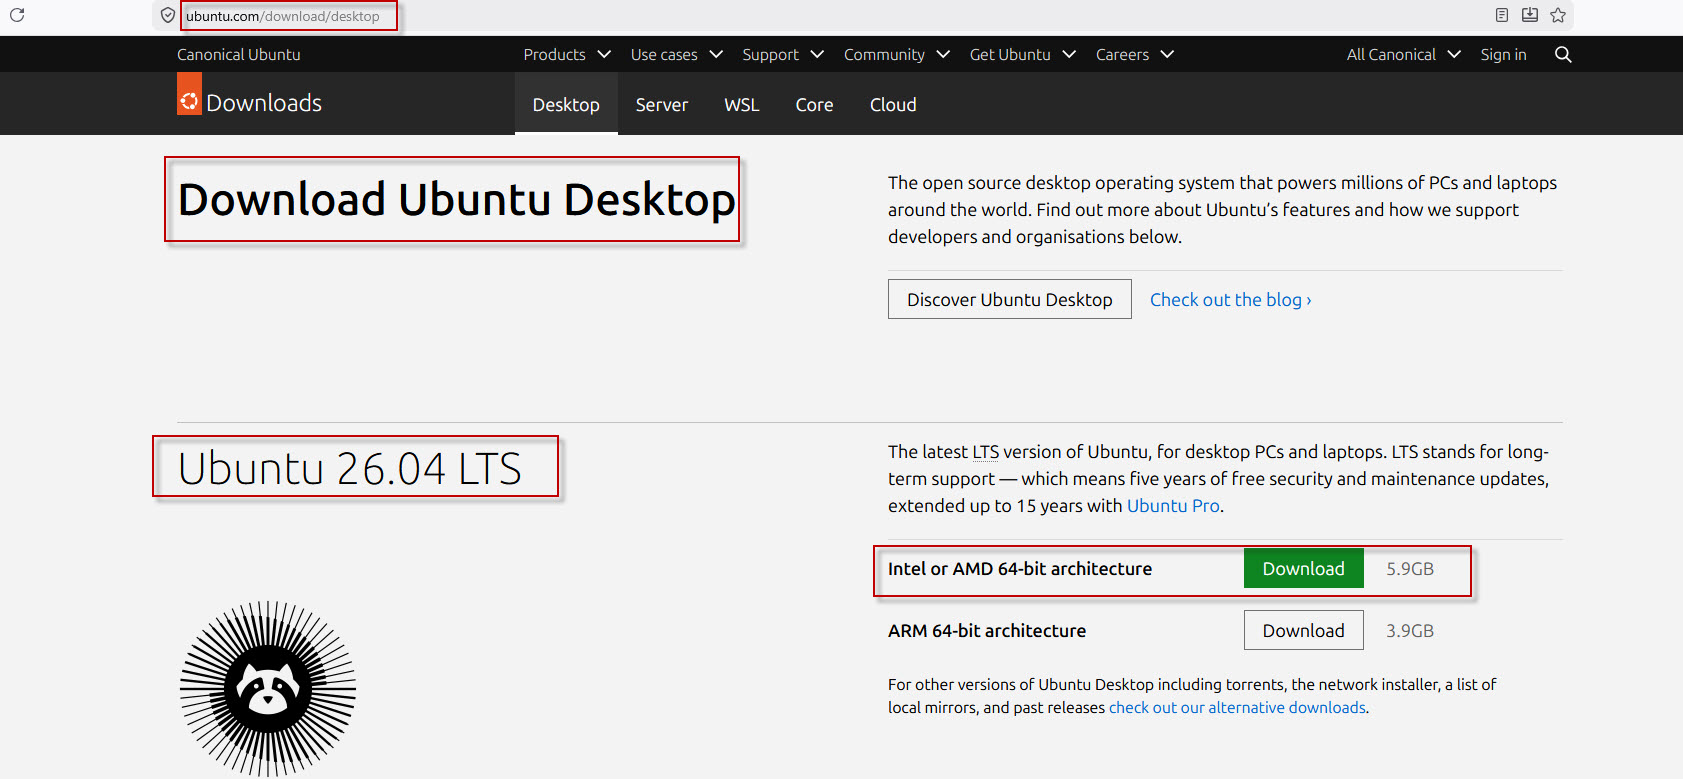
The ISO file is approximately 6 GB in size.
After downloading, verify that the file (ubuntu-26.04-desktop-amd64.iso) is available in your download location.
Step 2: Open Oracle VirtualBox
Open Oracle VM VirtualBox from the Windows Start Menu.
Once VirtualBox opens, click the New button.
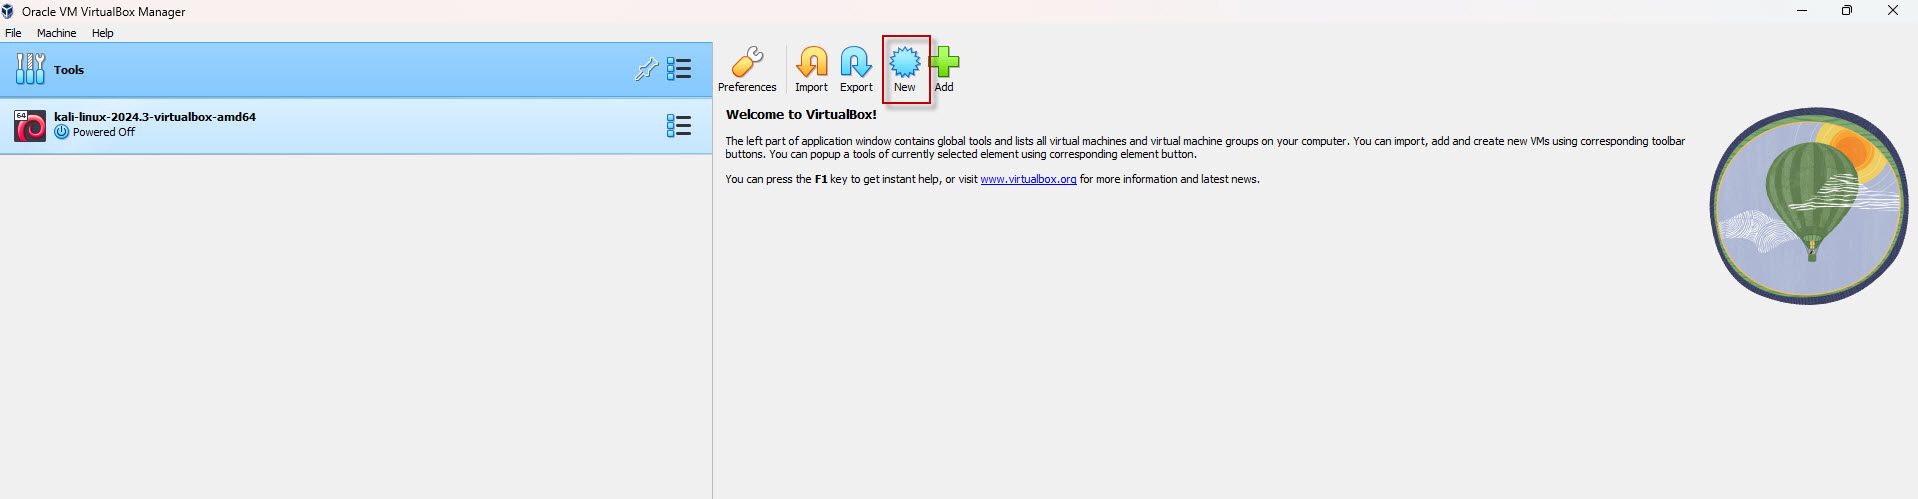
Shortcut: Press Ctrl + N to create a new virtual machine.
Step 3: Create a New Virtual Machine
The Create Virtual Machine window will appear.
Enter the following details:
| Setting | Value |
|---|---|
| Name | Ubuntu26 |
| Folder | Default Location |
| ISO Image | Select ubuntu-26.04-desktop-amd64.iso from downloaded path |
| Type | Linux |
| Version | Ubuntu (64-bit) |
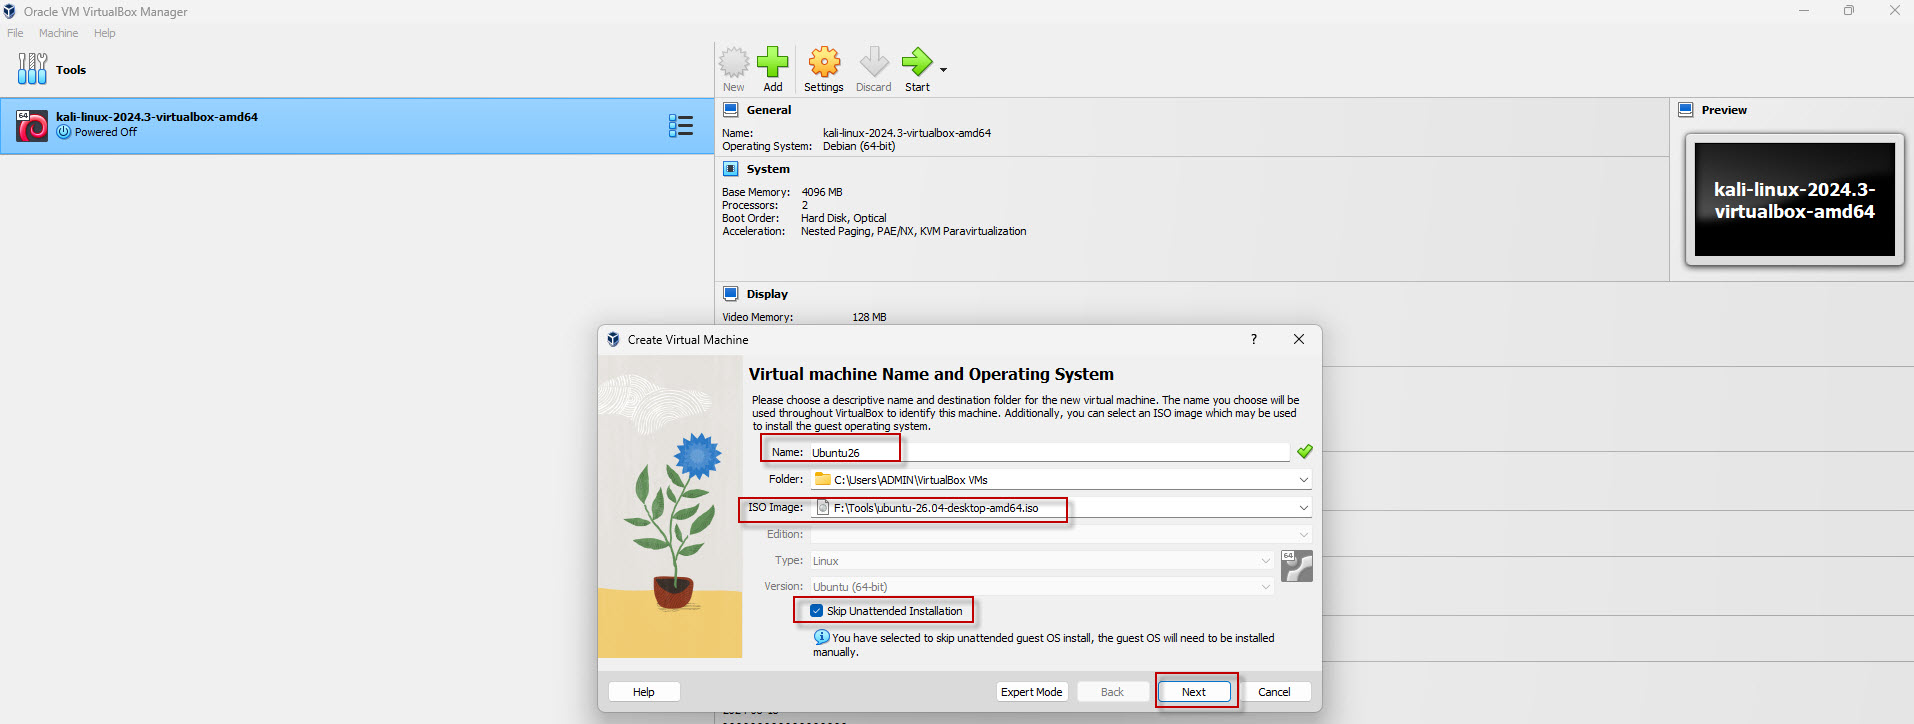
Also,
- Enable Skip Unattended Installation
- Click Next
Step 4: Configure Hardware
Assign the following resources:
- RAM: 6144 MB (6 GB)
- Processors: 2 CPUs
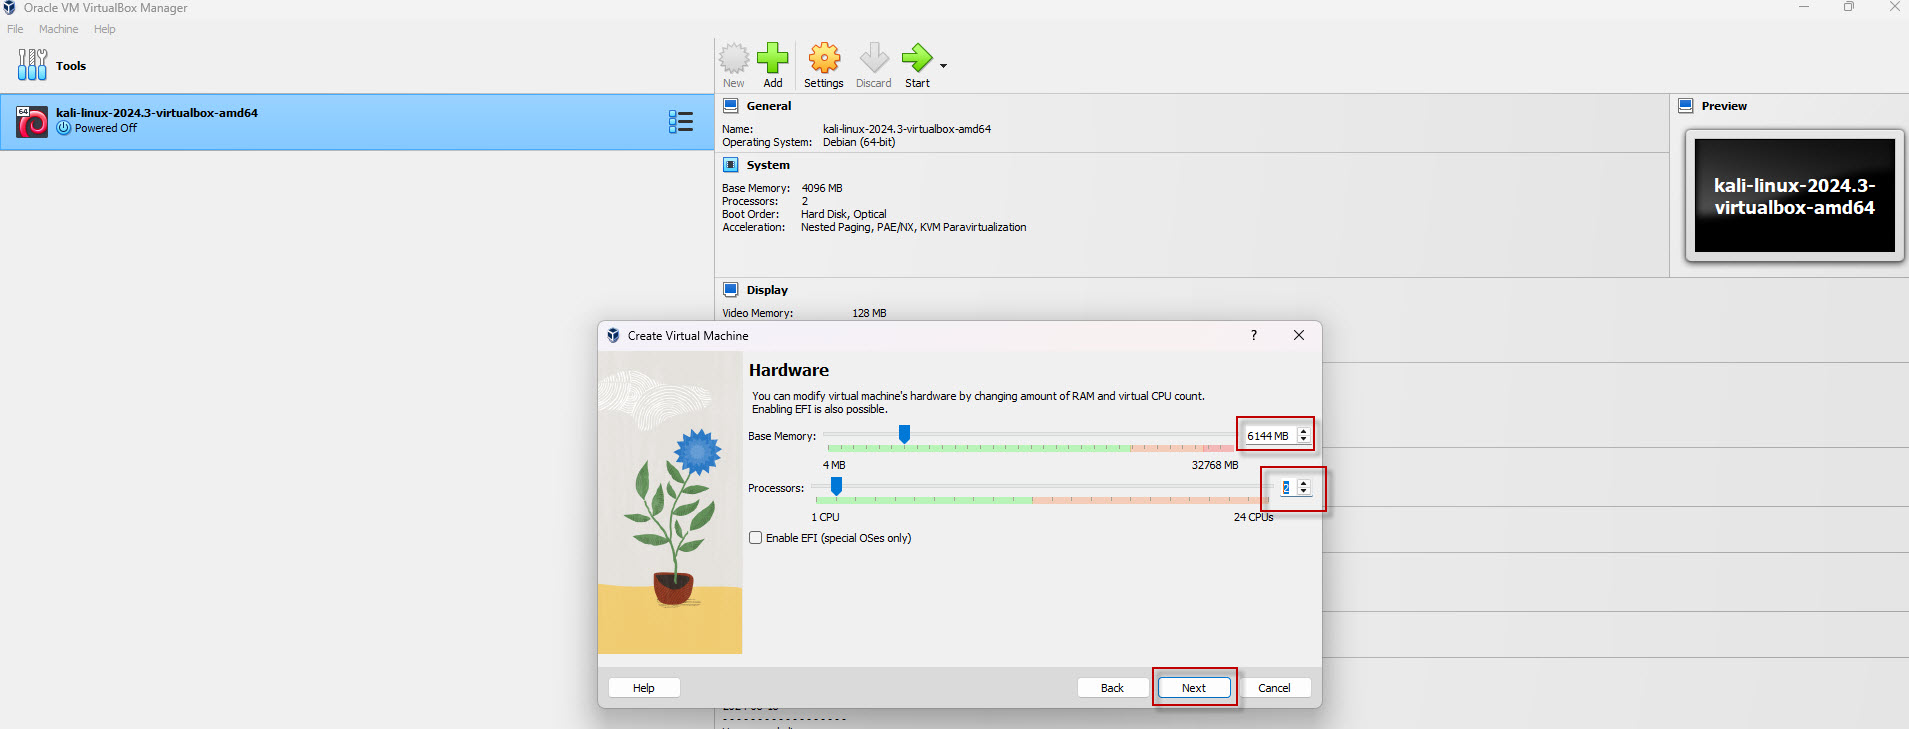
Click Next.
Note: You can allocate more RAM or CPU depending on your system configuration.Step 5: Create Virtual Hard Disk
Choose: Create a Virtual Hard Disk Now
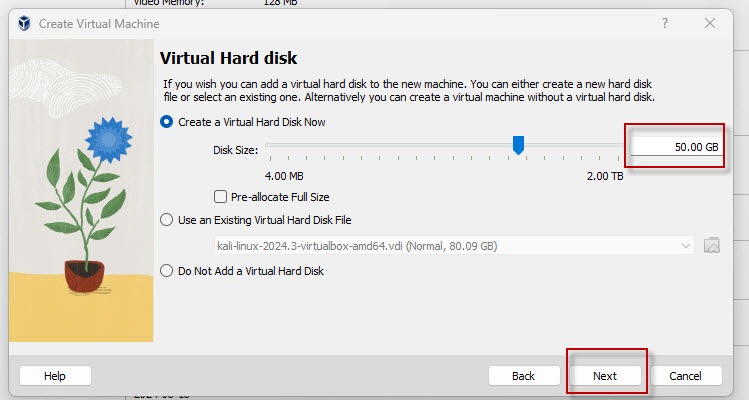
Set: Disk Size as 50 GB
Click Next.
Step 6: Review Virtual Machine Settings
The Summary screen displays all the VM configuration.
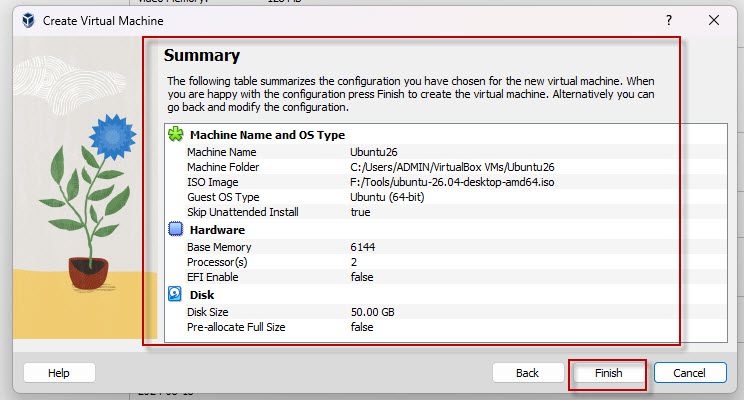
Verify everything carefully and click Finish.
Your Ubuntu virtual machine will now be created.
Step 7: Start the Ubuntu Virtual Machine
Select the newly created Ubuntu26 VM.
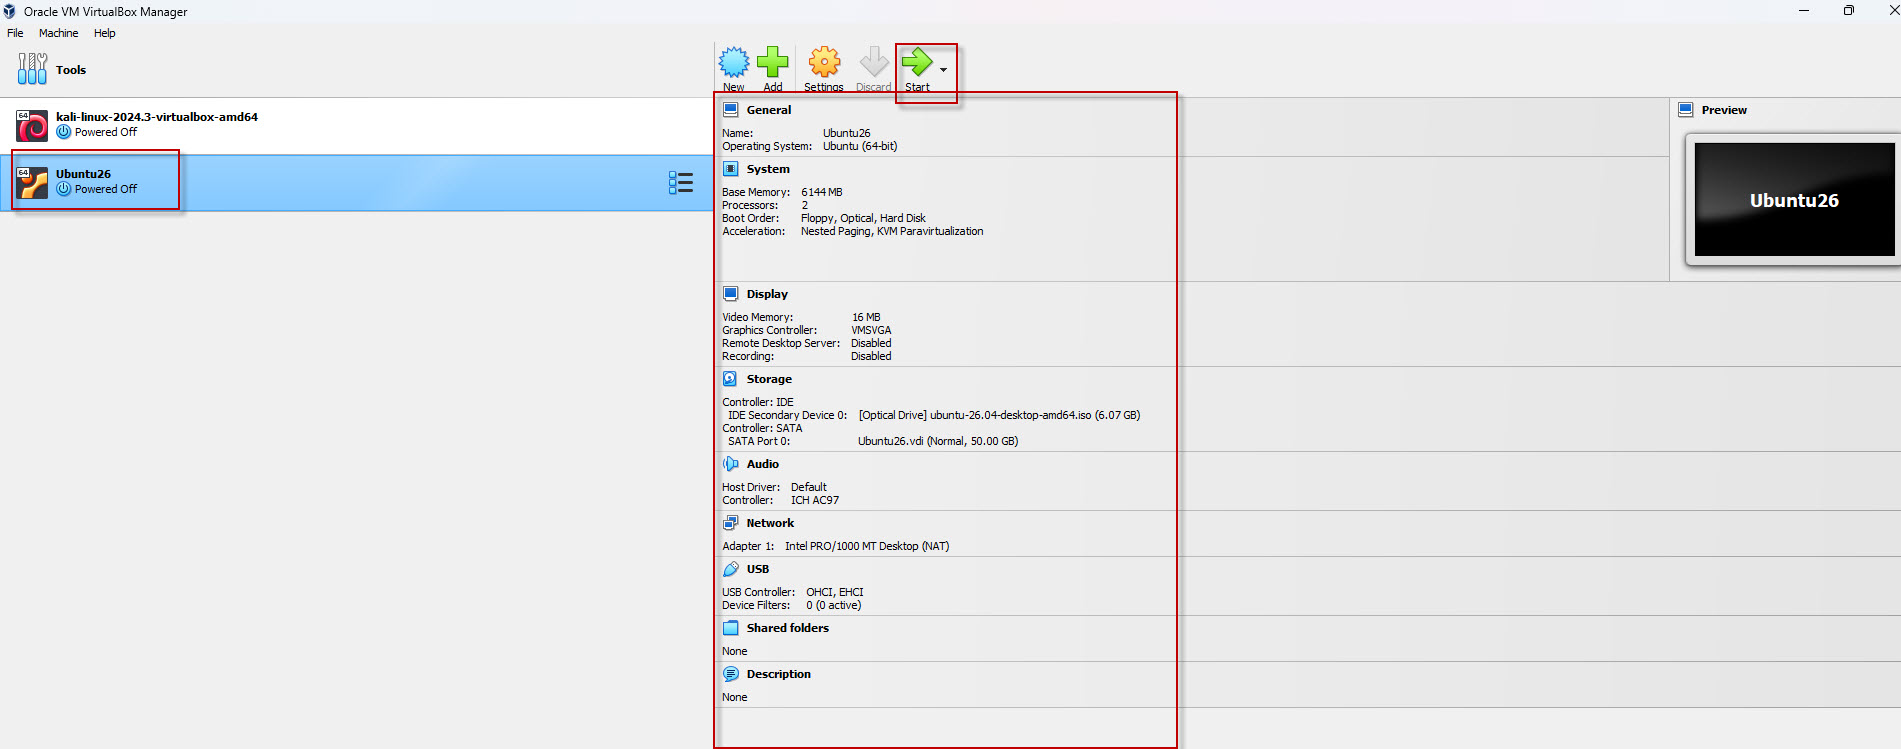
Click Start.
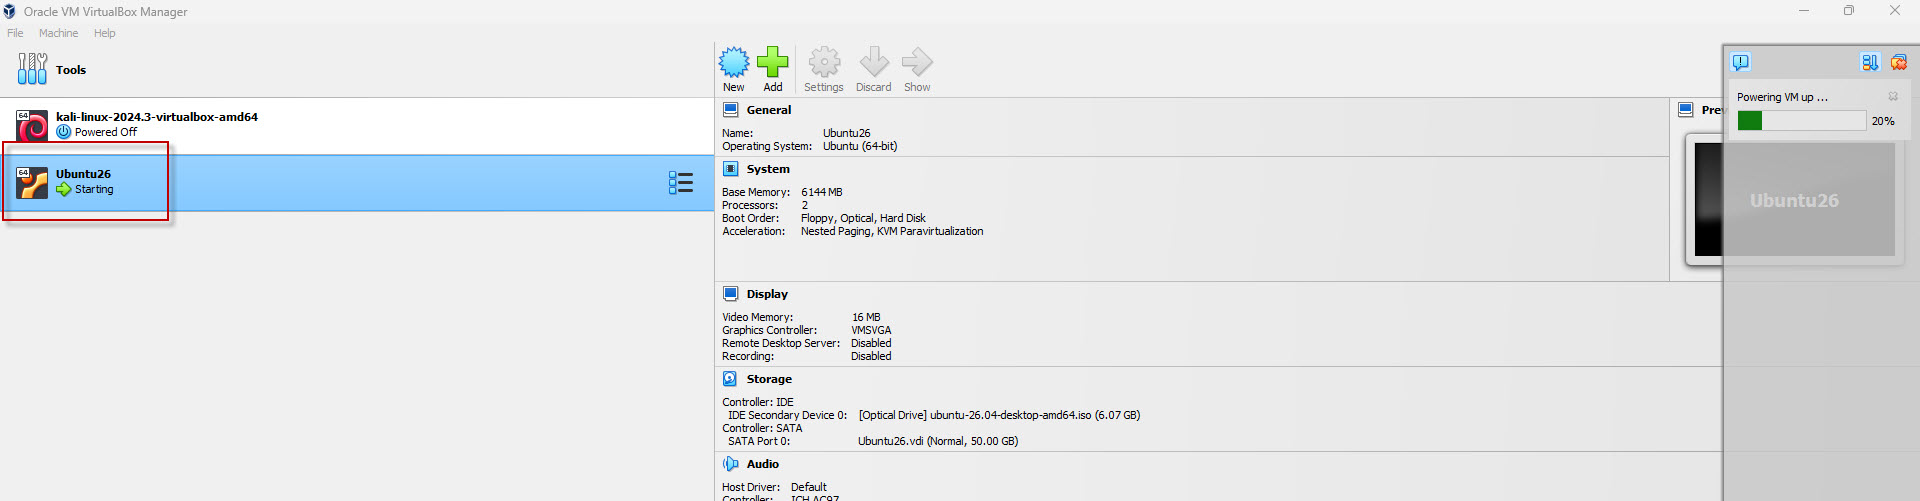
VirtualBox will boot using the Ubuntu ISO image.
Step 8: Ubuntu Installer Starts
Initially, you’ll see the Try or Install Ubuntu screen.
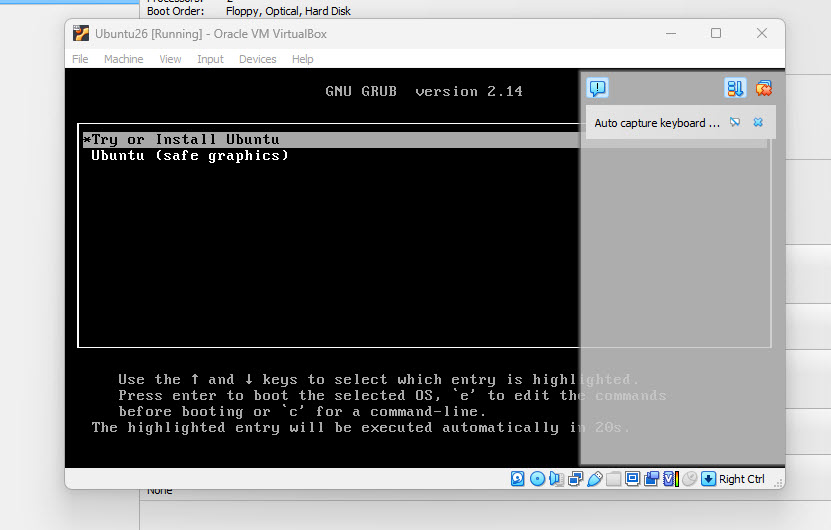
Wait for a few moments.
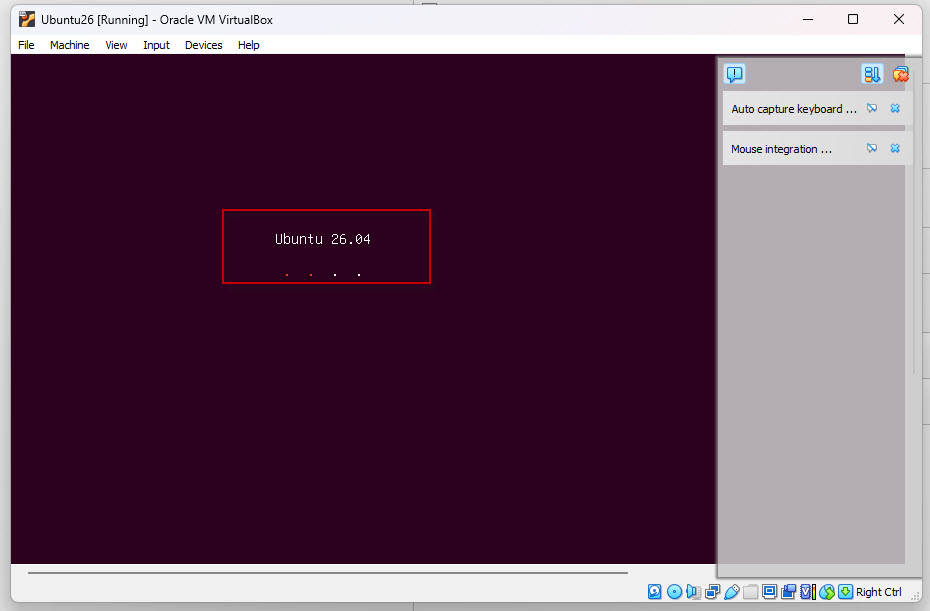
The installer will automatically launch.
Note: If a temporary video memory warning appears, simply wait. It usually resolves automatically.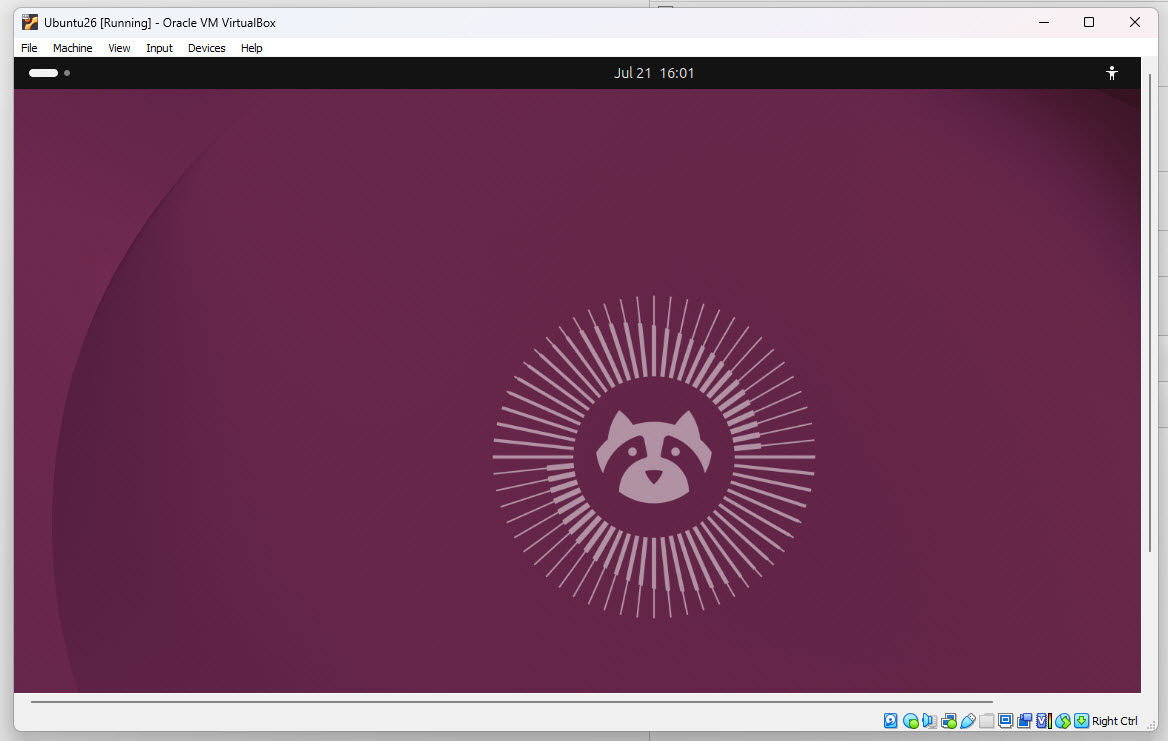
Step 9: Select Installation Language
Choose: English
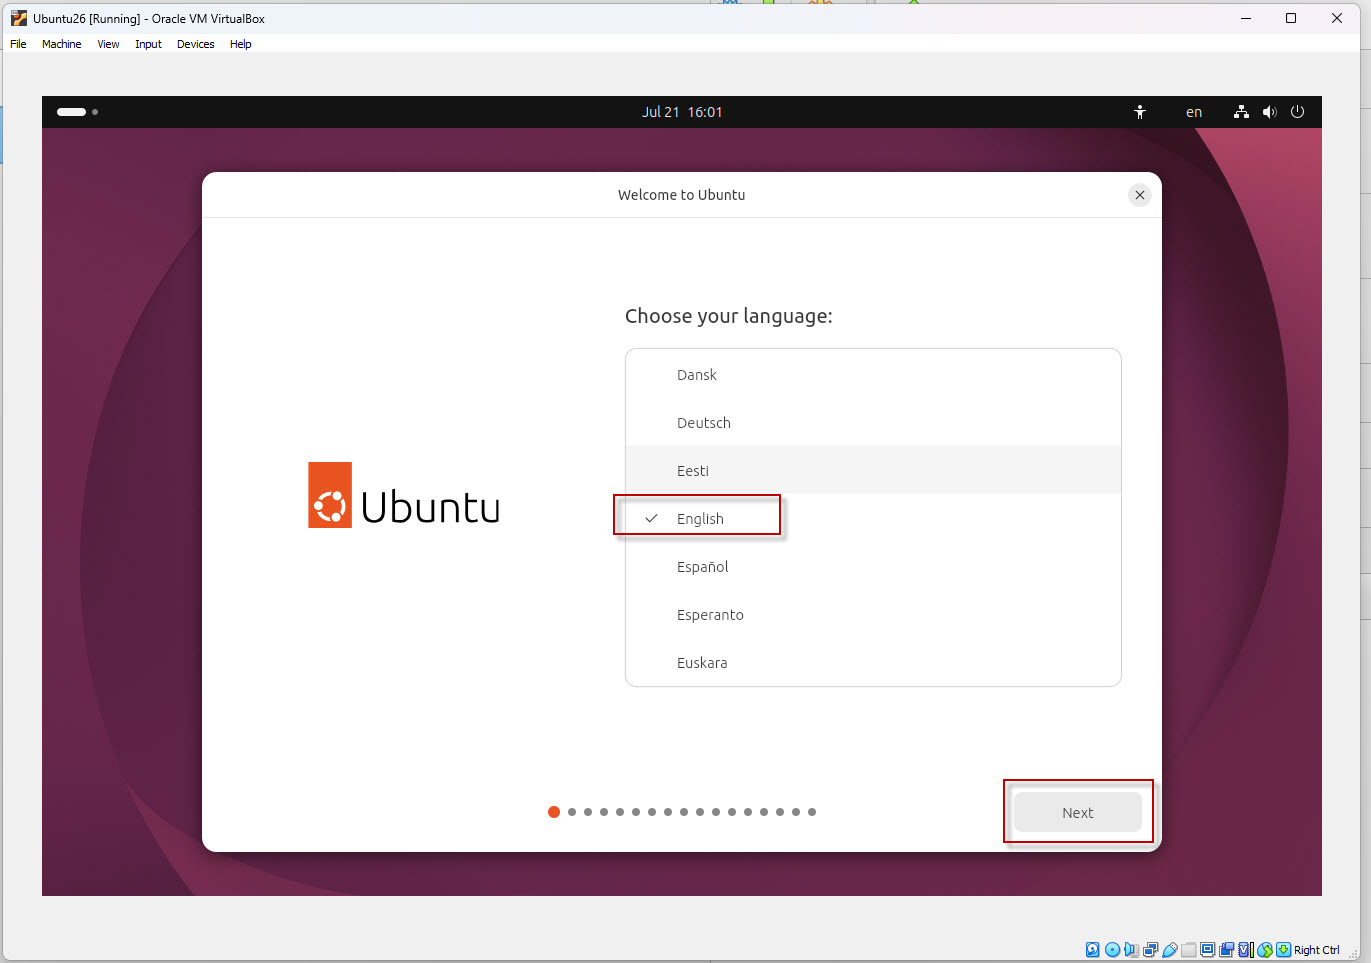
Click Next.
Step 10: Accessibility
Keep the default settings.
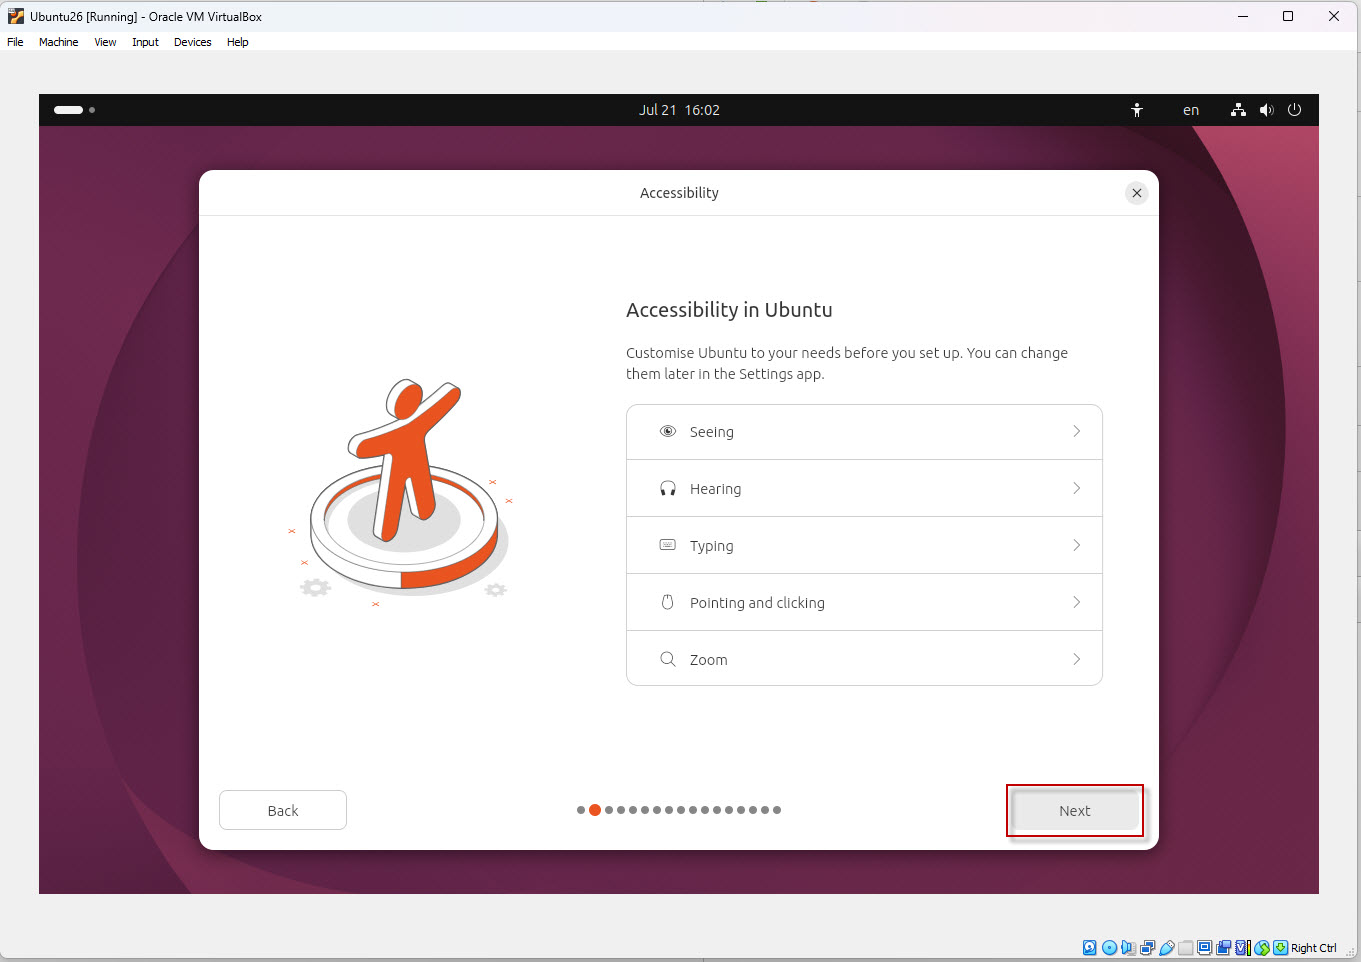
Click Next.
Step 11: Keyboard Layout
Select: English (US)
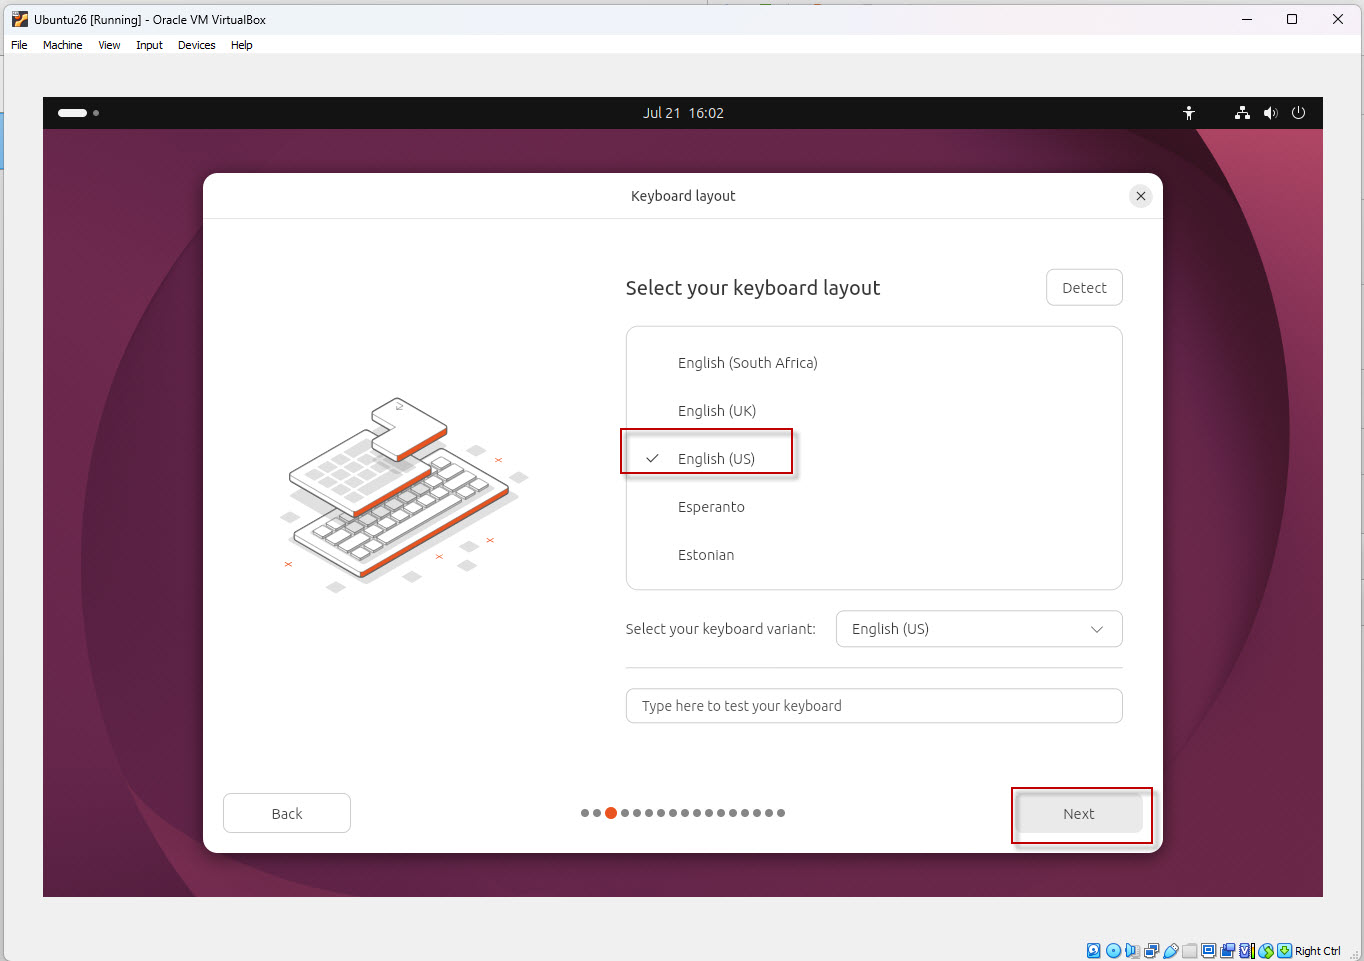
Click Next.
Step 12: Network Connection
Choose: Use Wired Connection
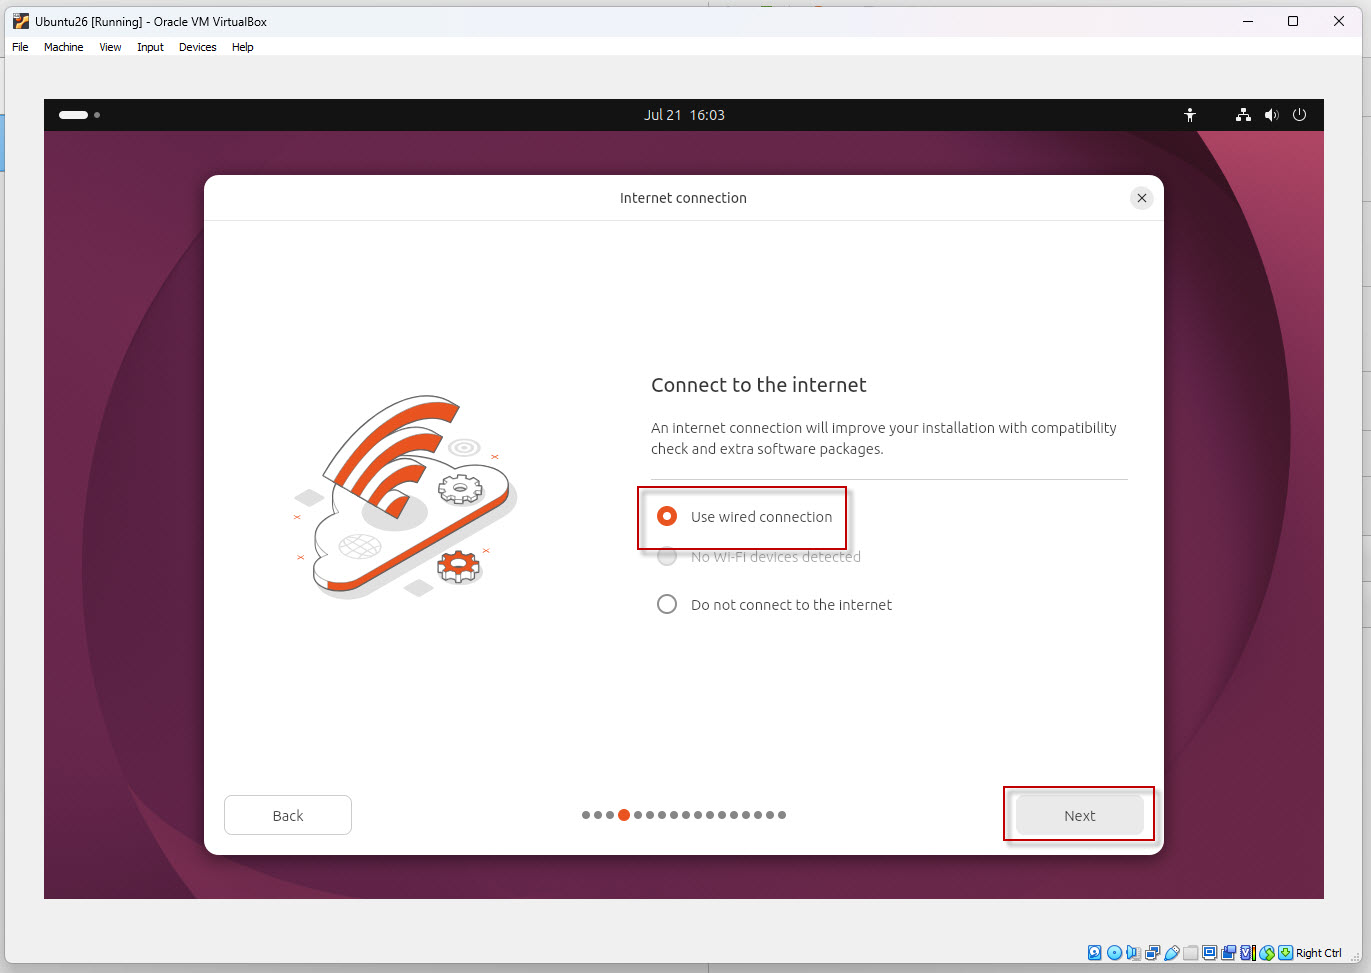
Click Next.
Step 13: Installation Type
Select: Install Ubuntu
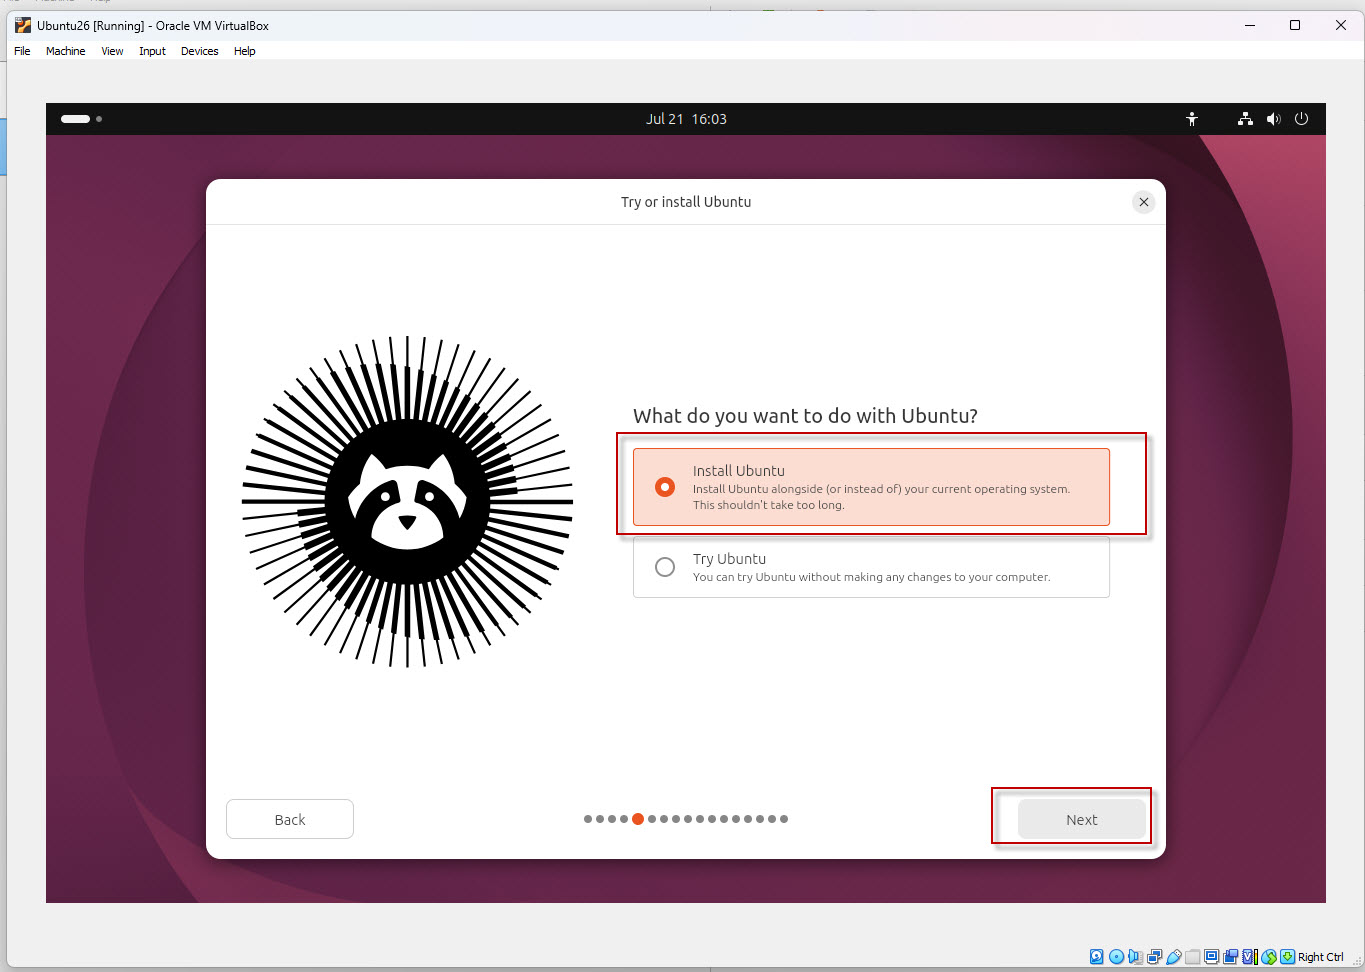
Click Next.
Step 14: Installation Mode
Choose: Interactive Installation
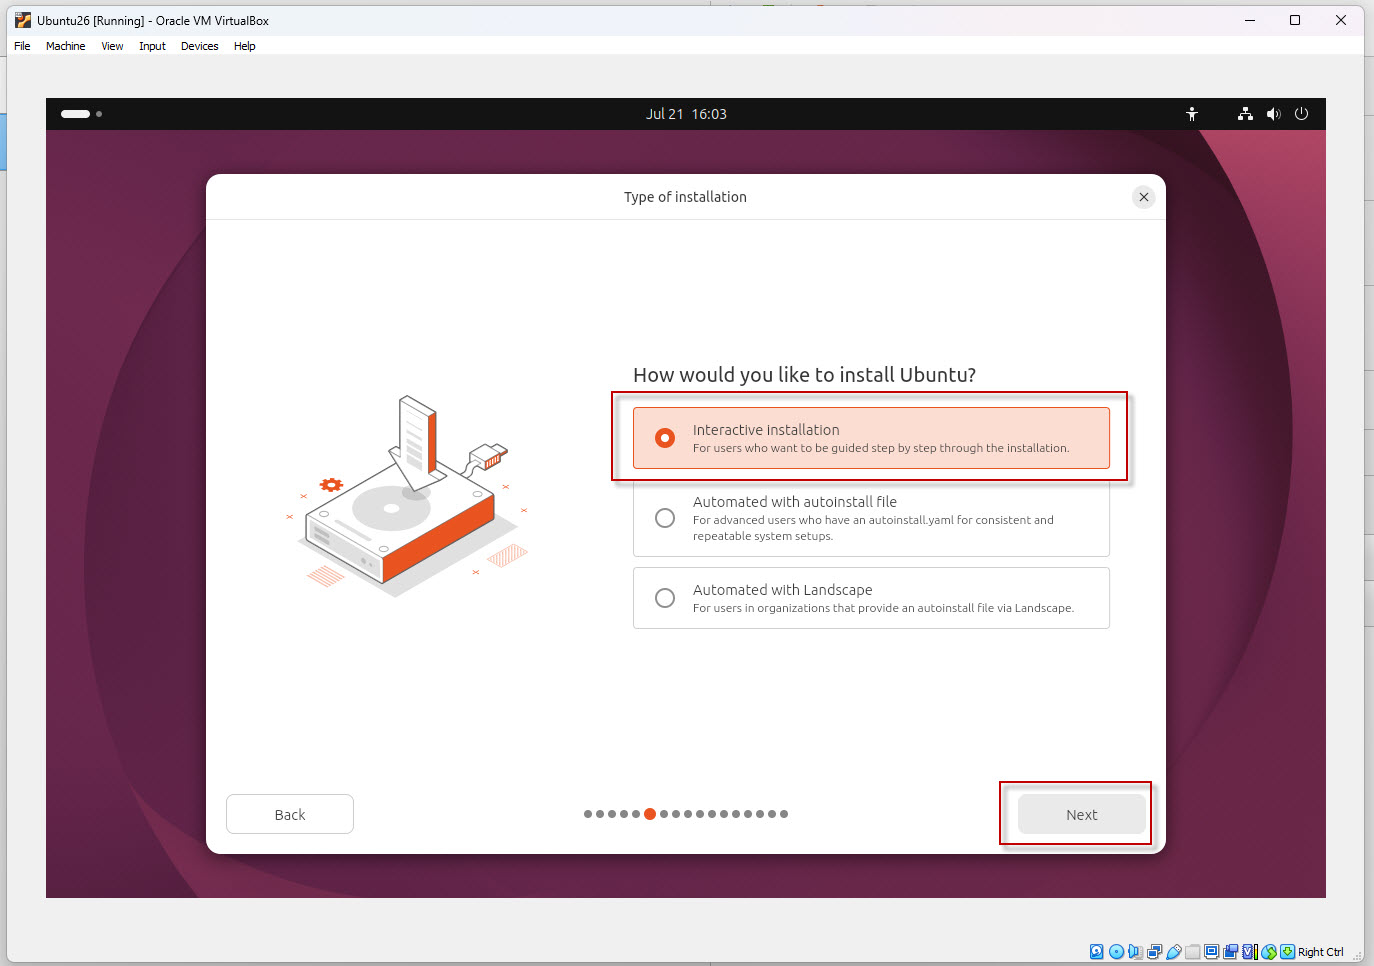
Click Next.
Step 15: Installation Selection
Select: Default Selection
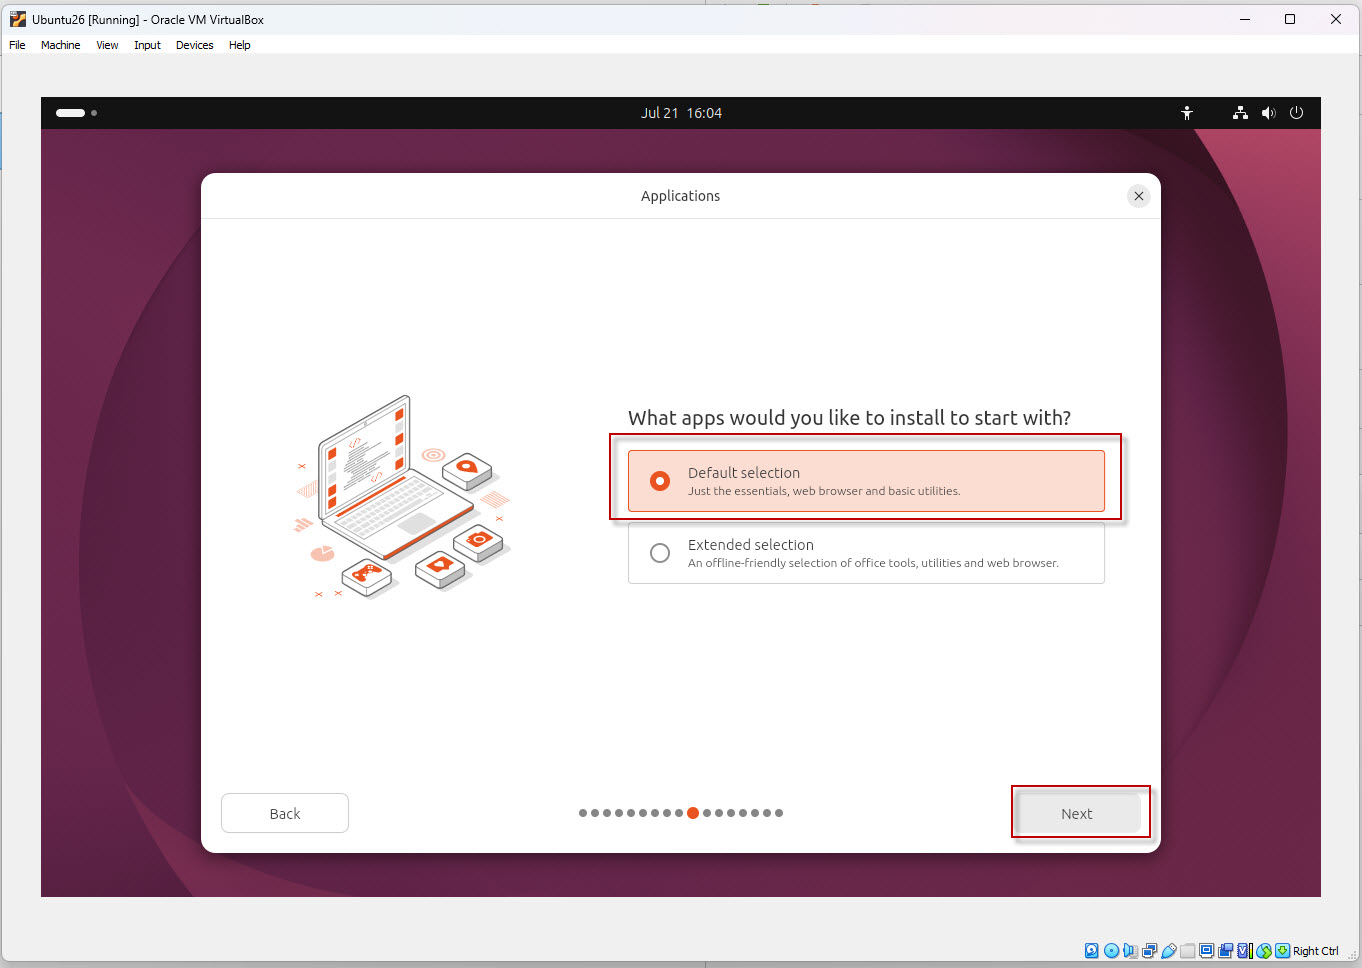
Click Next.
Step 16: Additional Software
Leave Install Recommended Software unchecked.
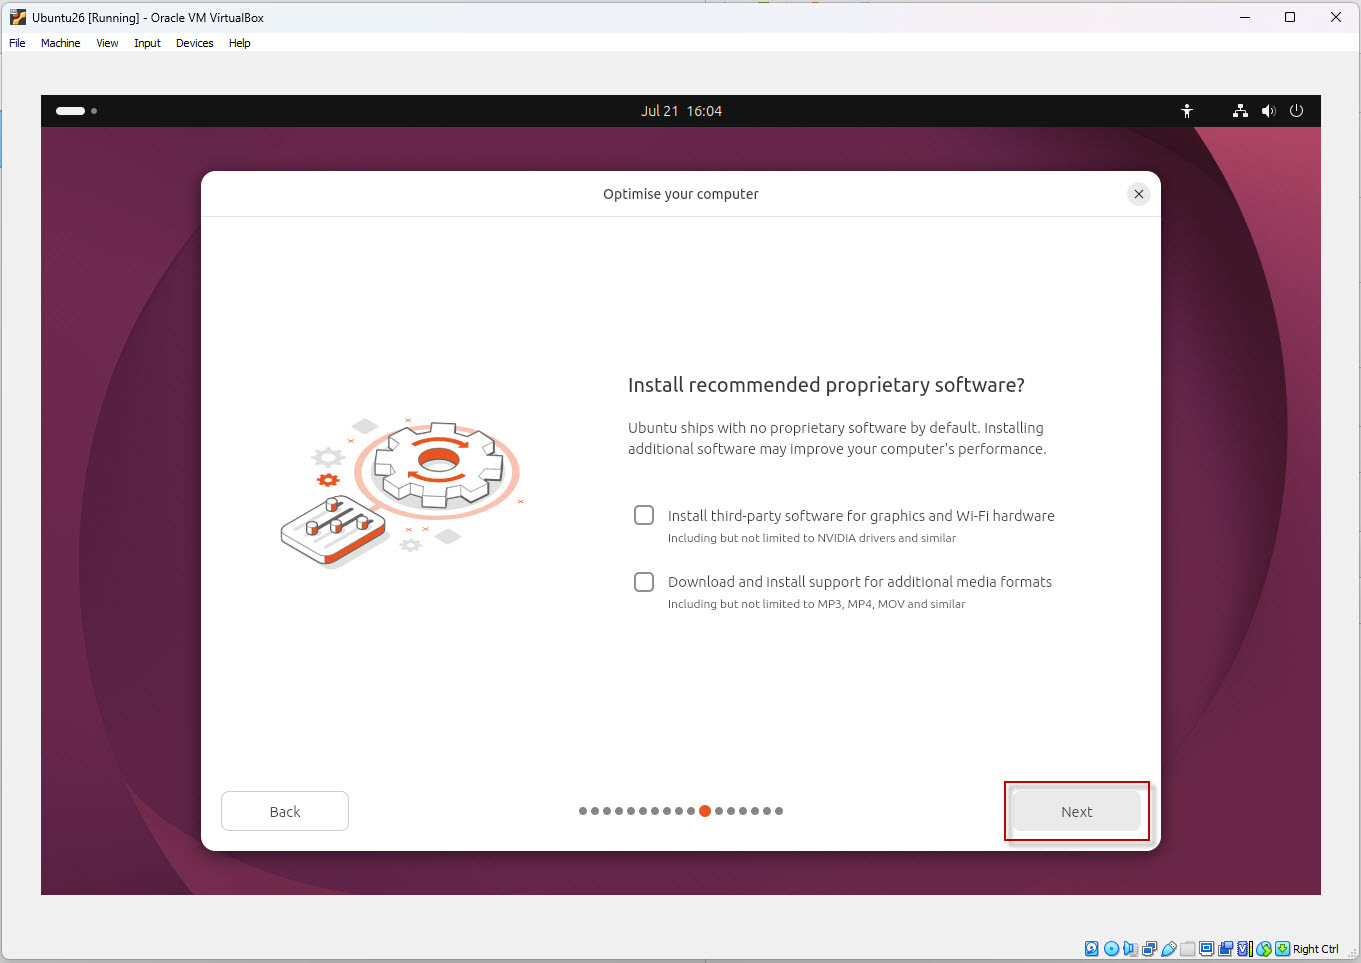
Click Next.
Step 17: Disk Setup
Select: Erase Disk and Install Ubuntu
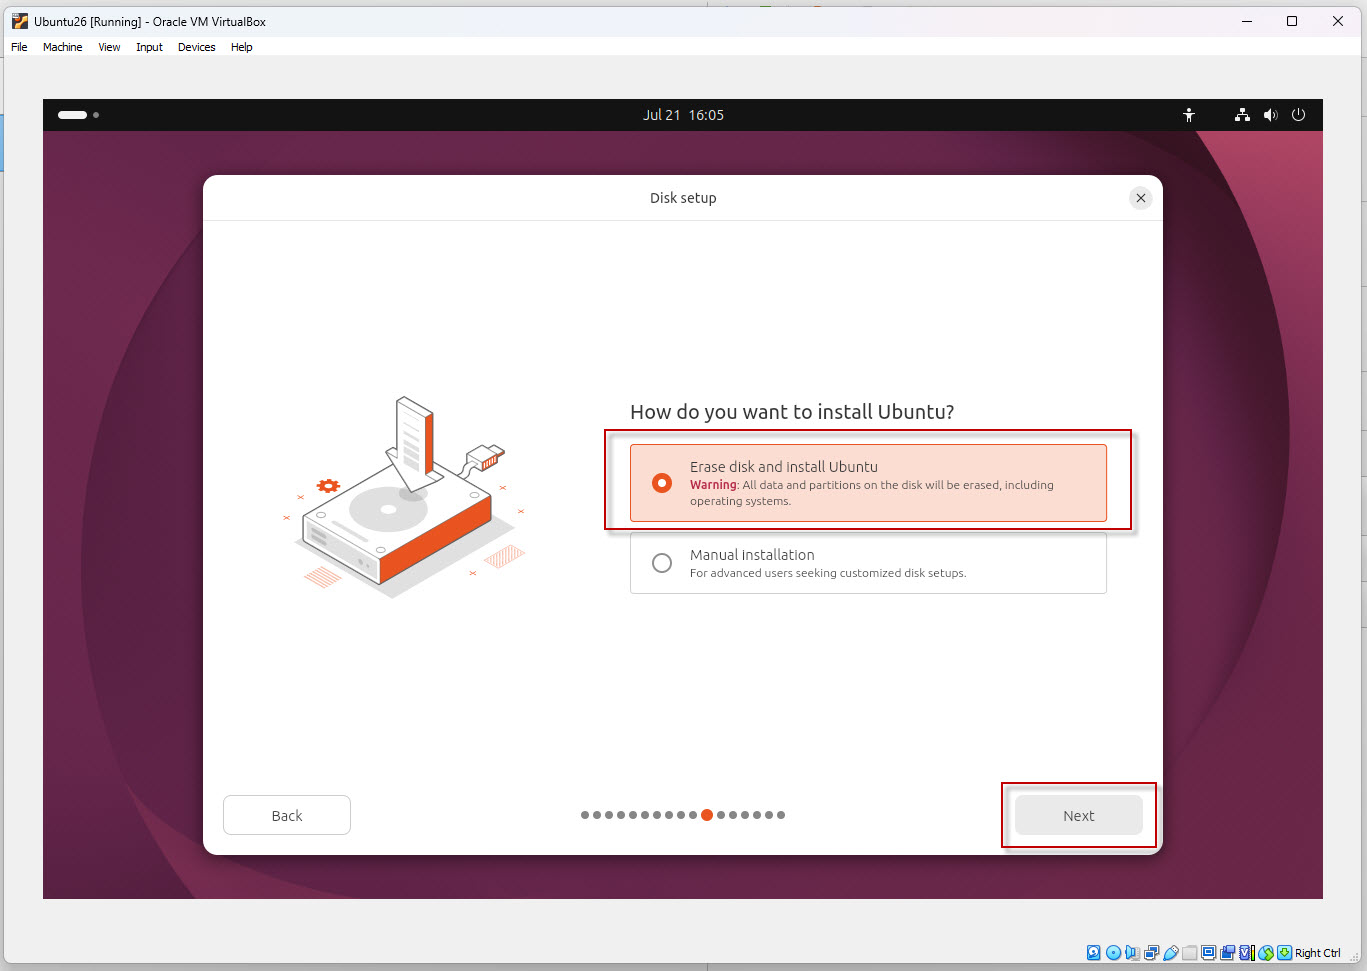
Click Next.
Since this is a virtual machine, only the virtual disk will be formatted.
Step 18: Encryption
Choose: No Encryption
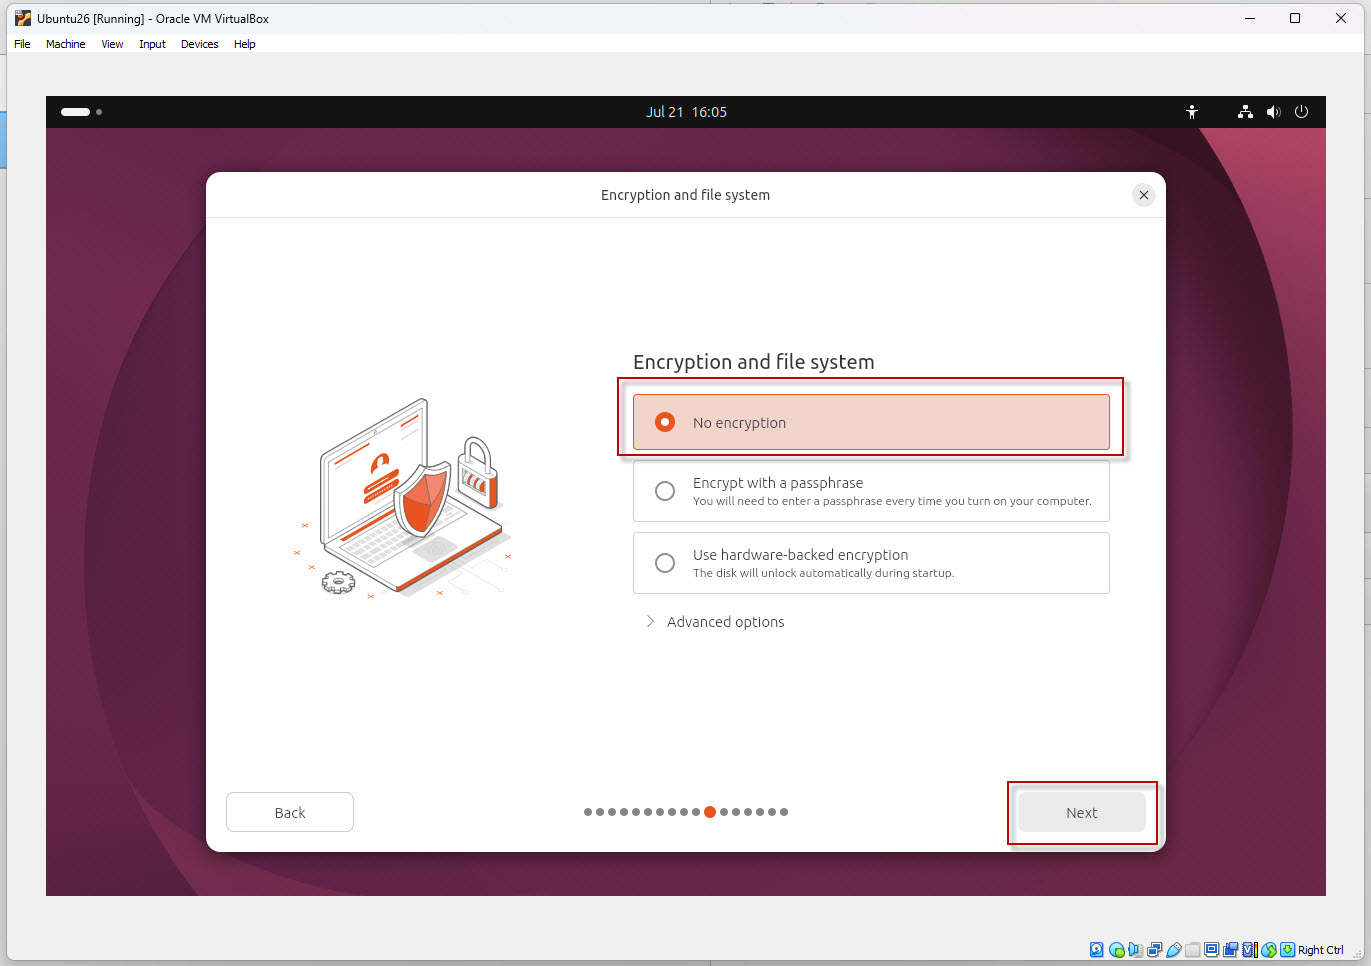
Click Next.
Step 19: Create Your User Account
Enter your account information.
Example:
| Field | Value |
|---|---|
| Your Name | TechArry |
| Computer Name | Auto Generated |
| Username | techarry |
| Password | Your Password |
| Confirm Password | Same Password |
Enable:
- Require my password to log in
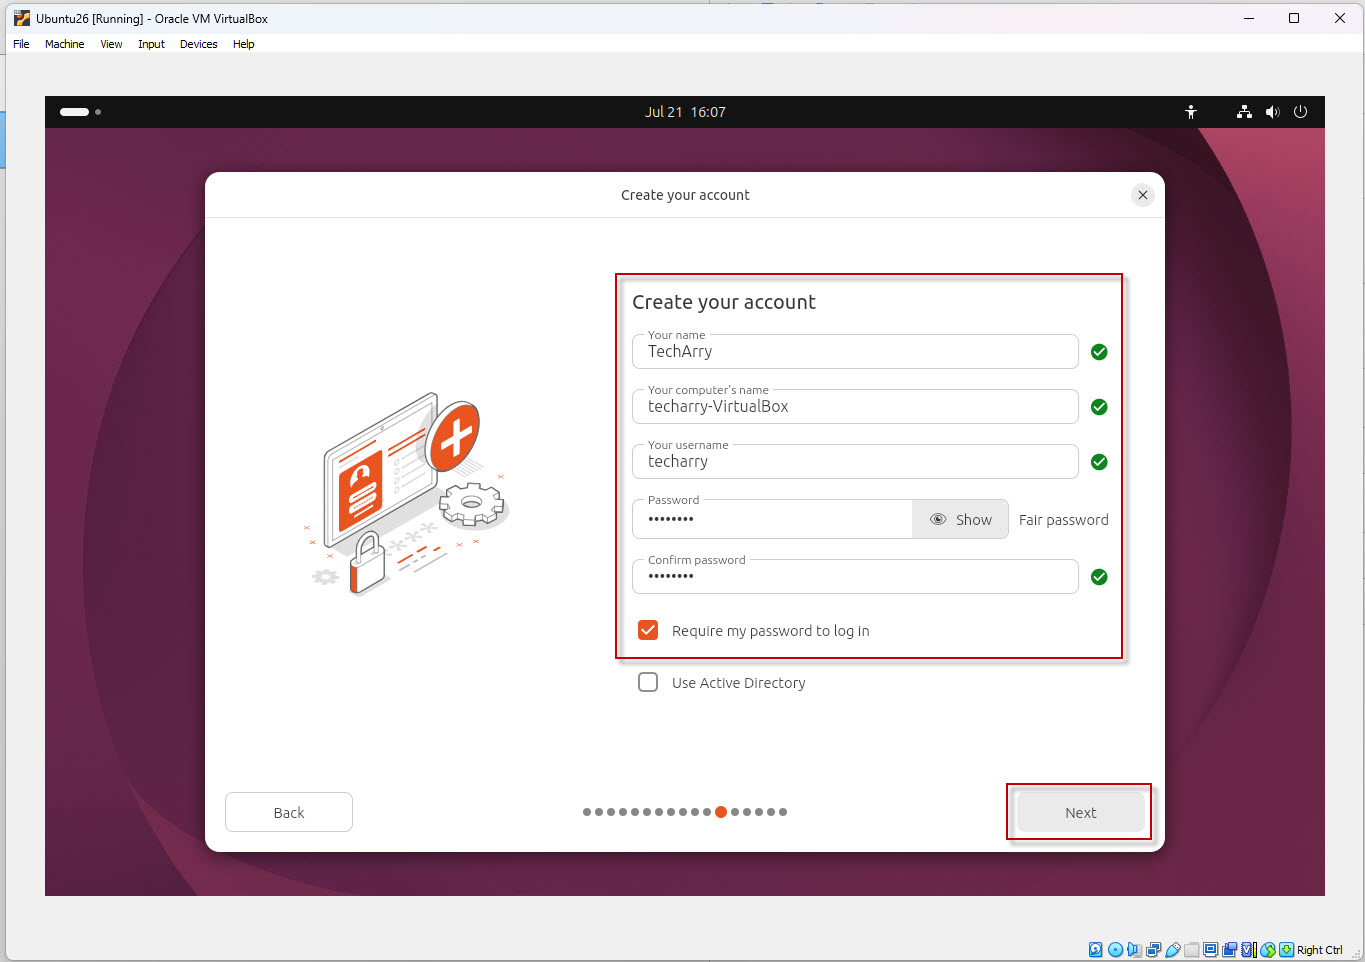
Click Next.
Step 20: Select Time Zone
Choose your country and time zone.
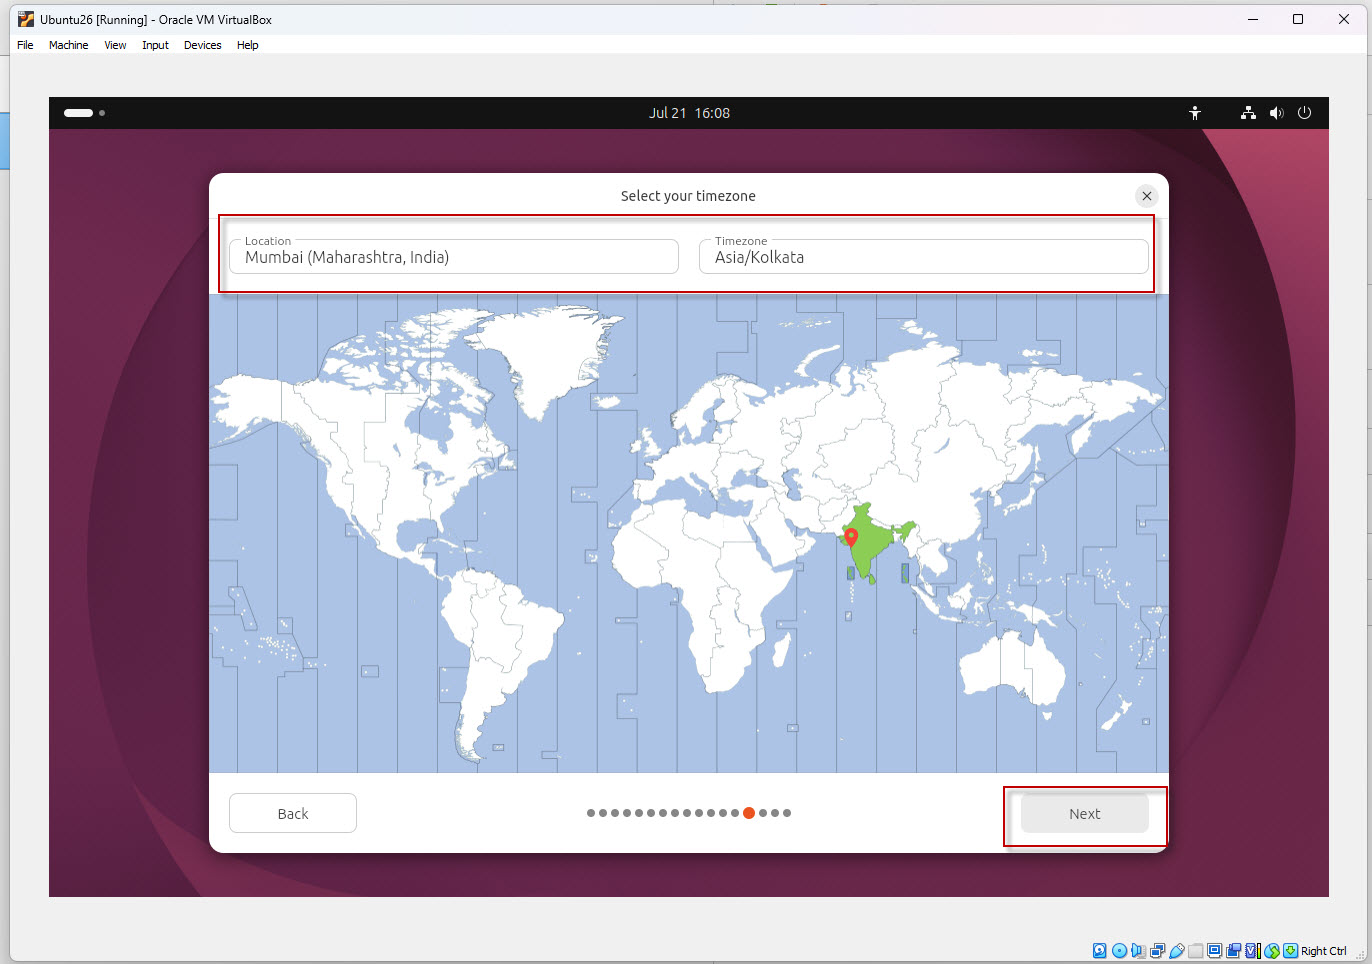
Click Next.
Step 21: Ready to Install
The installer displays a summary of your selections.
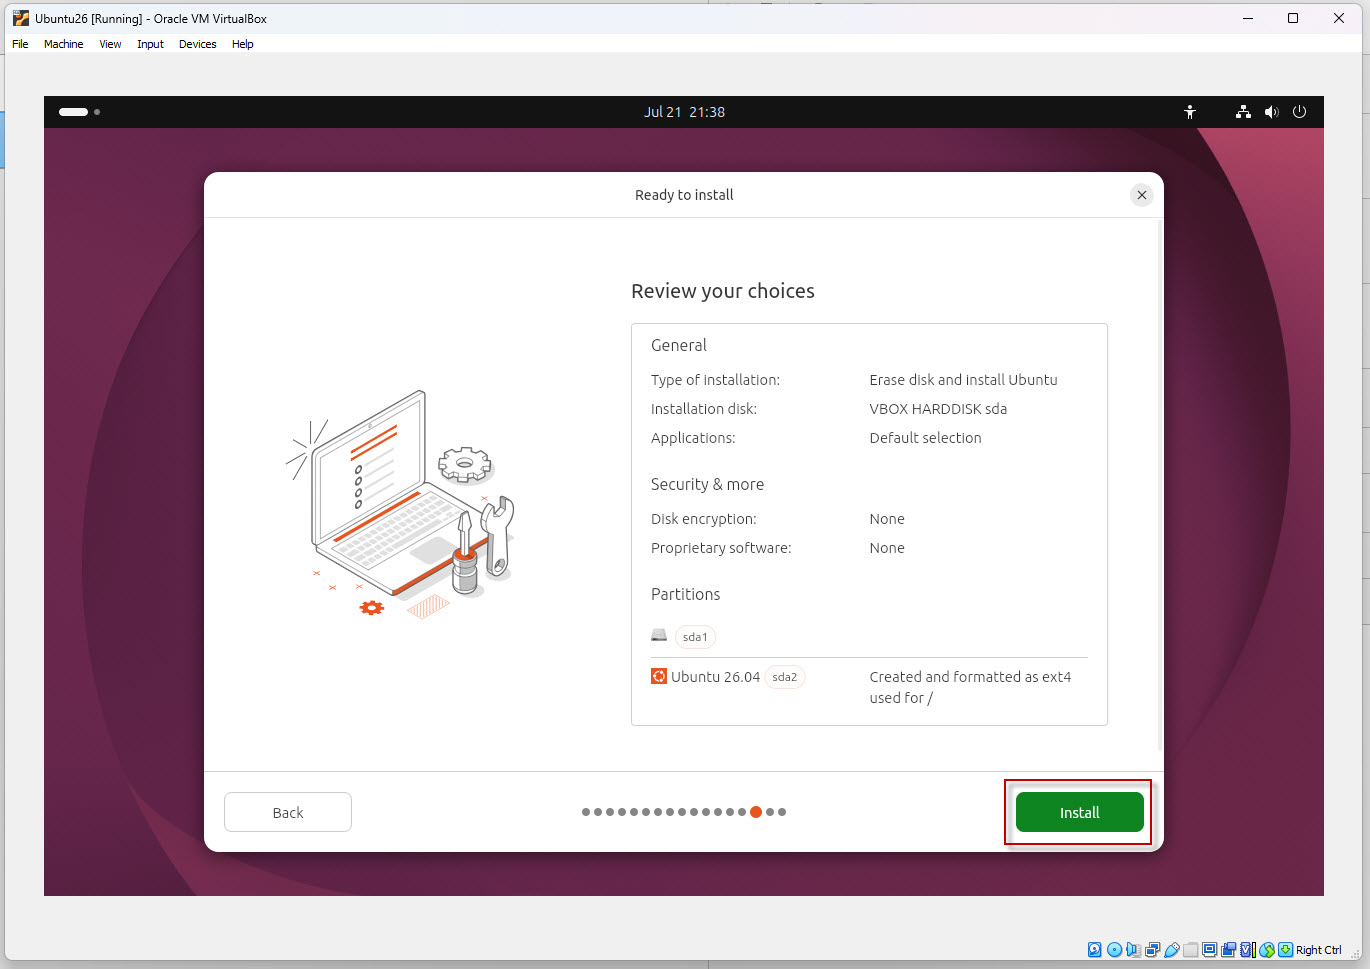
Click Install.
Ubuntu installation will begin.
Step 22: Wait for Installation
Ubuntu will now:
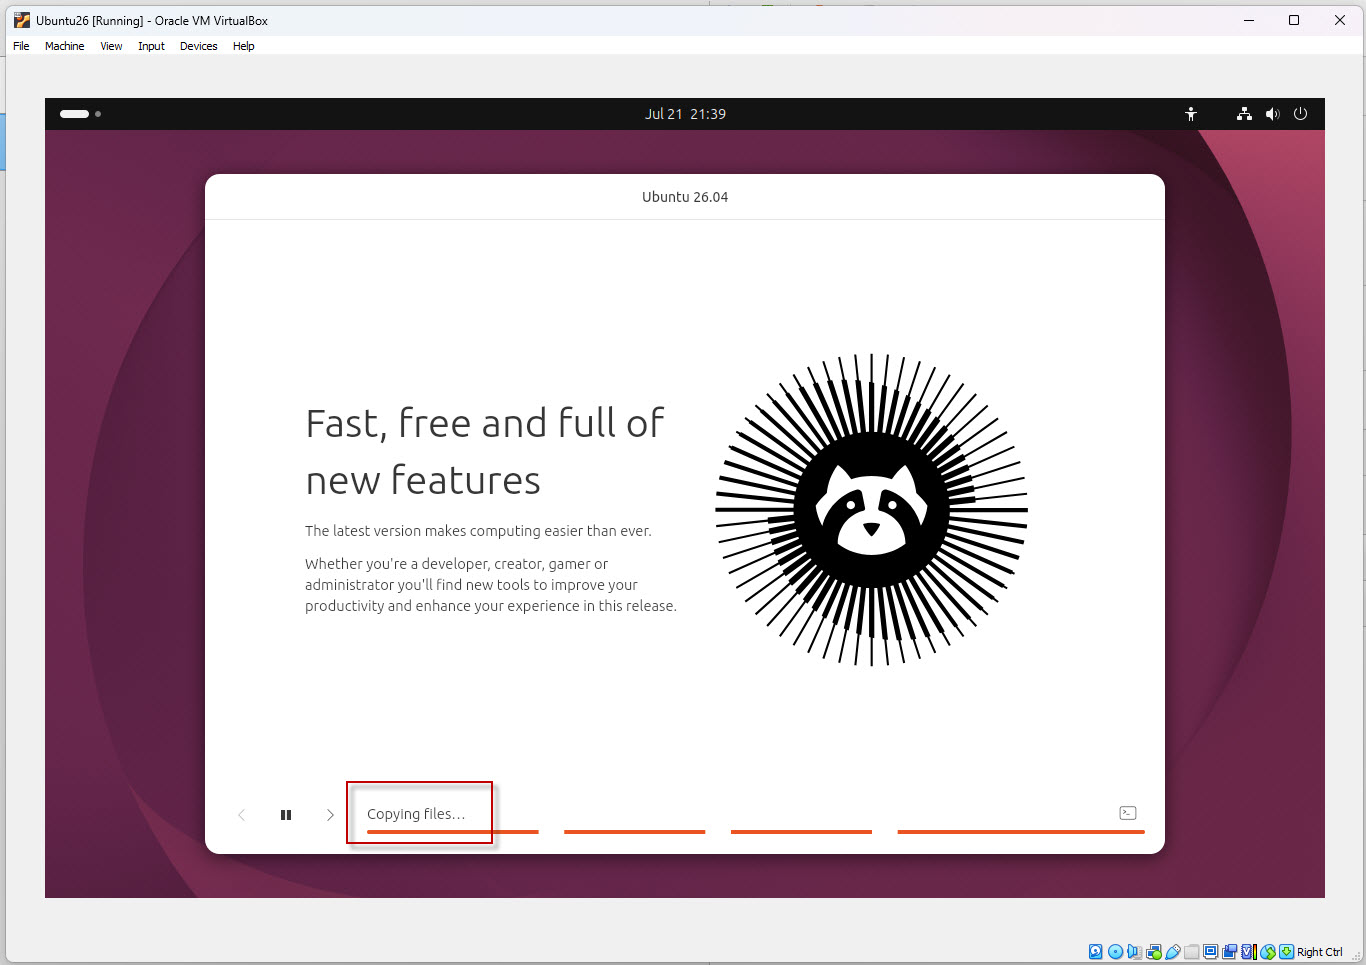
- Copy installation files
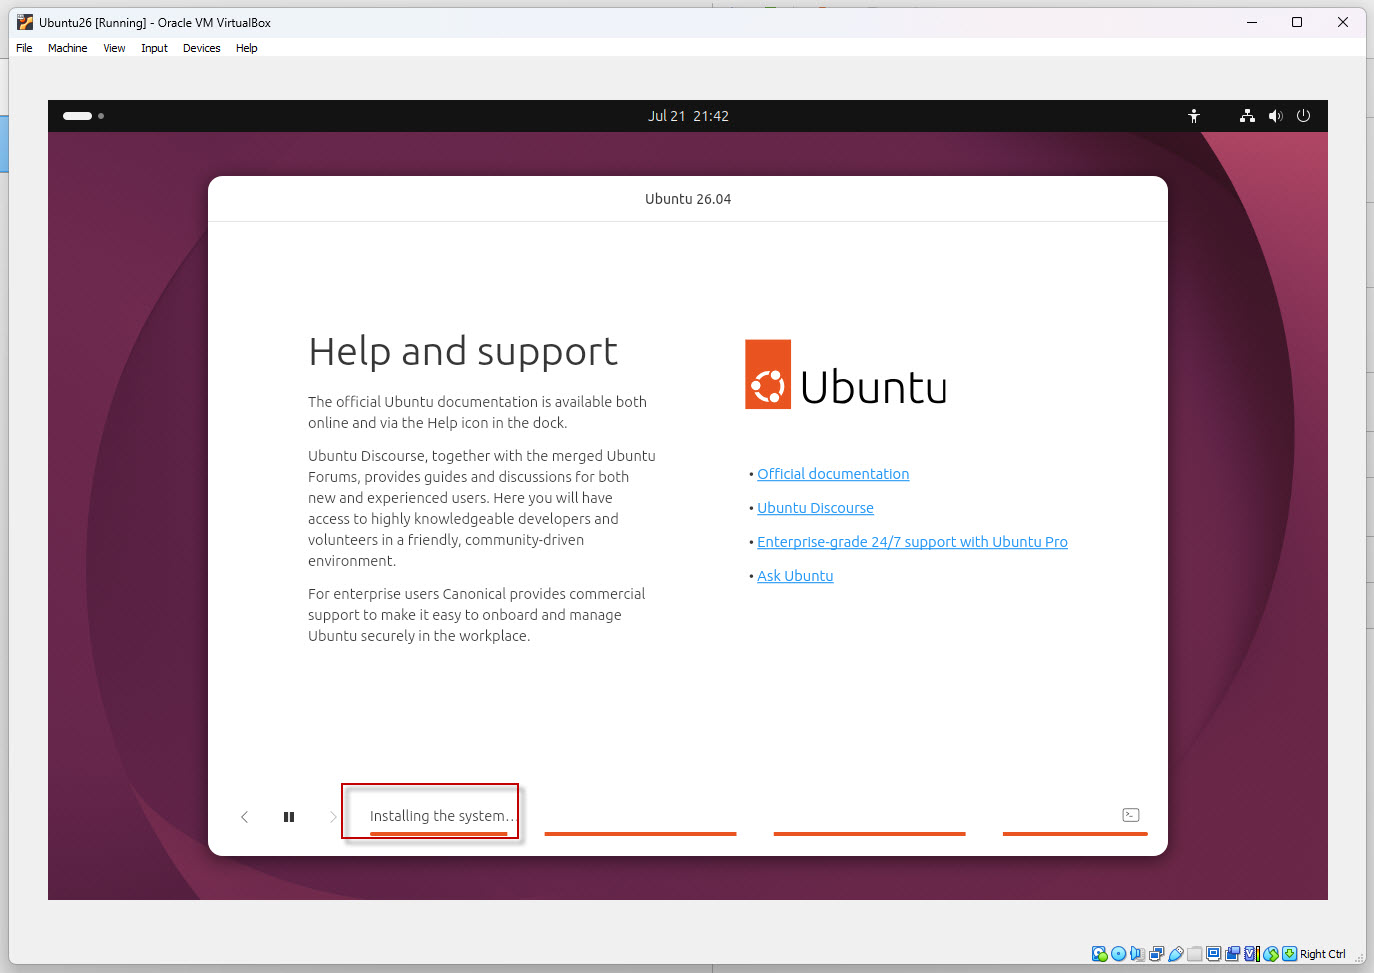
- Install system packages
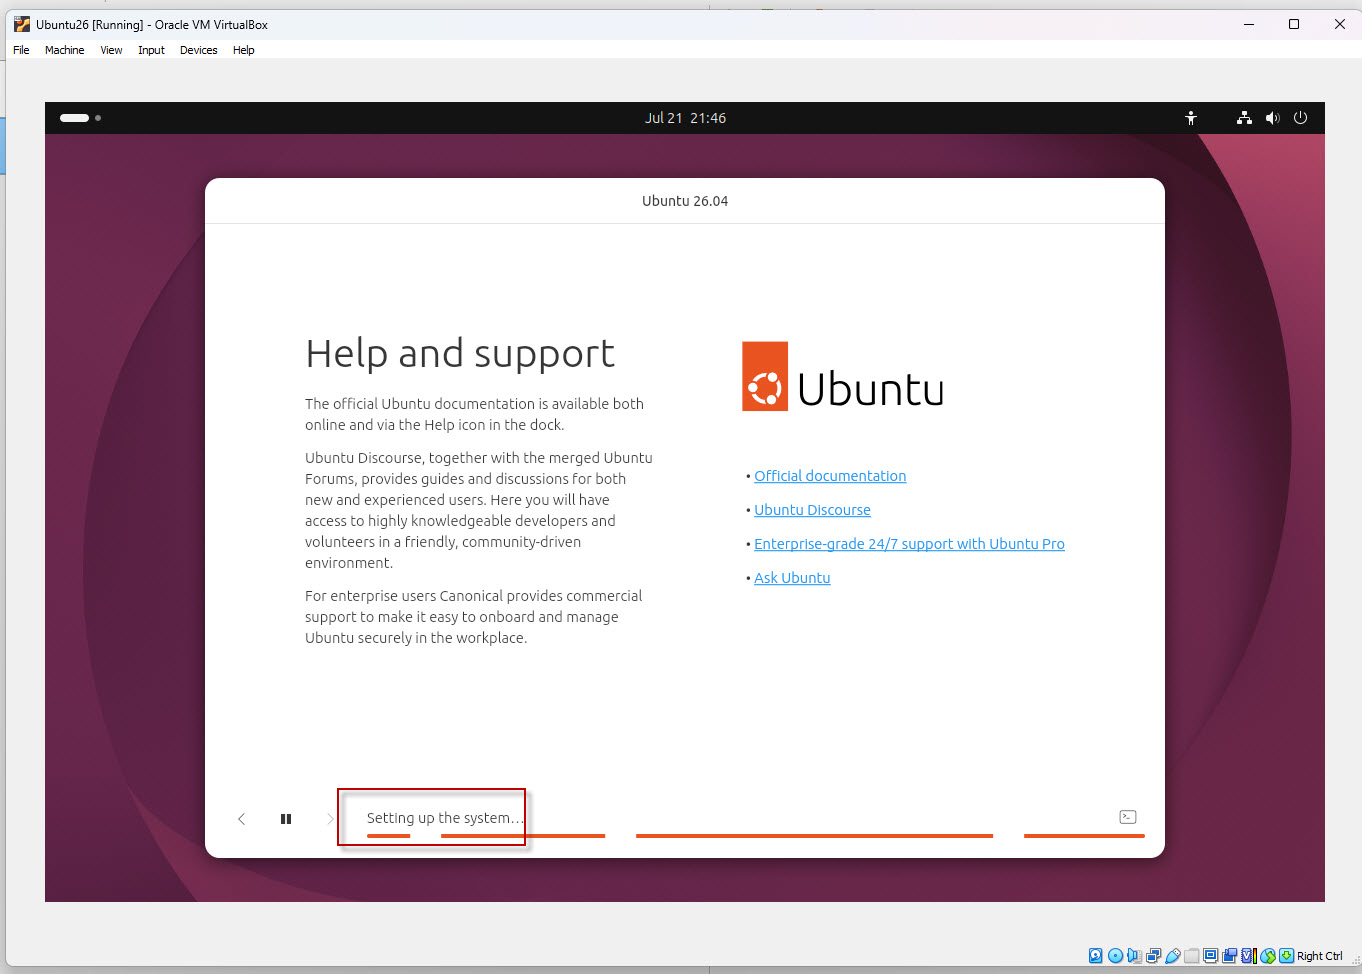
- Configure the operating system
- Complete setup automatically
This process may take several minutes depending on your system speed.
Step 23: Restart Ubuntu
Once installation completes, you’ll see the message: Ubuntu 26.04 LTS is Installed and Ready to Use
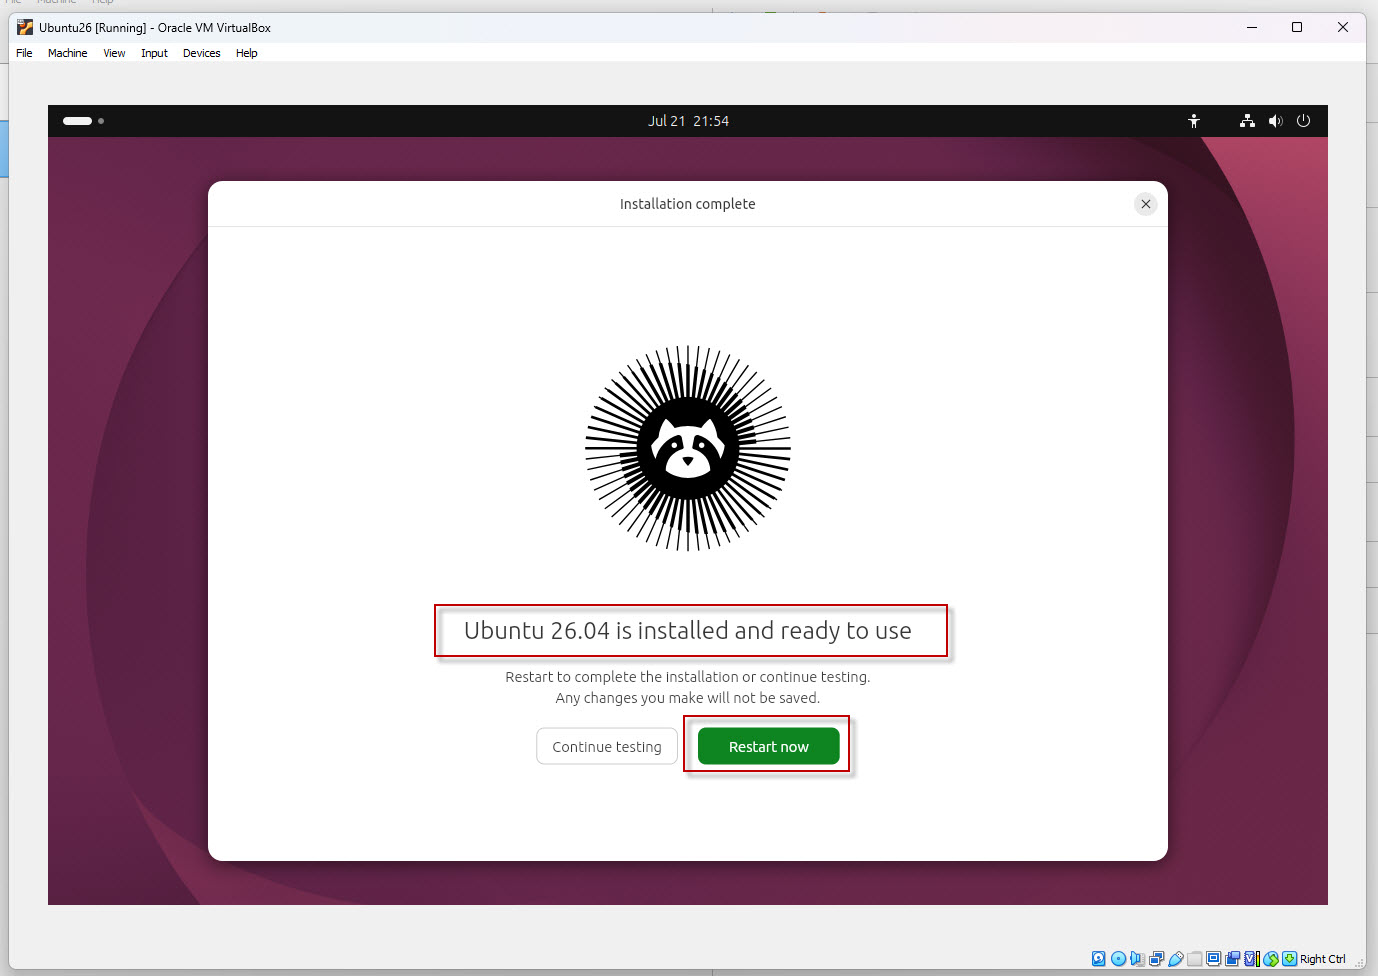
Click: Restart Now button
Step 24: Finalize Installation
During reboot, Ubuntu asks:
Press Enter to finalize the installation and return to the login screen.
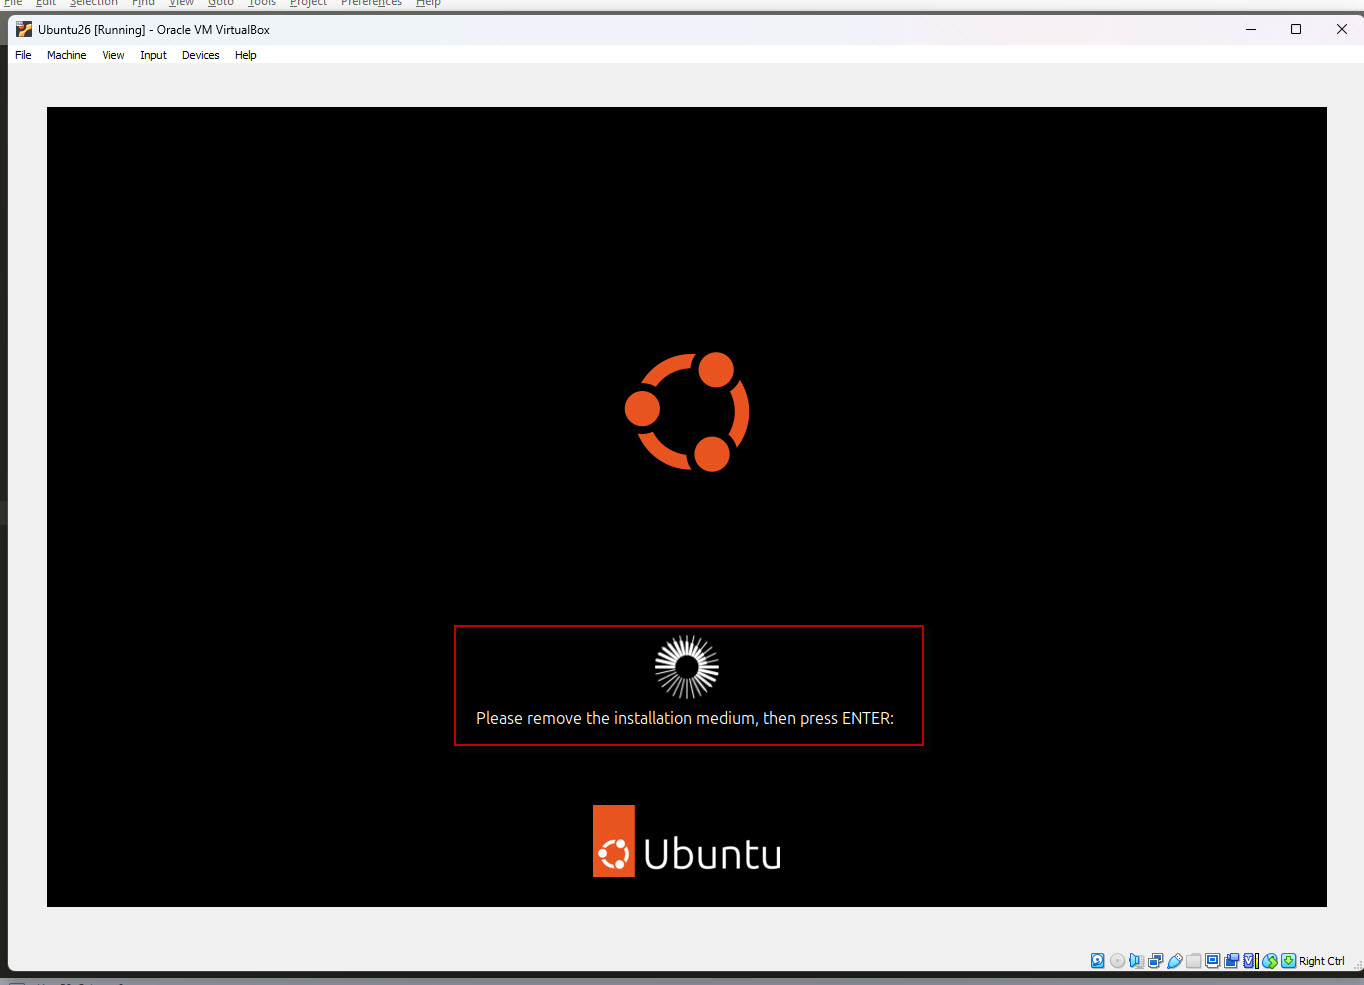
Press Enter.
Step 25: Log in to Ubuntu
Click your user account: TechArry
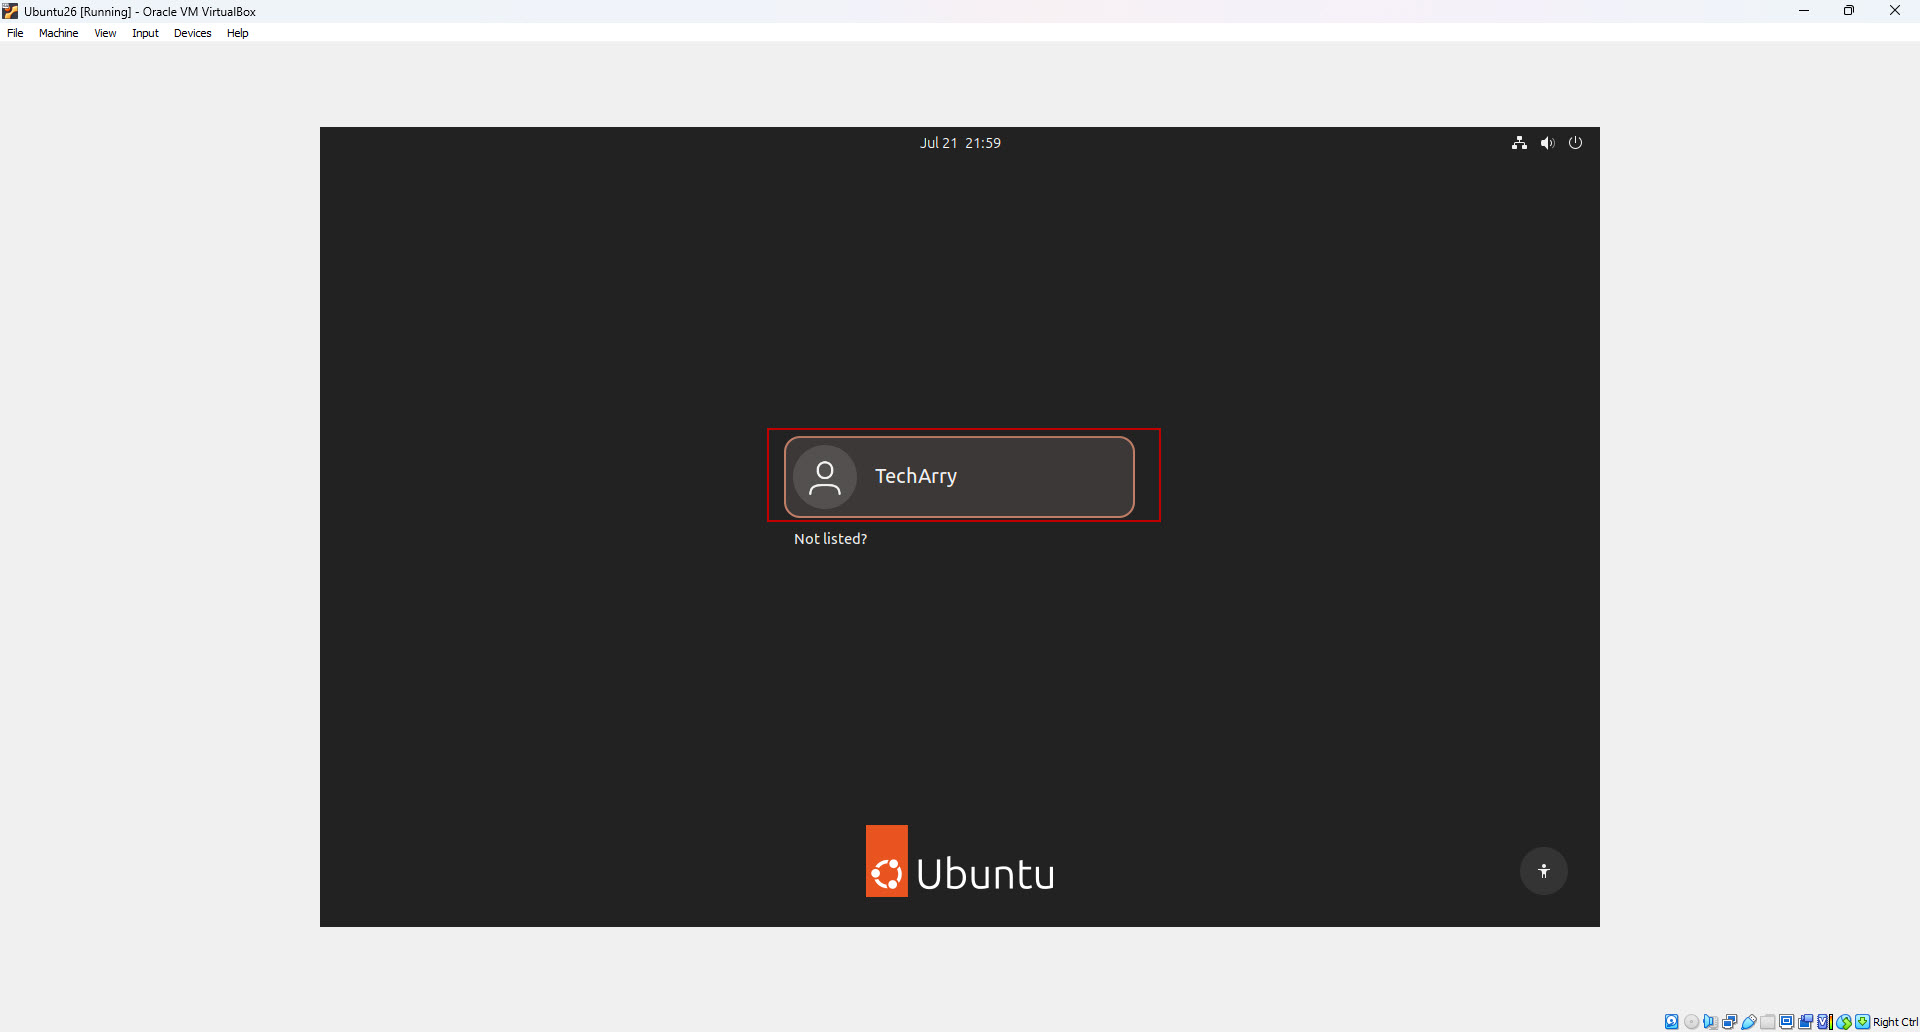
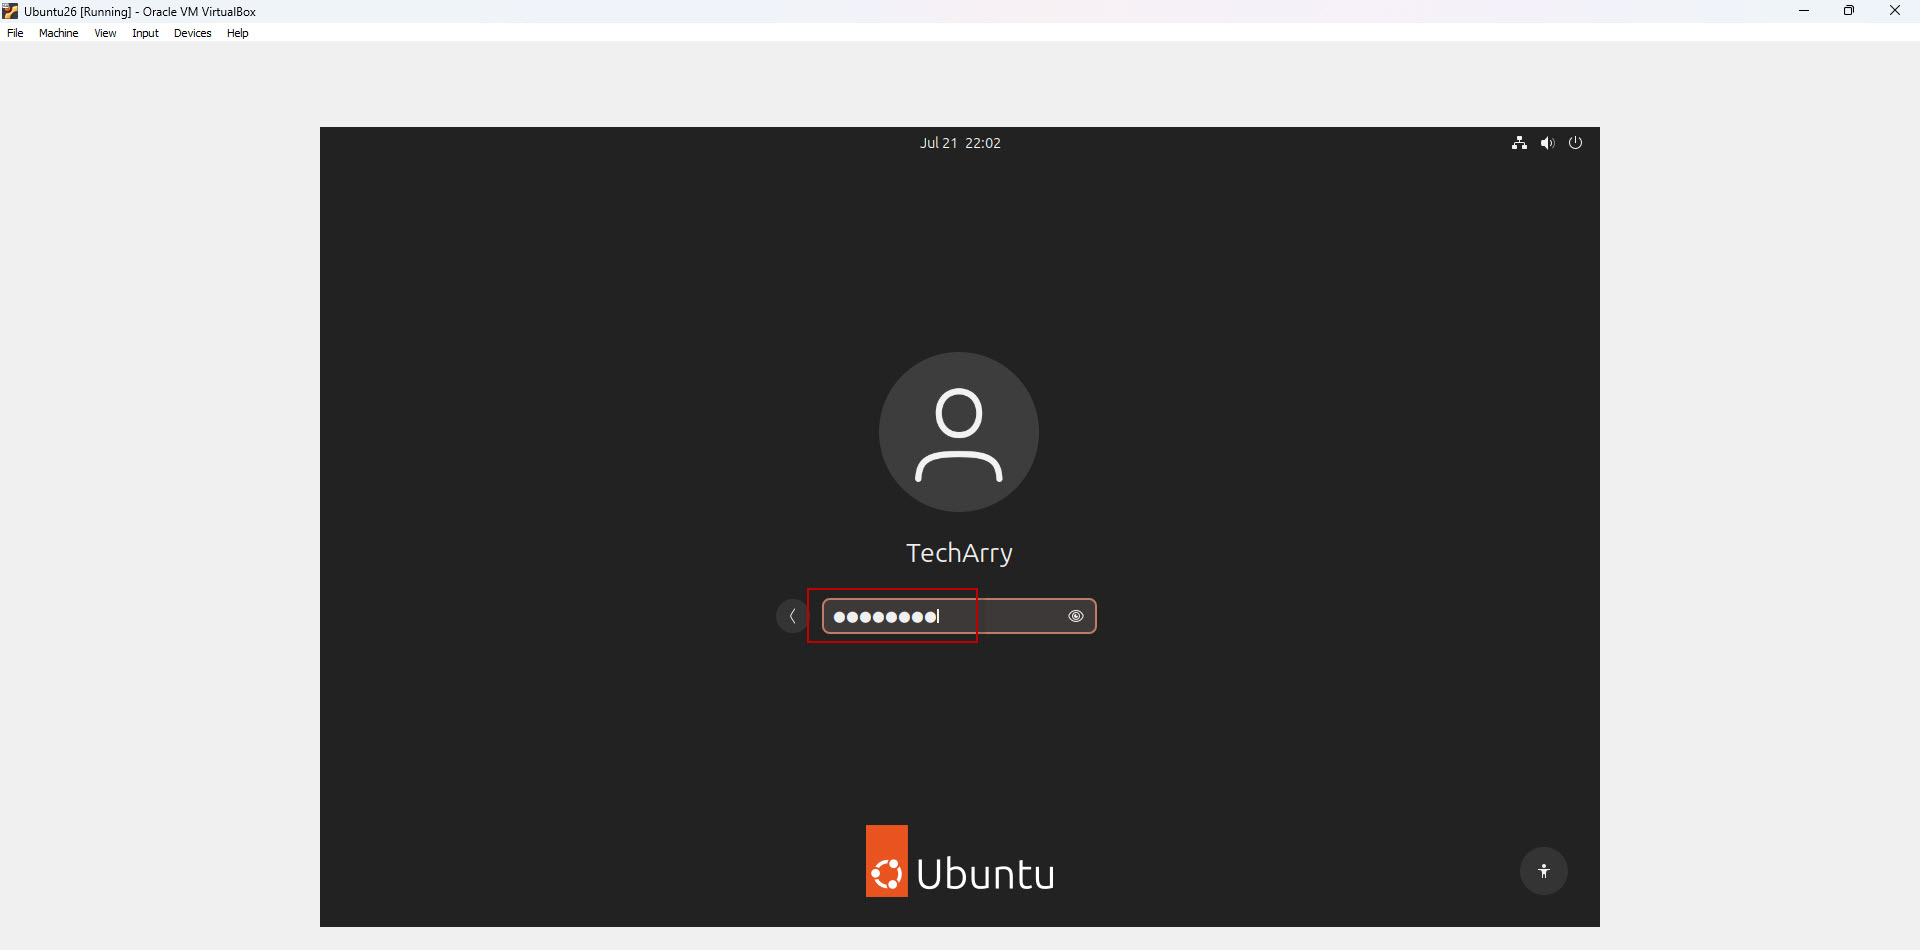
Enter your password and press Enter.
Ubuntu Desktop will load successfully.
Step 26: Complete the Welcome Wizard
After the first login:
- Click Next on the Welcome screen.
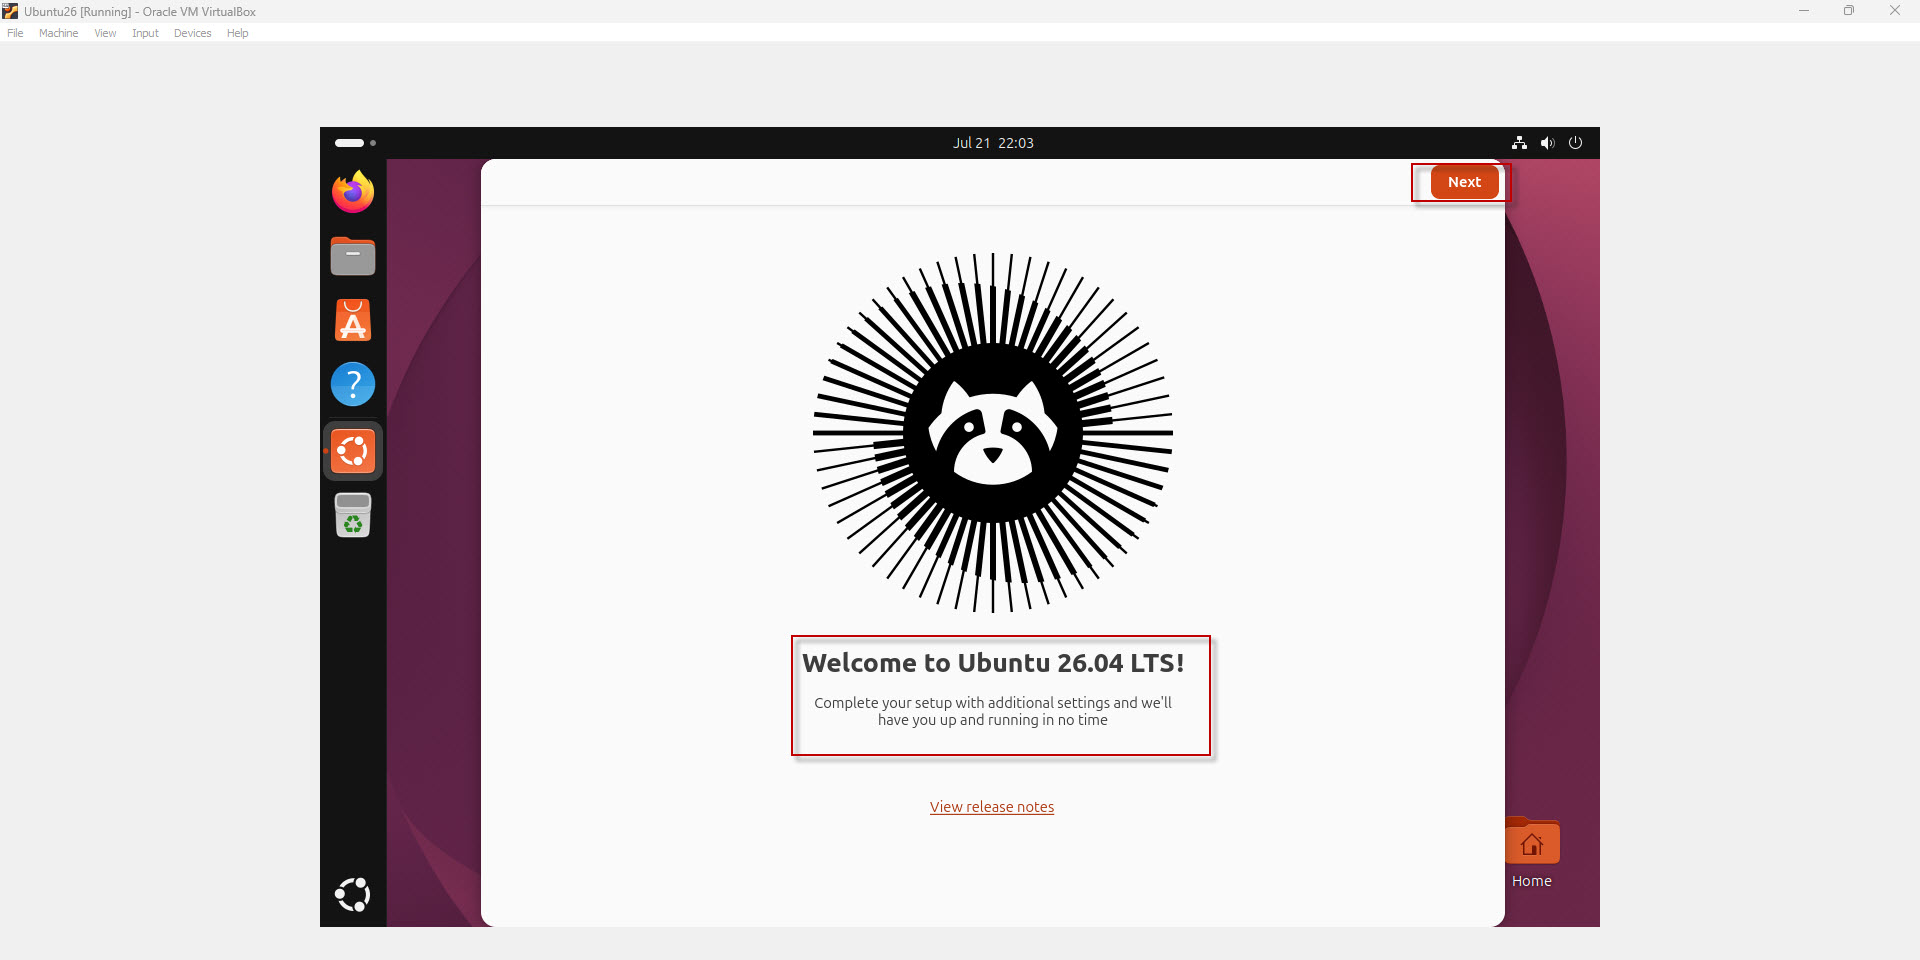
- Keep the default Location Services settings.
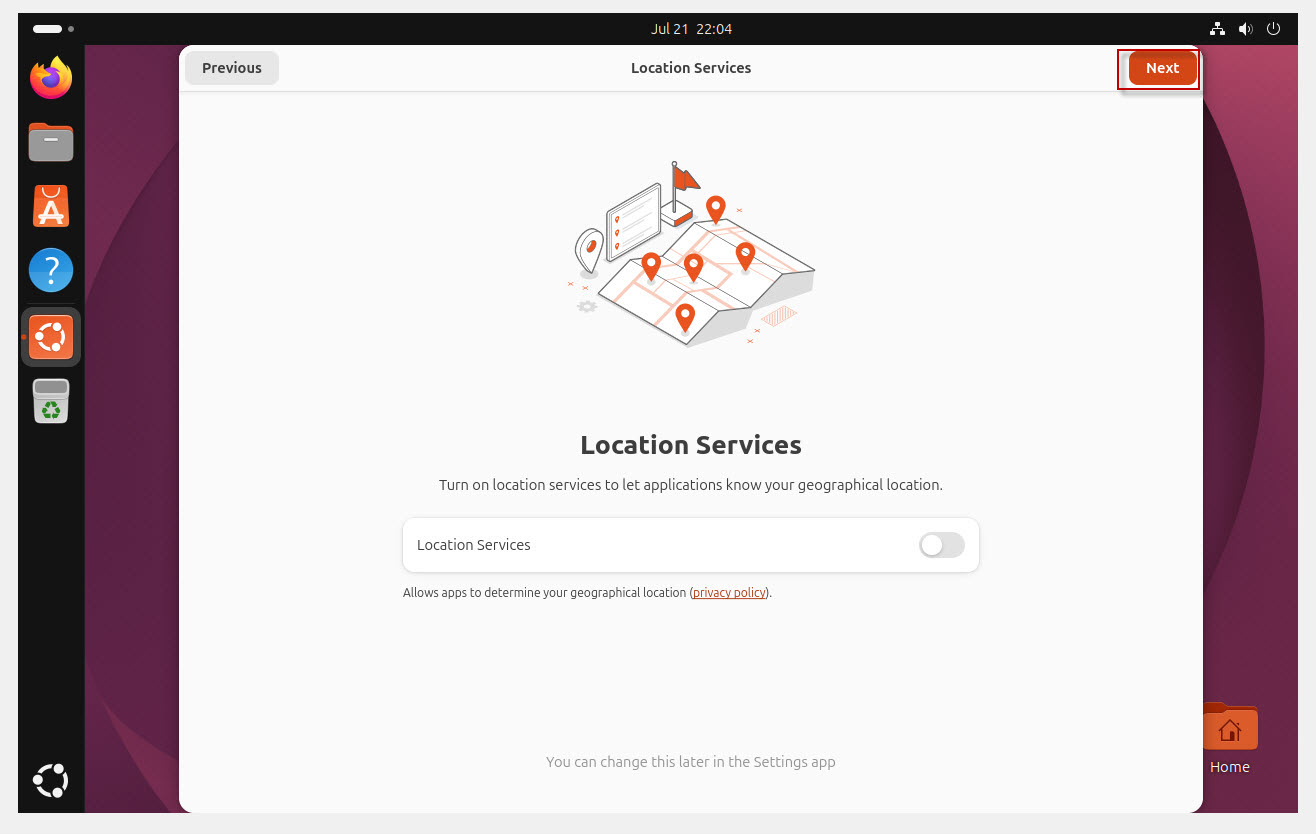
- Click Next.
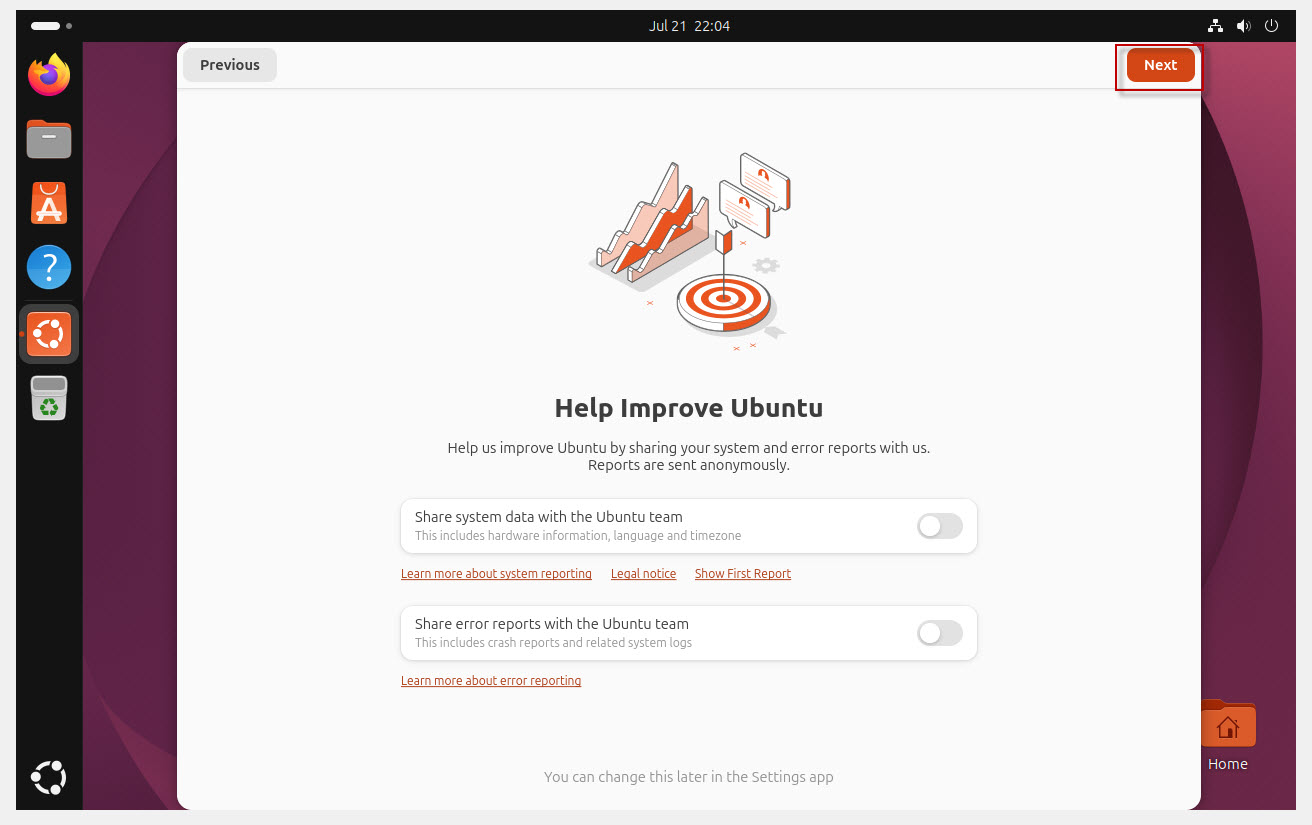
- Select the default Ubuntu appearance.
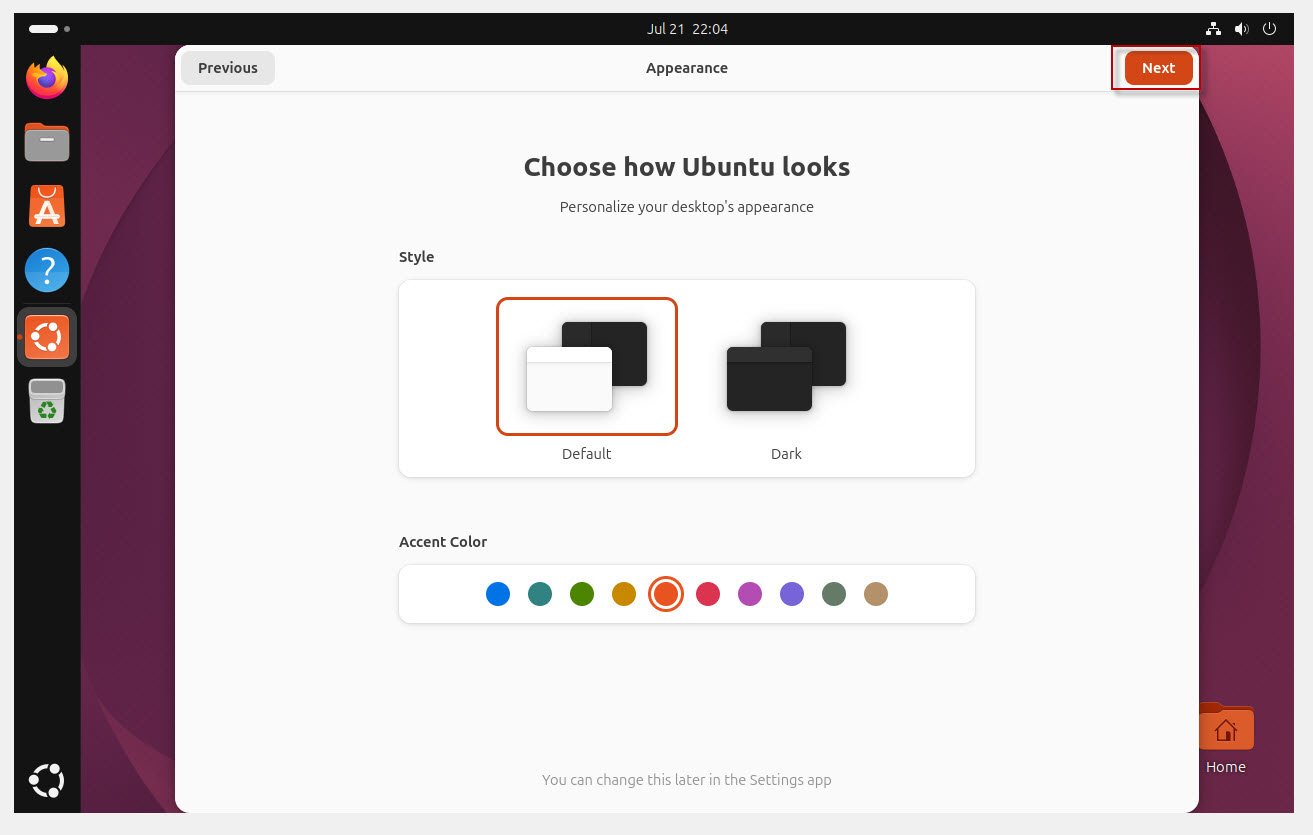
- Click Finish.
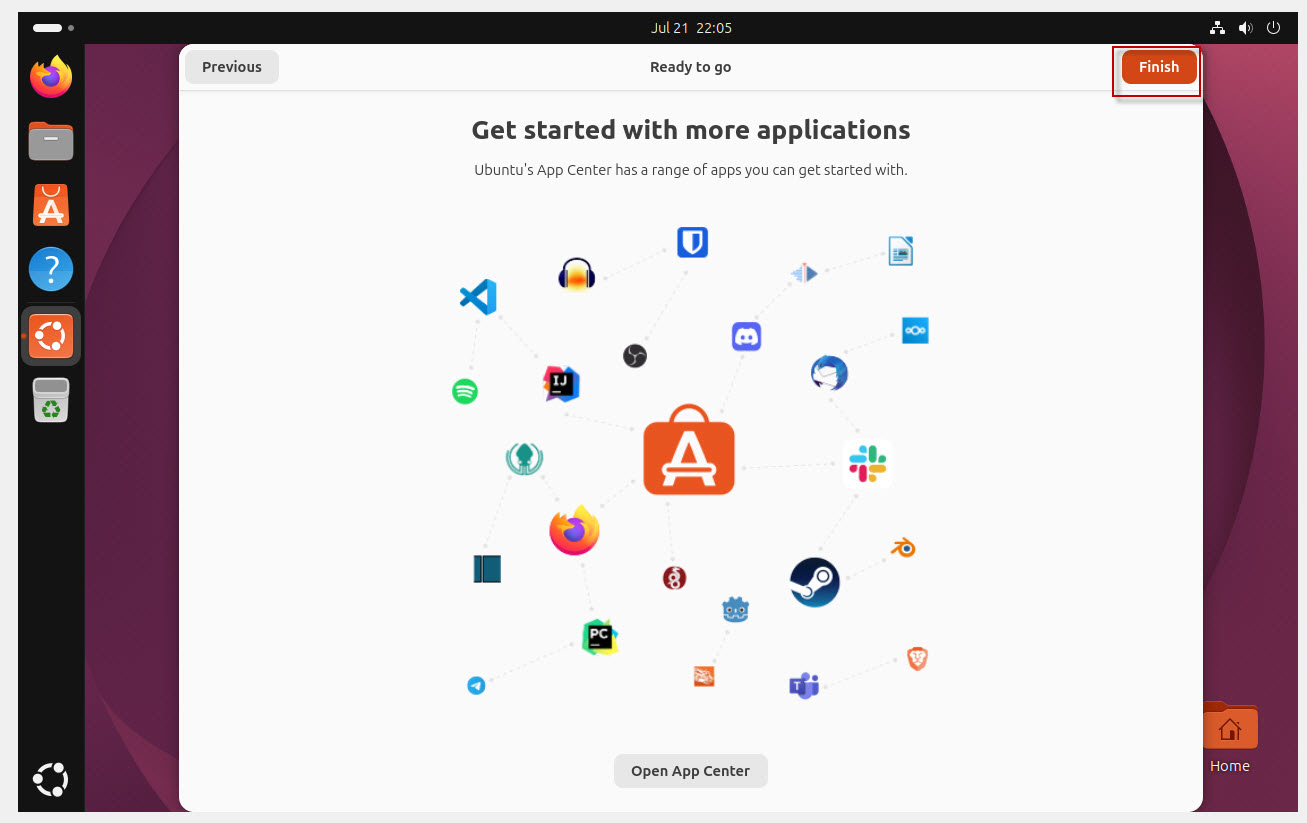
You are now on the Ubuntu Desktop.
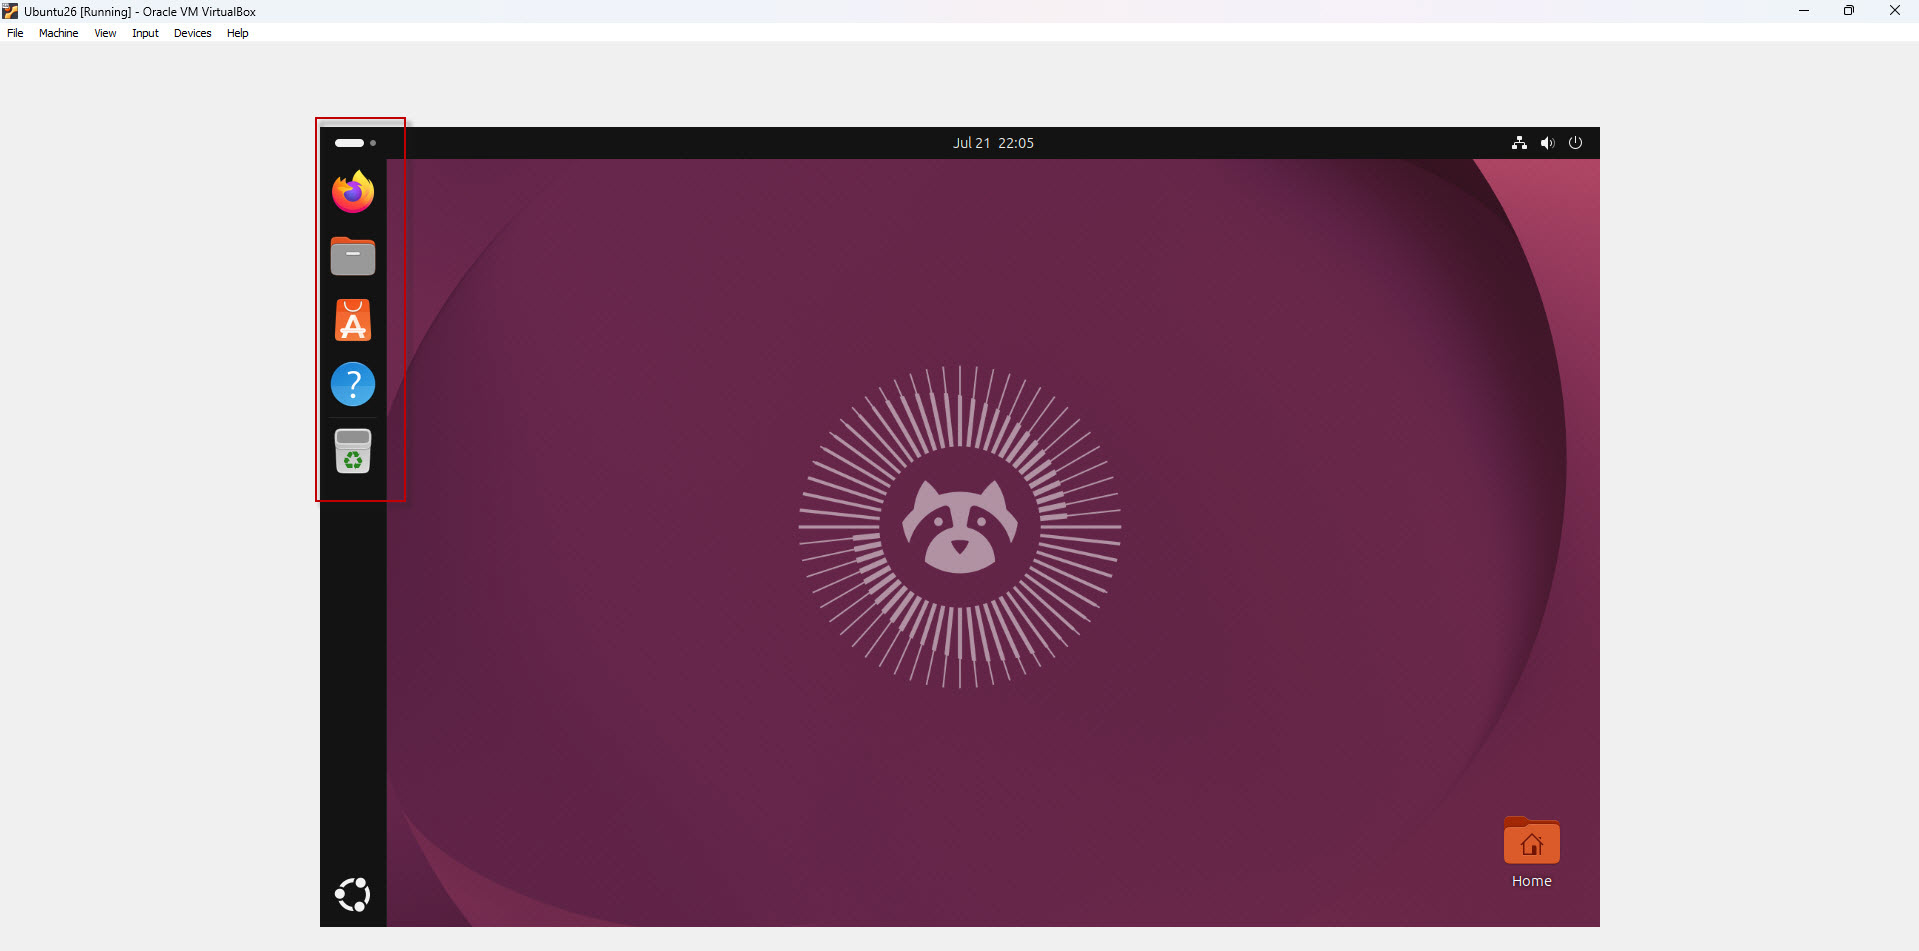
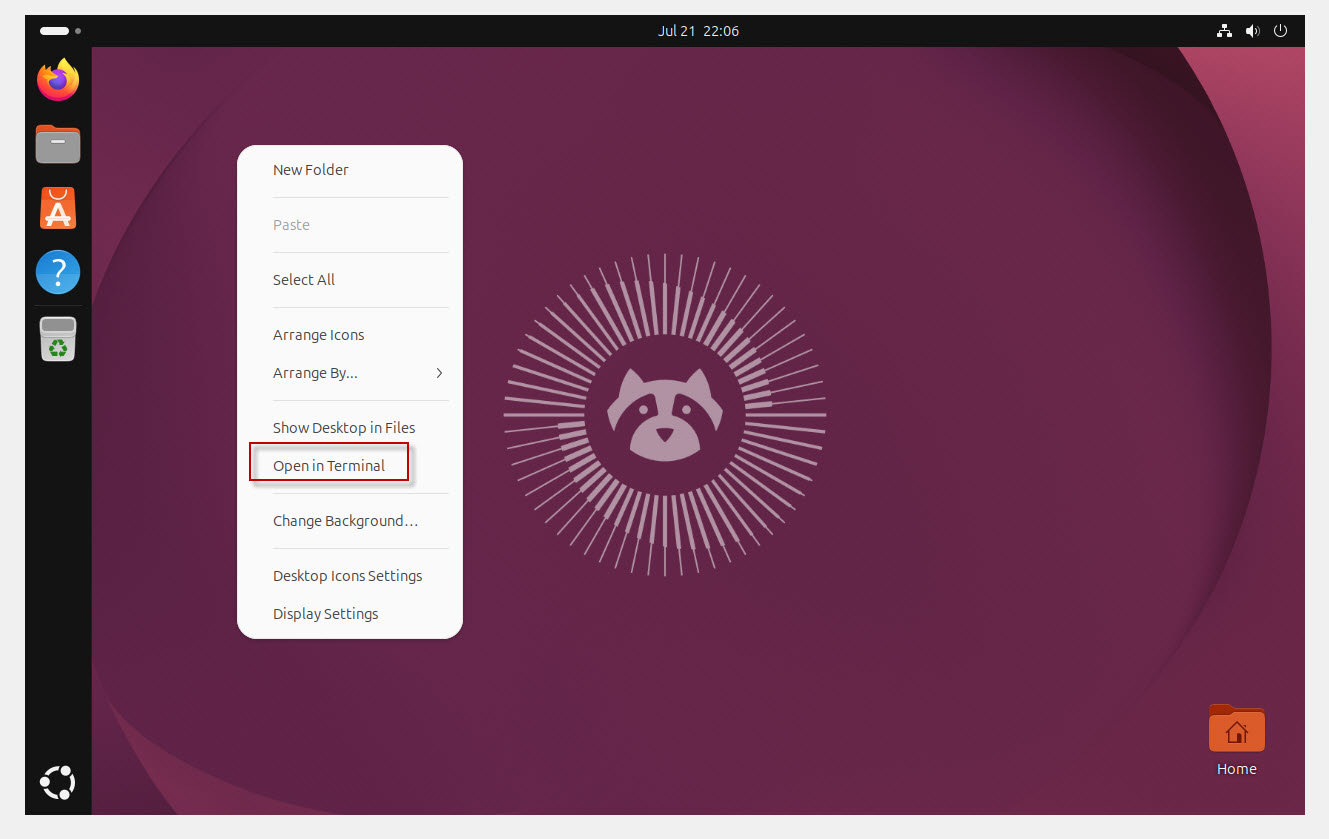
Step 27: Open Ubuntu Terminal
Right-click on the desktop and select: Open in Terminal
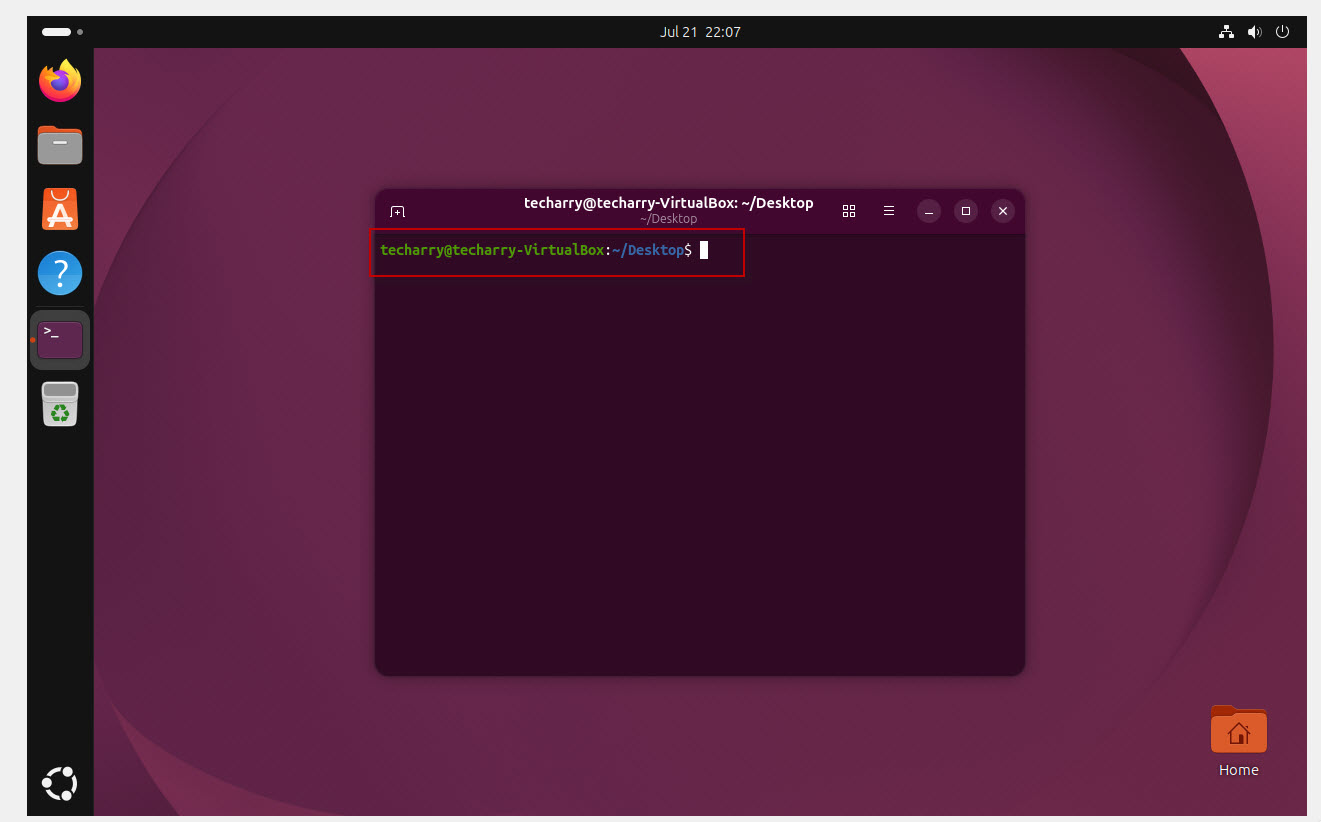
The Ubuntu Terminal opens.
Verify the logged-in user by running:
$ whoami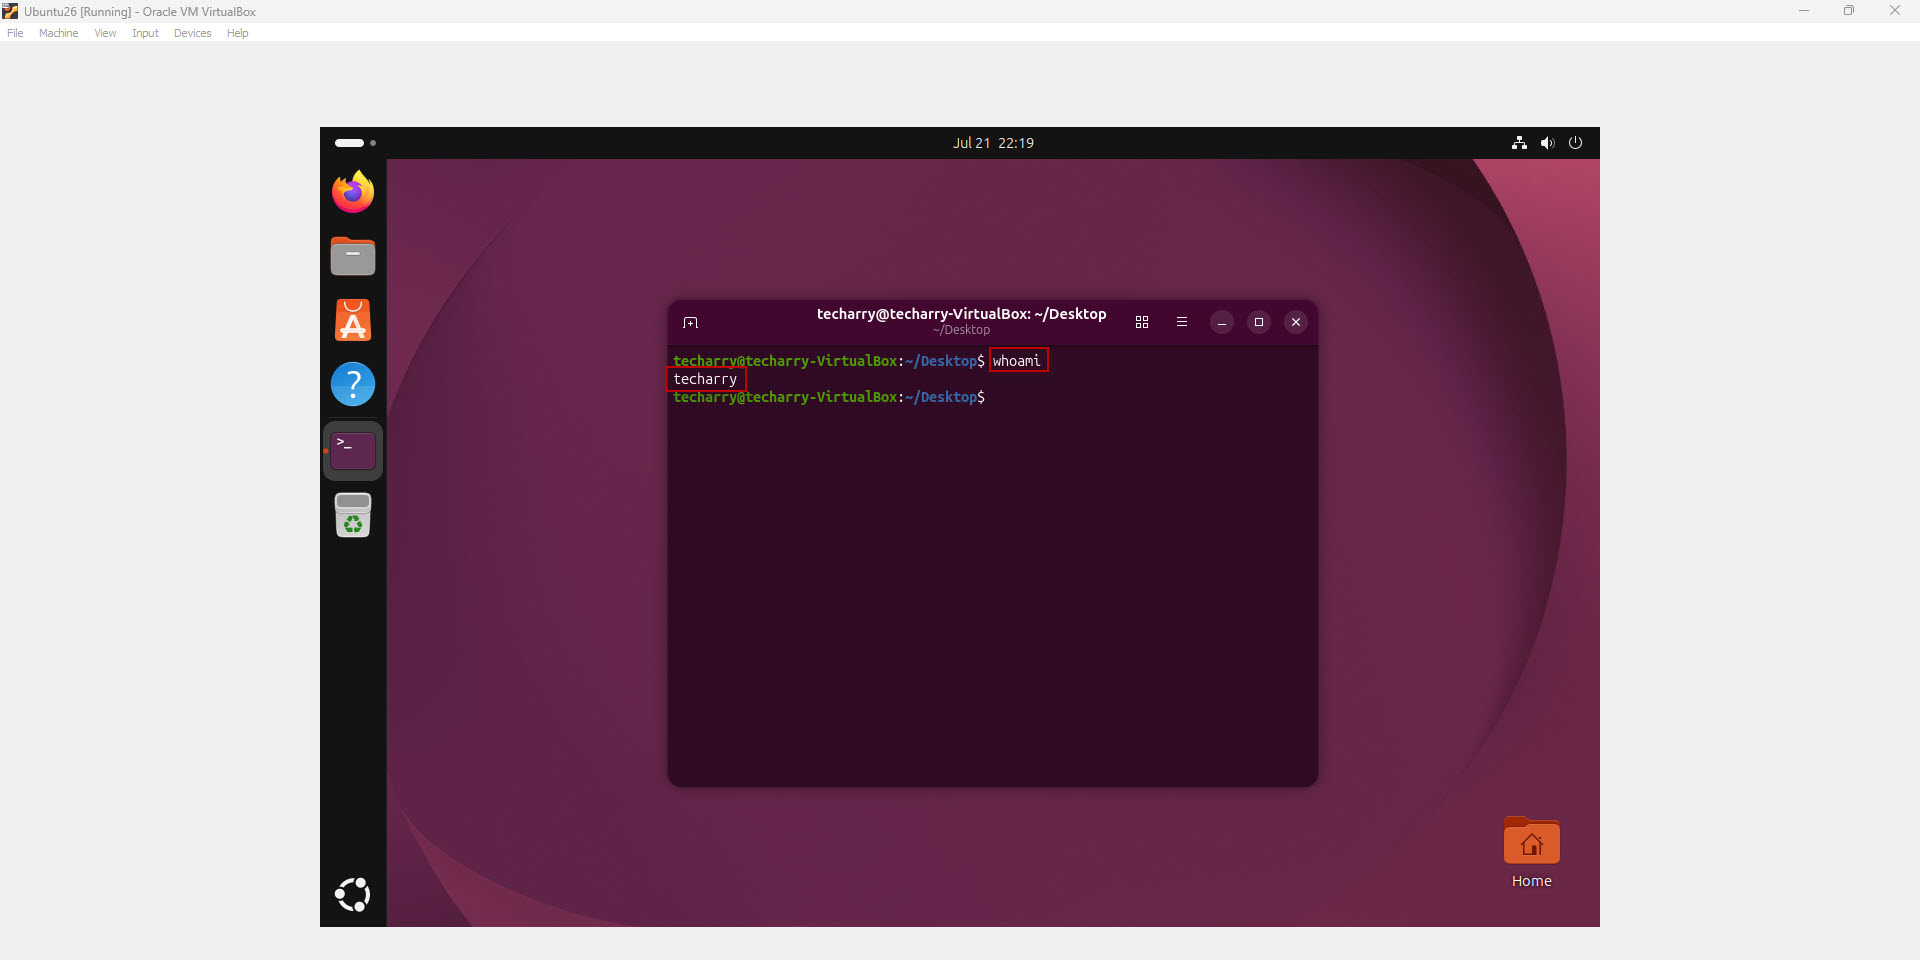
Output:
techarryYour Ubuntu virtual machine is now ready to use.
Congratulations! You have successfully installed Ubuntu Desktop 26.04 LTS on Oracle VirtualBox 7 running on Windows 11.
Using Ubuntu inside VirtualBox allows you to safely learn Linux, practice commands, develop applications, perform cybersecurity labs, and test software without modifying your primary operating system.
Now that your Ubuntu virtual machine is ready, you can begin exploring Linux commands, installing software, configuring development tools, or setting up your own testing environment.




This Post Has 5 Comments
Comments are closed.