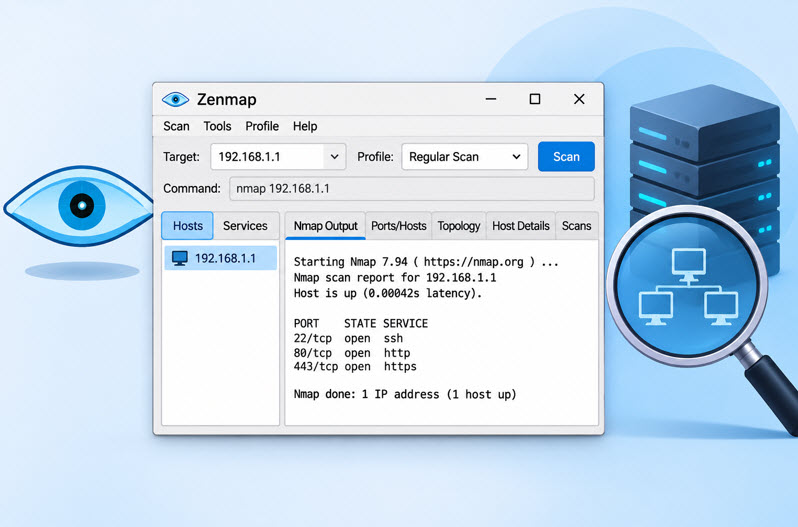

Angry IP Scanner is a free and open-source network scanning tool used to scan IP address ranges, identify active hosts, and check open ports. It is a useful tool for network administrators and security professionals who want to perform basic network assessments.
In this article, we will explain how to download, install, and use Angry IP Scanner on a Windows machine. We will also explore how to scan an IP address range and view the scanning results.
It can also collect useful information about discovered hosts, such as hostname, response time, and open ports, depending on the selected scanning options.
Some of its key features include:
- IP Address Scanning: Scan a single IP address or an entire range of IP addresses.
- Live Host Detection: Identify active hosts on a network.
- Port Scanning: Check selected TCP ports to identify available services.
- Cross-Platform Support: Available for Windows, Linux, and macOS.
- Export Results: Save scanning results for further analysis.
- Open Source: Free to download and use.
How to Download Angry IP Scanner on Windows
First, we need to download Angry IP Scanner from its official website.
Step 1: Open the official Angry IP Scanner website: https://angryip.org/
Step 2: Click on the Download link to access the available versions.

You can also directly visit the Windows download page: https://angryip.org/download/#windows
Step 3: Since we are installing the tool on Windows, select the Windows installer option.
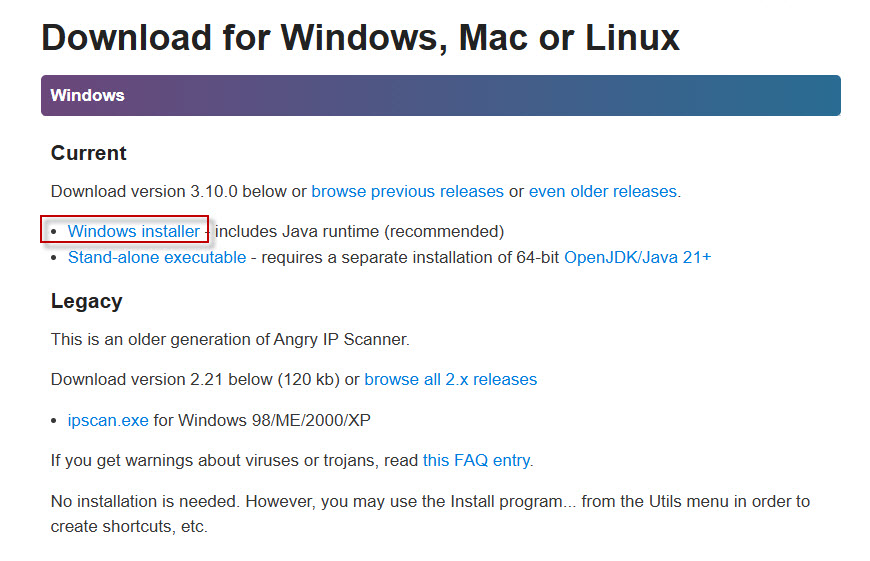
Download the .exe installation file. Once the download is complete, we can proceed with the installation.
How to Install Angry IP Scanner on Windows
Follow the steps below to install Angry IP Scanner on your Windows machine.
Step 1: Navigate to the folder where you downloaded the installer.
Double-click the downloaded ipscan-3.10.0-setup.exe file to start the installation process.
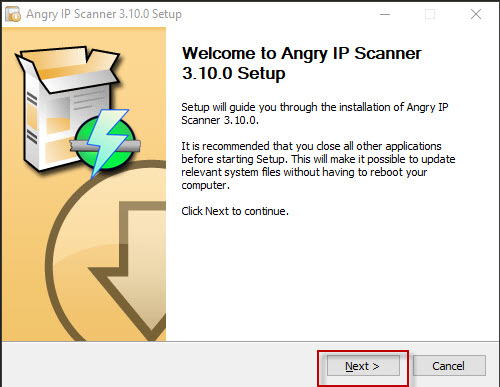
Step 2: The installation wizard will appear. Click on the Next button to continue.
Step 3: Select the destination folder where you want to install the software.
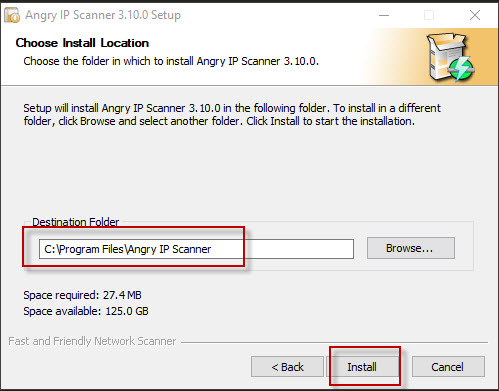
You can keep the default installation location or choose another folder according to your preference. Click on Install to begin the installation.
Step 4: Wait for the installation process to complete.
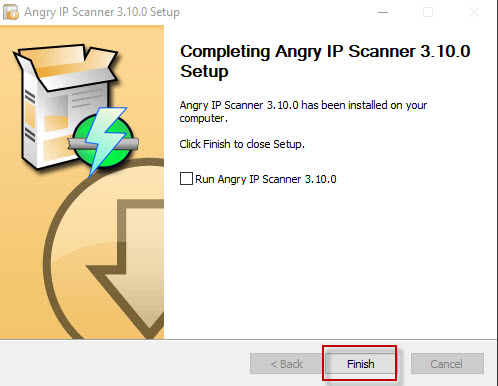
Once the installation is finished, click on the Finish button to close the installation wizard. Angry IP Scanner is now installed on your Windows machine.
How to Start Angry IP Scanner
After successfully installing the tool, we can start using it to scan IP addresses.
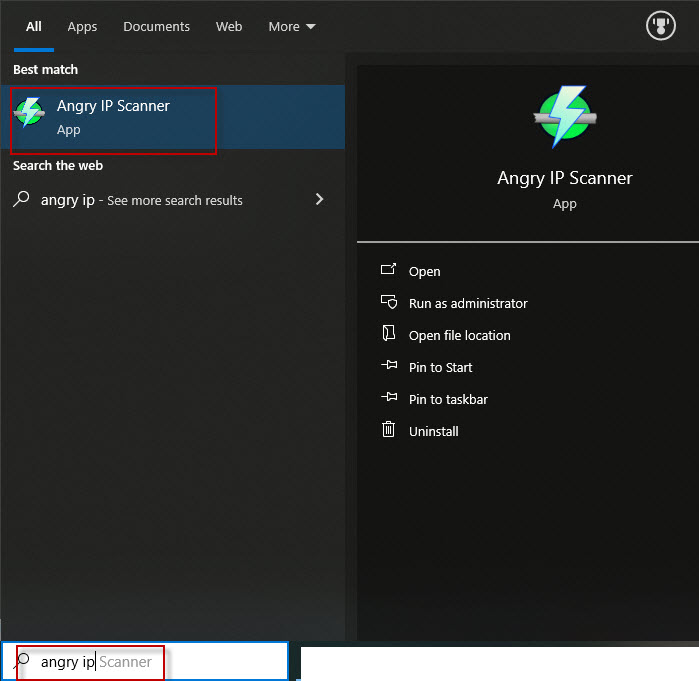
Step 1: Open the Windows Search box.
Step 2: Type Angry IP Scanner in the search box.
Step 3: Click on the Angry IP Scanner application icon to launch the tool.
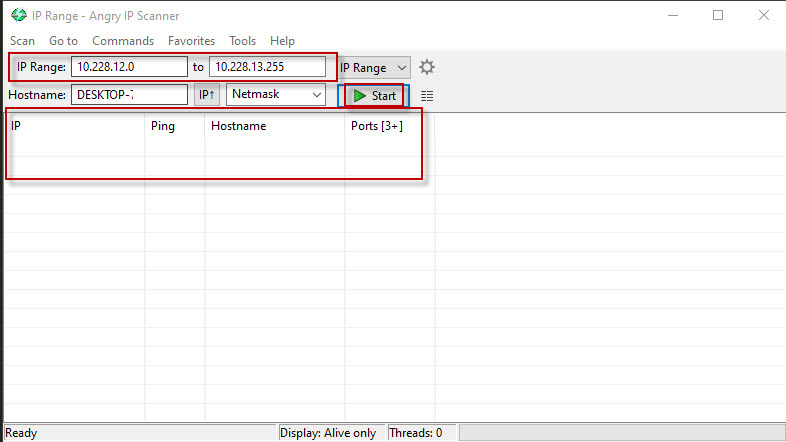
Once the application starts, you will see its main interface. Here, you can specify the IP address range that you want to scan.
How to Scan an IP Address Range Using Angry IP Scanner
Now, let’s perform a basic network scan to identify active hosts and check their open ports.
Step 1: Open Angry IP Scanner.
In the main interface, you will find fields for entering the IP address range. Enter the starting and ending IP addresses that you want to scan.
Step 2: Before starting the scan, you can configure the scanning options.
Angry IP Scanner allows you to select which information should be collected during the scan. You can also configure the ports you want to check.
For example, you can check commonly used ports such as:21(FTP), 22(SSH), 80(HTTP), 443(HTTPS), 3389(RDP)
Step 3: Once you have configured the IP address range and scanning options, click on the Start button.
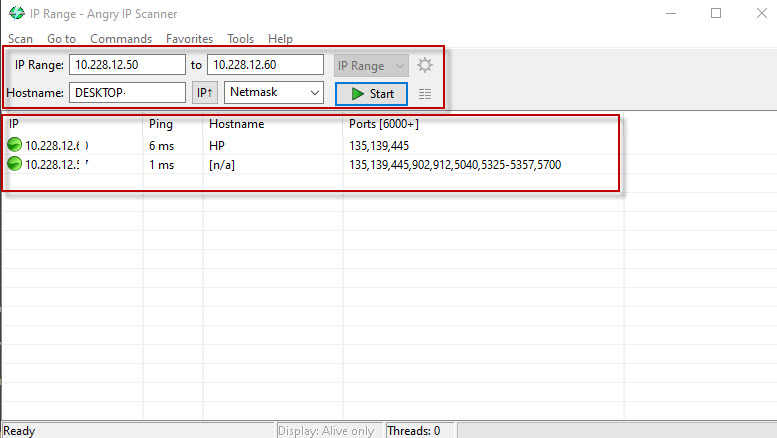
The tool will begin scanning the specified IP address range.
Step 4: After the scanning process is complete, the results will appear in the application.
You can view the scanned IP addresses along with information such as:
- IP Address
- Ping status
- Hostname
- Response time
- Open ports (when configured)
Active hosts can be identified from the scan results. You can select an individual IP address to view additional information collected by the scanner.
Step 5: You can also save the scanning results for future reference or further analysis.
Angry IP Scanner provides options to export scan results in supported formats. This can be useful when documenting network assessments.
Conclusion
Angry IP Scanner is a simple and useful tool for scanning IP address ranges and identifying active hosts on a network. Its ability to check selected ports and collect basic host information makes it helpful for network administrators, penetration testers, and security professionals.
In this tutorial, we covered how to download and install Angry IP Scanner on Windows and how to perform a basic IP address scan.
It is a good starting point for anyone who wants to learn network scanning and perform basic network assessments.