
Kali Linux is a popular Linux distribution designed for penetration testing, vulnerability assessment, digital forensics, and cybersecurity research. Running Kali Linux as a virtual machine is a convenient way to practice security testing without replacing your existing operating system.
In this tutorial, you will learn how to install Kali Linux 2026.2 on Oracle VirtualBox running on a Windows host machine. We will also configure some important VirtualBox settings after installation, including shared clipboard, drag and drop, boot order, and video memory.
Prerequisite: Oracle VirtualBox should already be installed on your Windows computer.
Step 1: Download Kali Linux 2026.2
First, visit the official Kali Linux website: Kali Linux Official Website
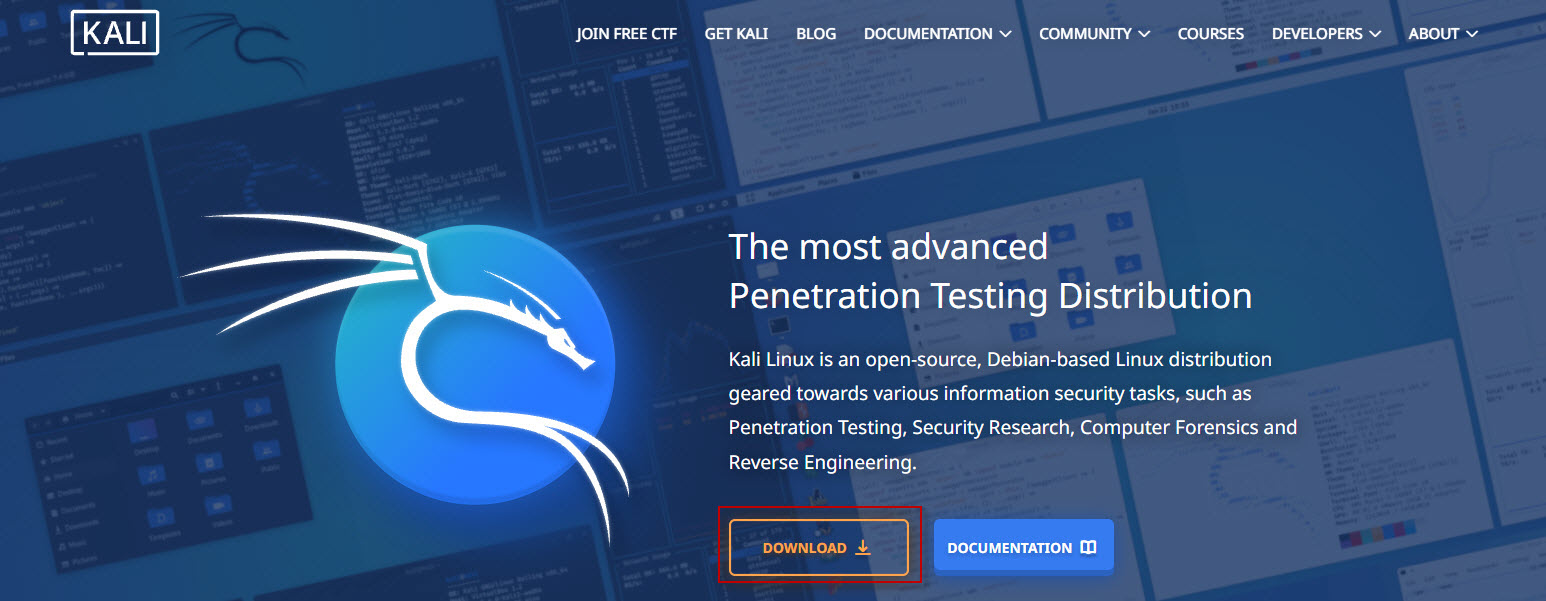
Click Download and look for the Installer Images section.
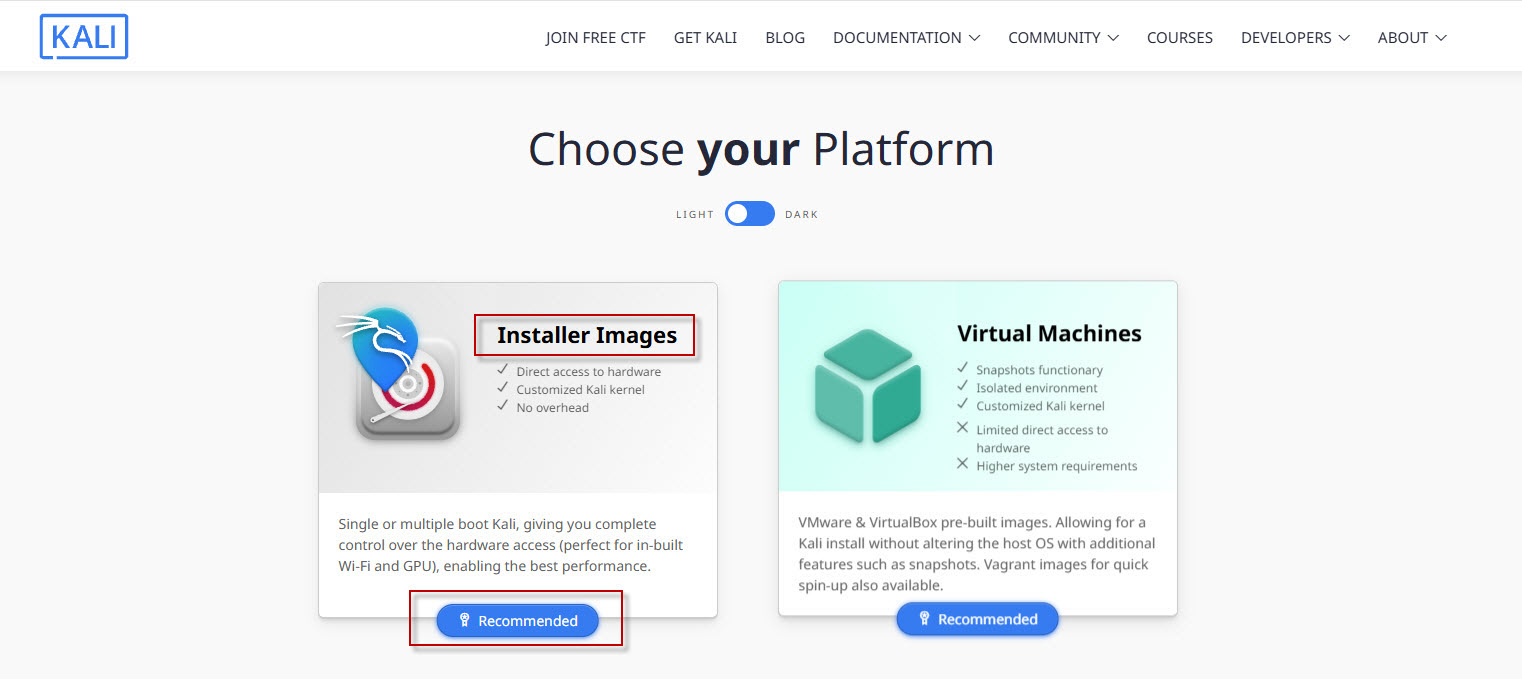
Select the x86_64 installer image for Kali Linux 2026.2 and download the ISO file. The installer image is approximately 4.5 GB, so the download may take some time depending on your internet connection.
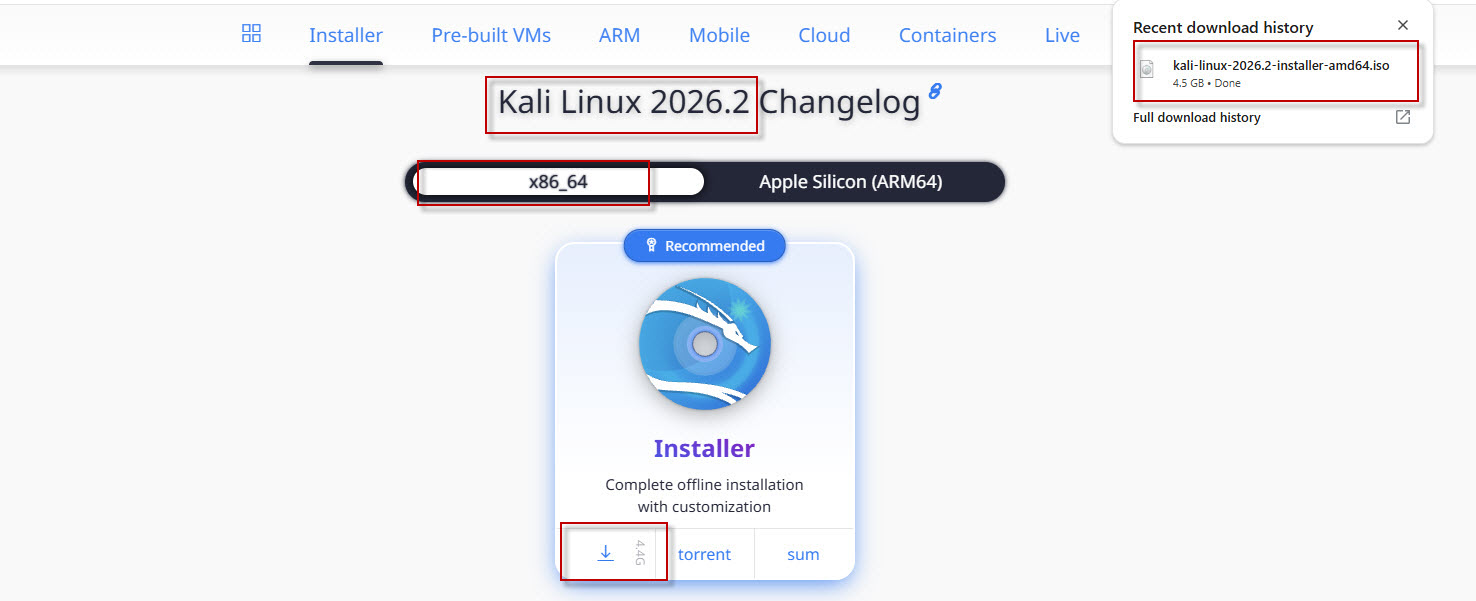
For this tutorial, the downloaded ISO file is: kali-linux-2026.2-installer-amd64.iso
Step 2: Create a New Virtual Machine
After downloading the ISO image, open Oracle VM VirtualBox Manager.
Click New to create a new virtual machine.
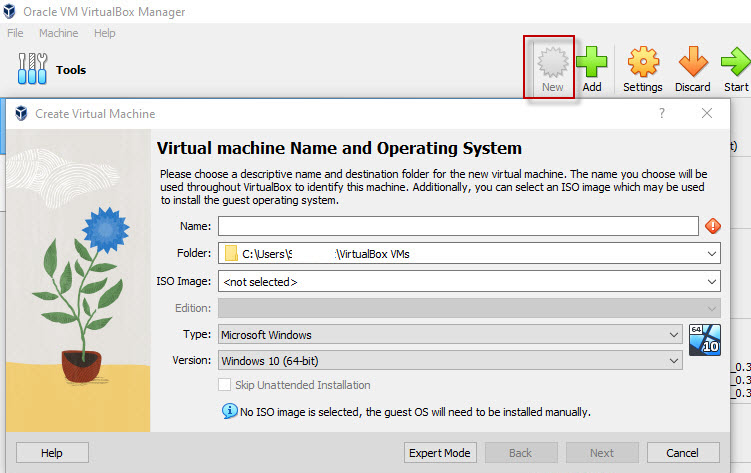
Enter a name for the VM. In this example, we use: KaliLinux2026
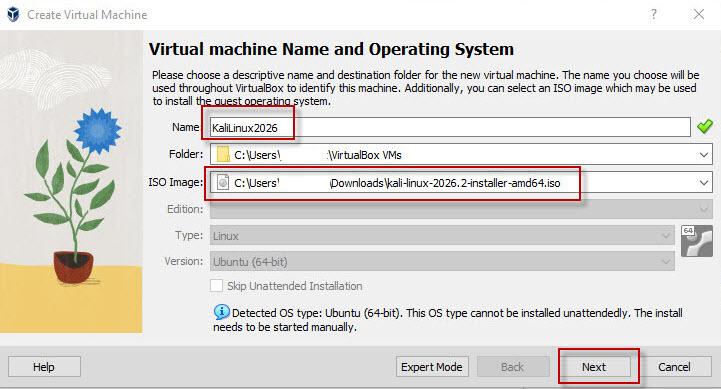
Select the downloaded Kali Linux ISO image, for example: C:\Users\test\Downloads\kali-linux-2026.2-installer-amd64.iso
Click Next.
Step 3: Configure Hardware
VirtualBox will now ask you to configure the hardware resources for the virtual machine.
For this example, we use:
- RAM: 8192 MB (8 GB)
- Processors: 2 CPUs
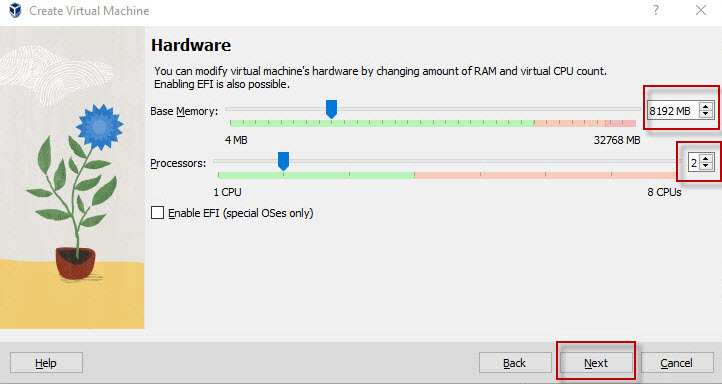
The appropriate values depend on the hardware available on your host computer. Avoid allocating excessive RAM or CPU resources to the virtual machine because Windows also needs sufficient resources to operate normally.
Click Next.
Step 4: Create a Virtual Hard Disk
Select Create a Virtual Hard Disk Now.
For this installation, we use a virtual disk size of: 50 GB
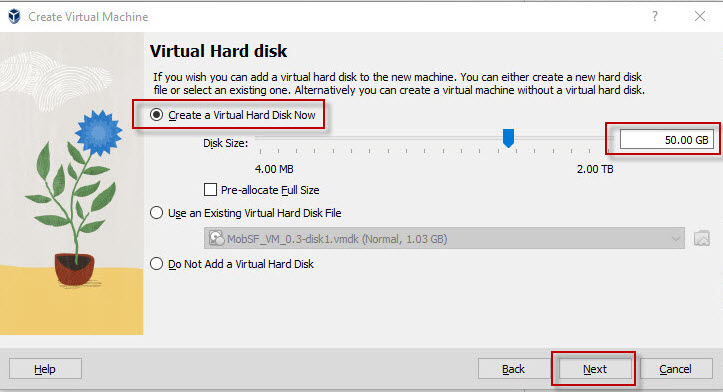
You can increase the disk size if you plan to install additional tools, applications, or store testing data.
Click Next.
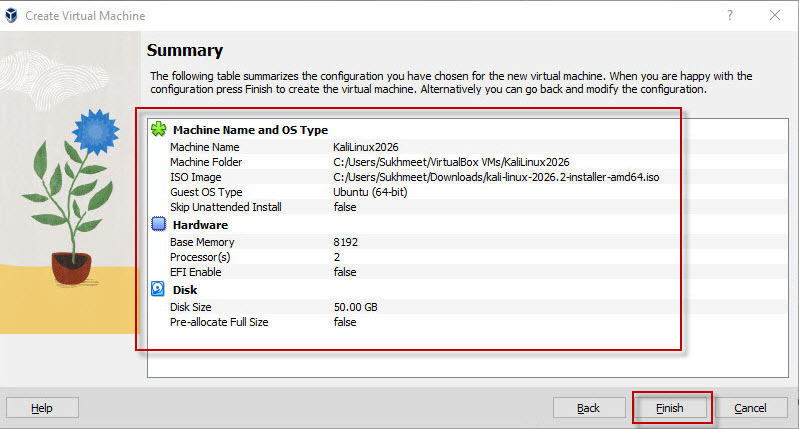
Review the configuration shown on the Summary screen and click Finish to create the virtual machine.
Step 5: Start the Kali Linux Virtual Machine
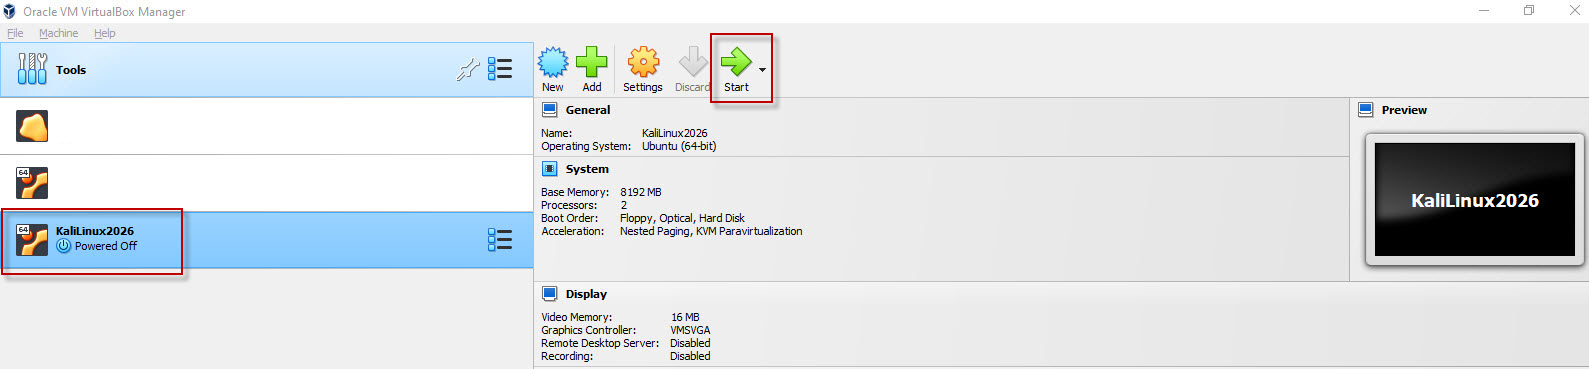
You should now see KaliLinux2026 in the VirtualBox Manager.
Select the VM and click Start.
The Kali Linux installer will start.
From the installation menu, select: Graphical Install
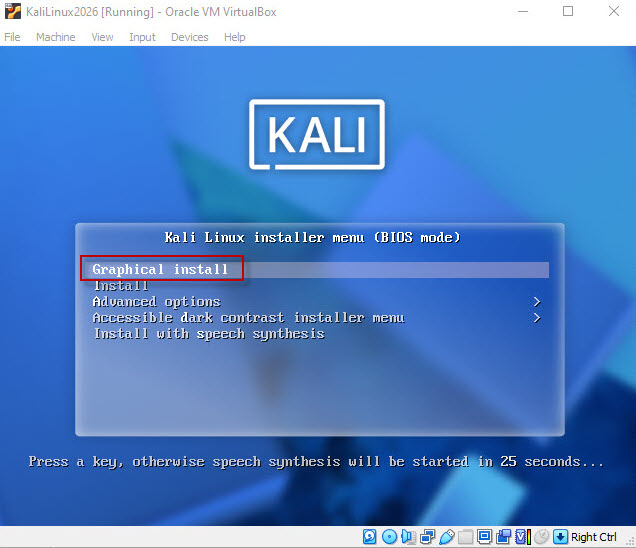
Press Enter.
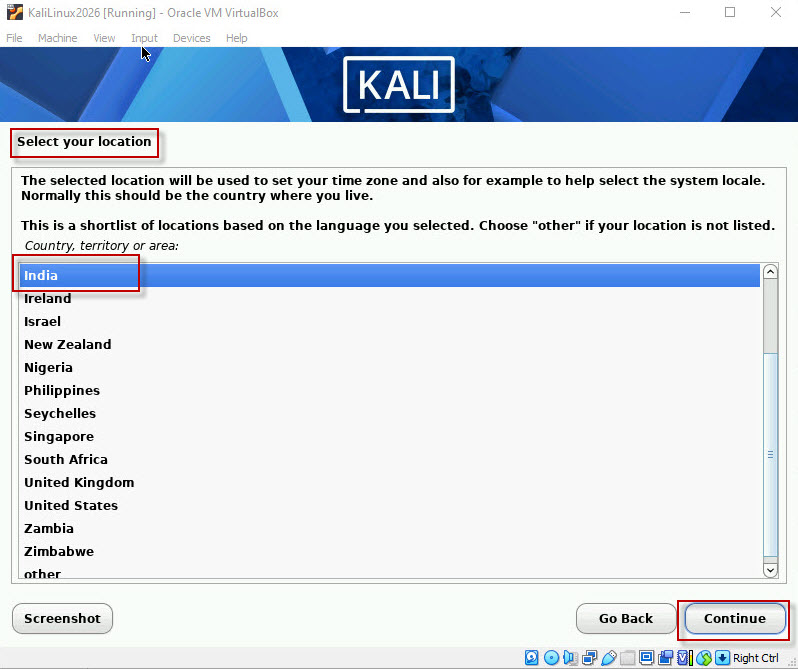
Step 6: Select Language, Location and Keyboard
The installer will ask you to select several basic configuration options.
Select your preferred:
- Language
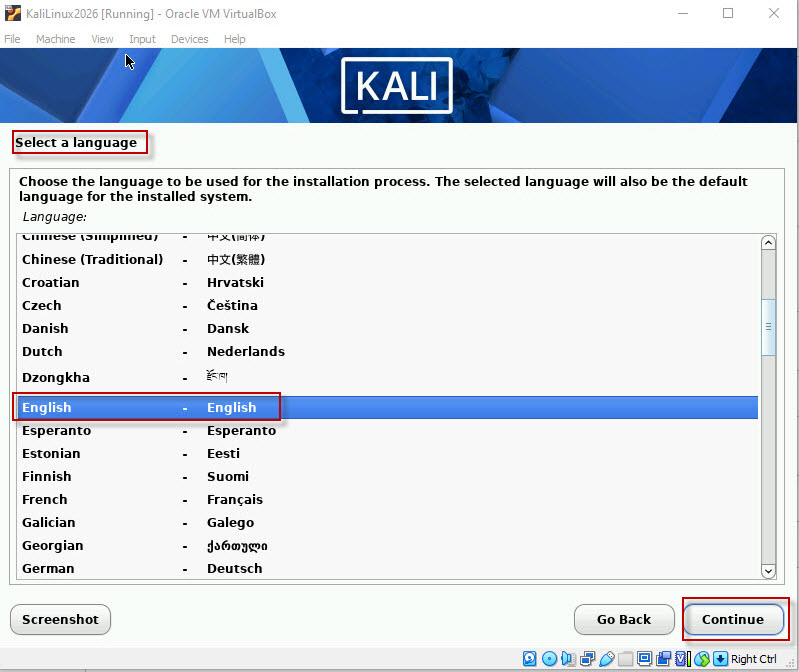
- Location
- Keyboard layout
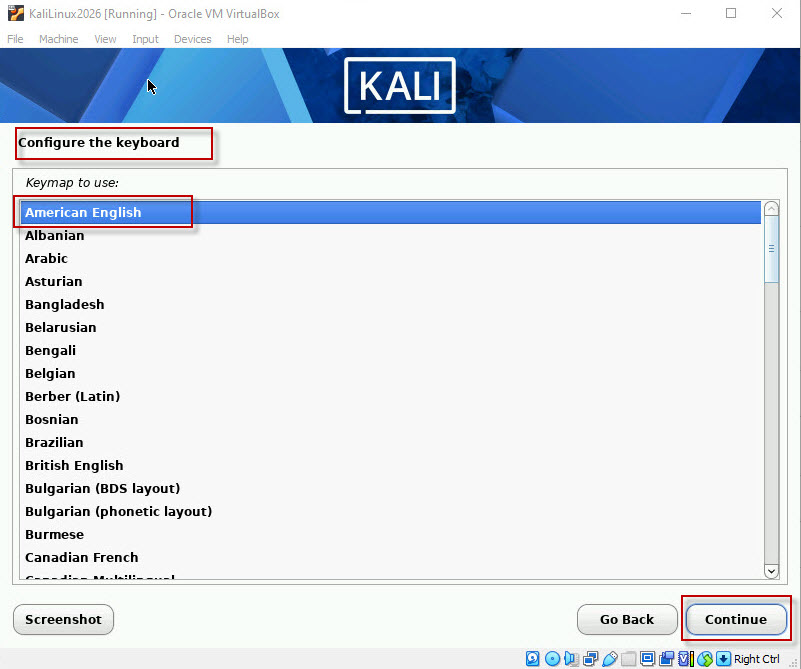
Click Continue after each selection.
Step 7: Configure the Hostname
The installer will ask for a hostname for the Kali Linux machine.
For this tutorial, we use: kali
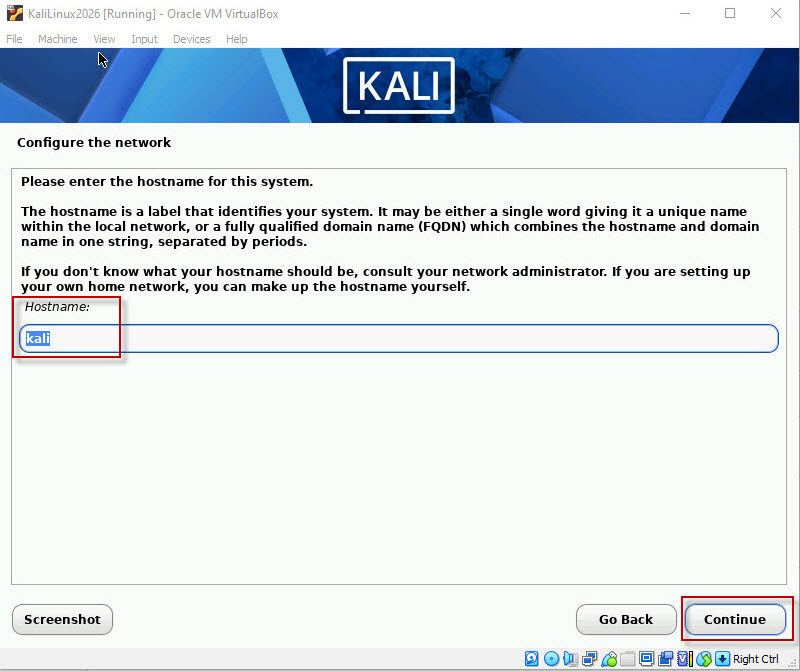
Enter your preferred hostname and click Continue.
When asked for the Domain Name, you can leave it blank if you are not using a specific domain.
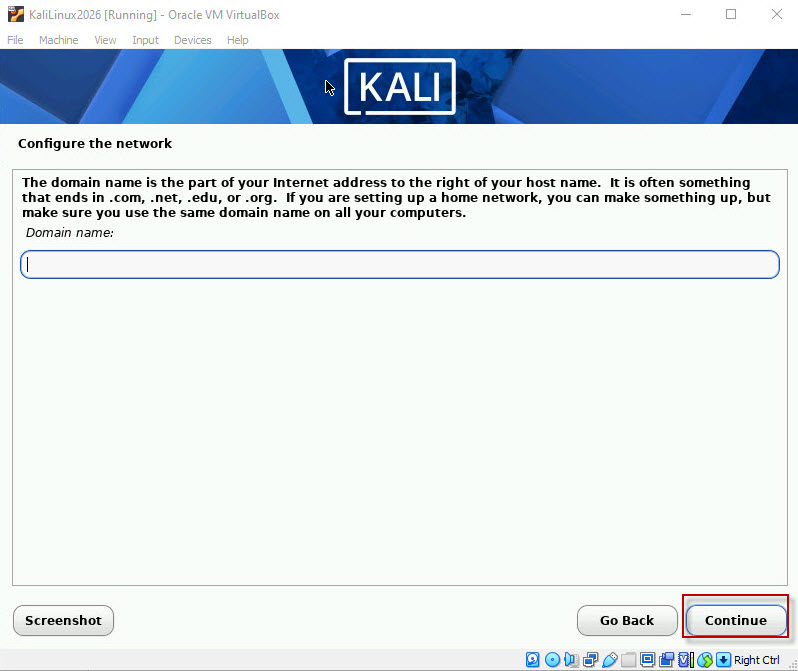
Click Continue.
Step 8: Configure the User Account
The installer may ask for the full name associated with the account. You can leave this blank or provide a name.
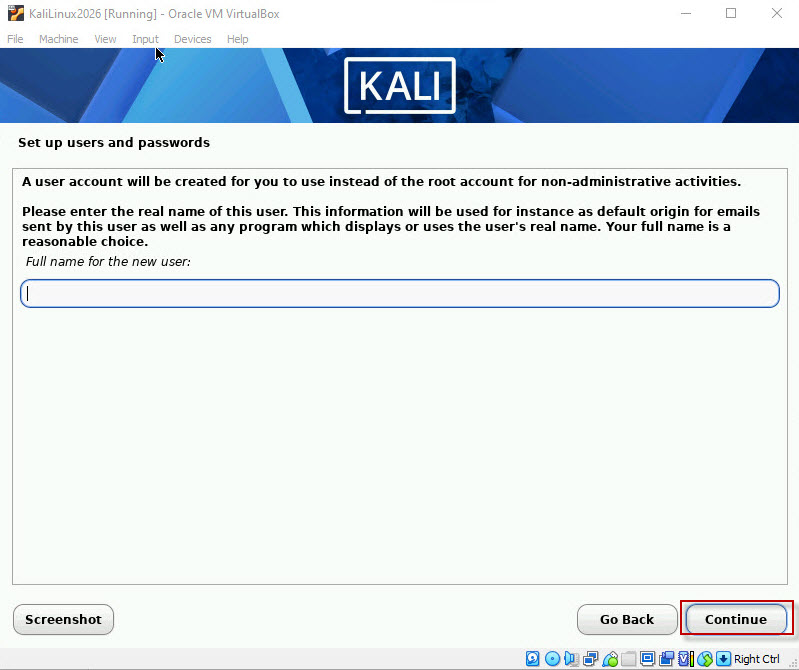
Next, create the user account that you will use to log in to Kali Linux.
For example: tech
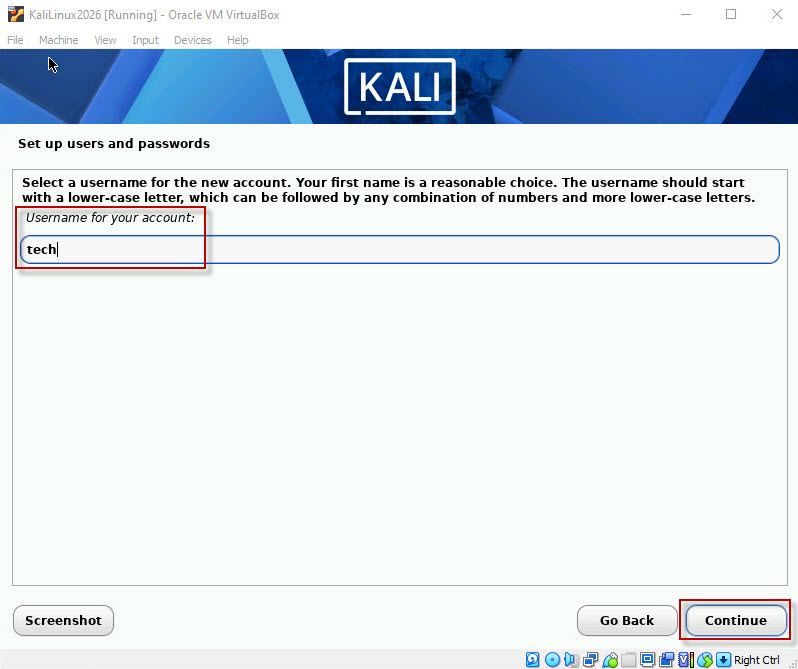
Enter your preferred username and click Continue.
Enter a password and confirm it when prompted.
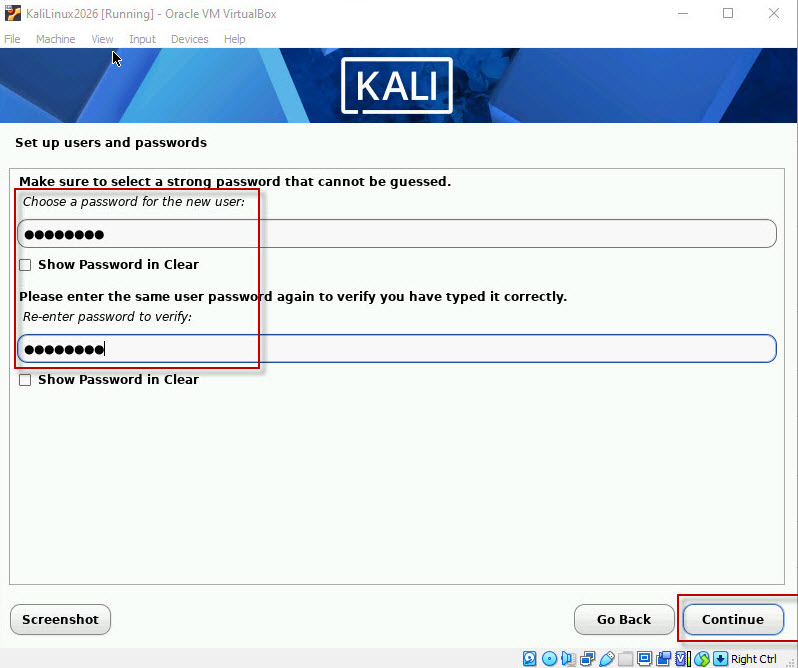
Use a strong password that is not easy to guess.
Step 9: Configure Disk Partitioning
The installer will now ask how you want to partition the virtual disk.
For a basic VirtualBox installation, select: Guided – use entire disk
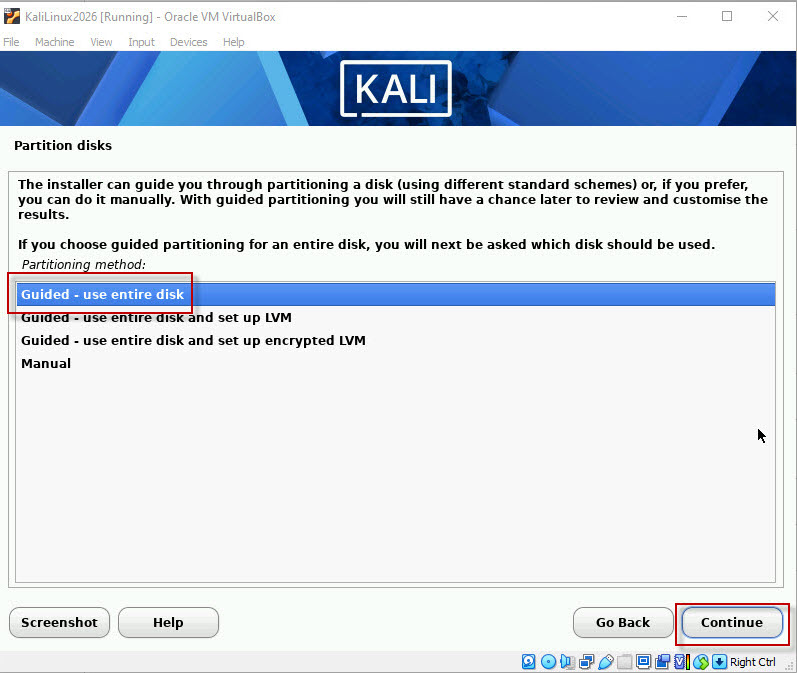
Click Continue.
Select the virtual disk created earlier and continue.
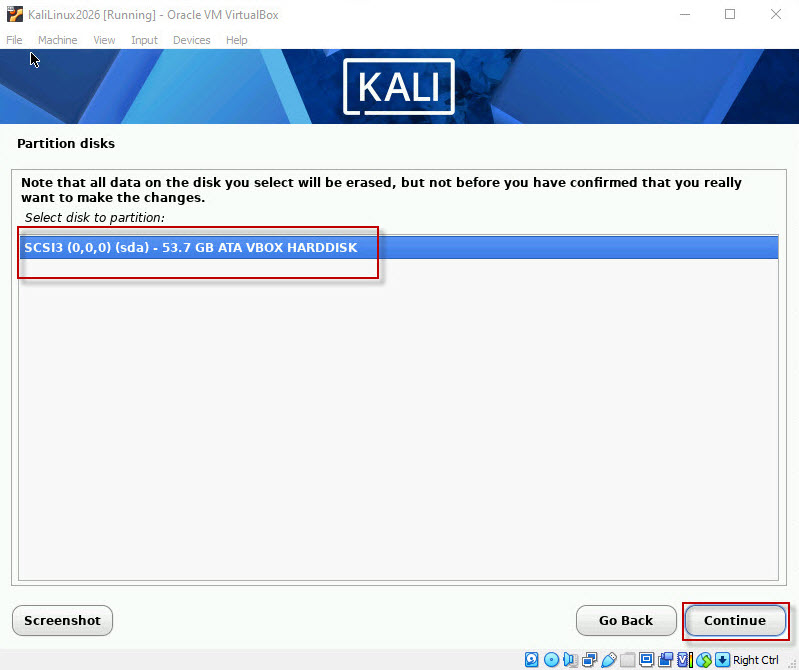
When asked about the partitioning scheme, select: All files in one partition
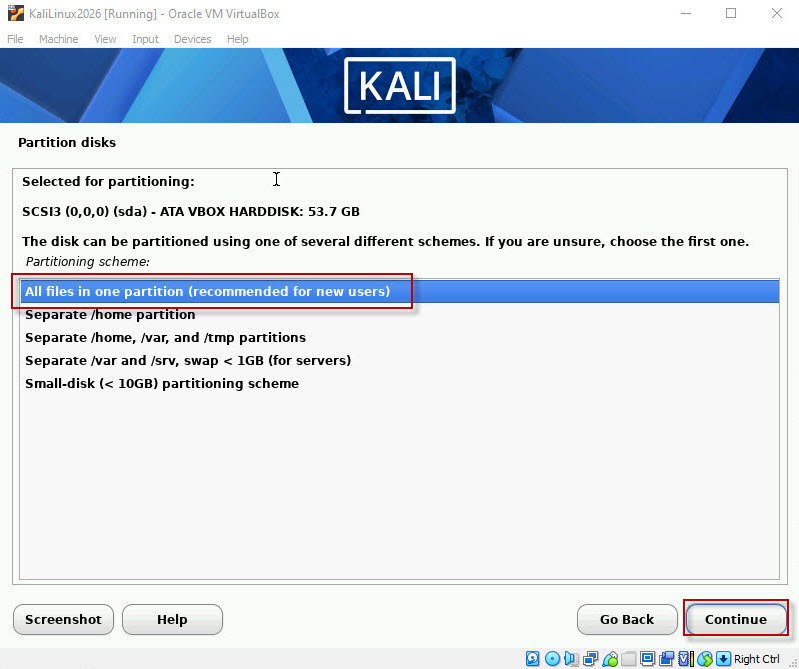
Click Continue.
Review the partitioning configuration and select: Finish partitioning and write changes to disk
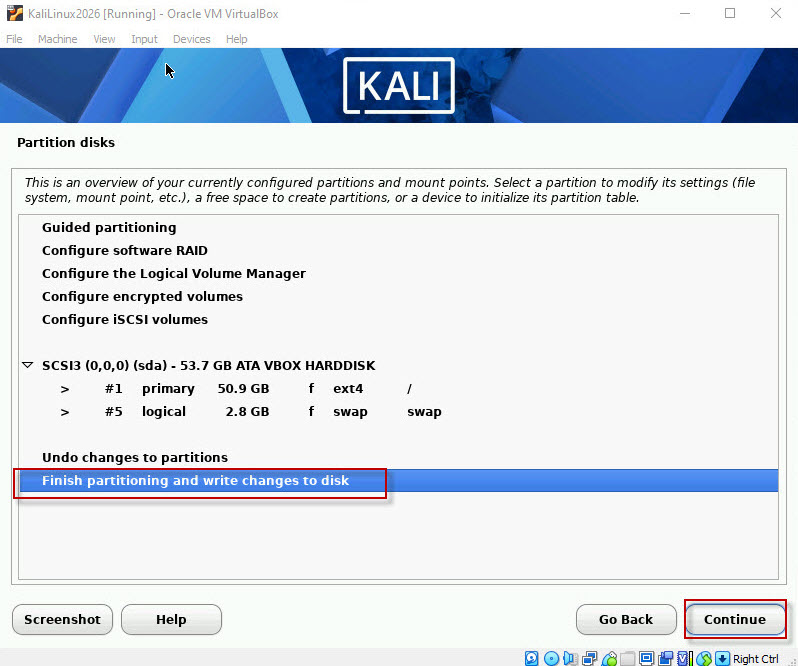
Click Continue.
When prompted to write the changes to the disk, select: Yes
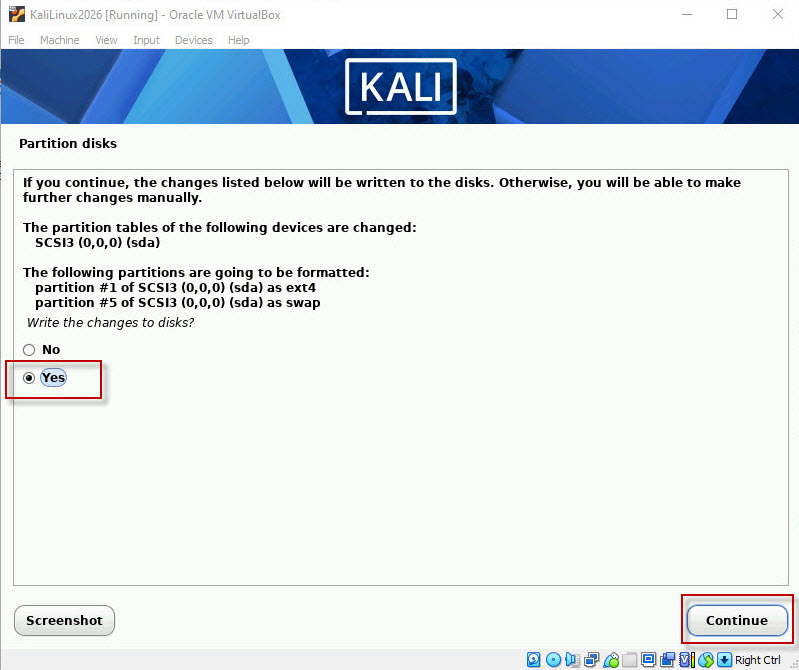
Click Continue.
The Kali Linux installation will now begin.
Step 10: Install Kali Linux Software
The installer will install the selected Kali Linux components and software packages.
For a standard installation, you can keep the default software selections and click Continue.
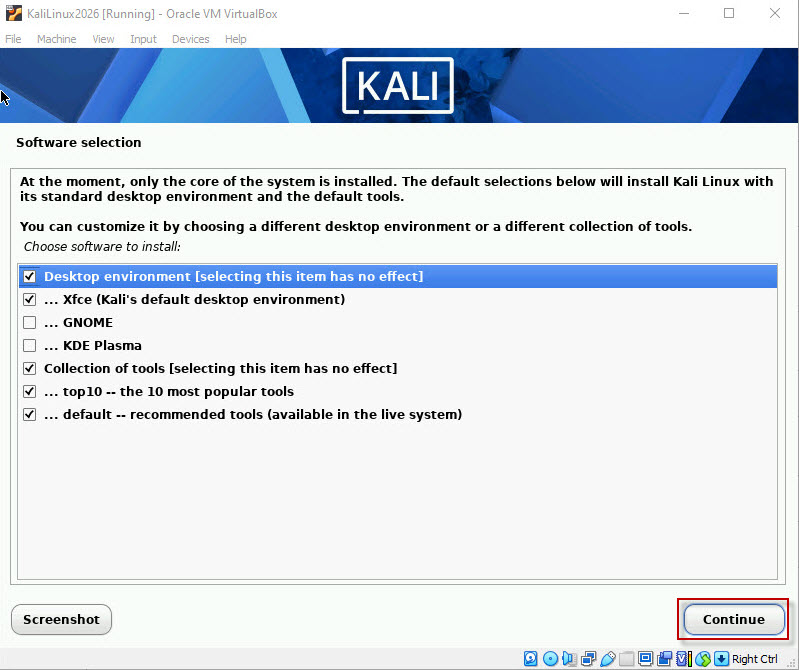
The installation process may take some time depending on your VM resources and internet connection.
Step 11: Install the GRUB Boot Loader
During installation, Kali Linux will ask whether you want to install the GRUB boot loader.
Select: Yes
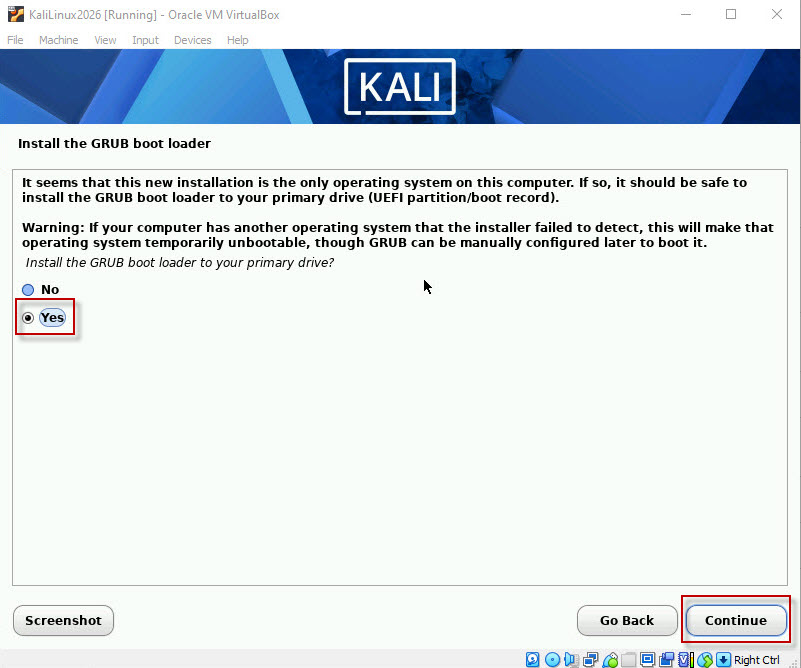
Click Continue.
When asked where to install the boot loader, select the appropriate virtual disk and continue.
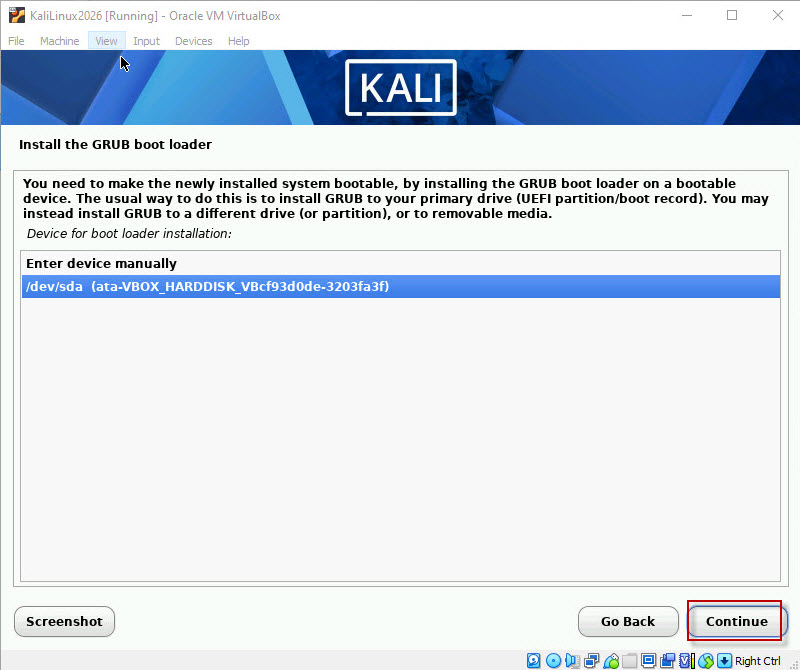
The installer will complete the remaining configuration.
Step 12: Complete the Installation
After the installation is completed, select Continue to finish the installation process.
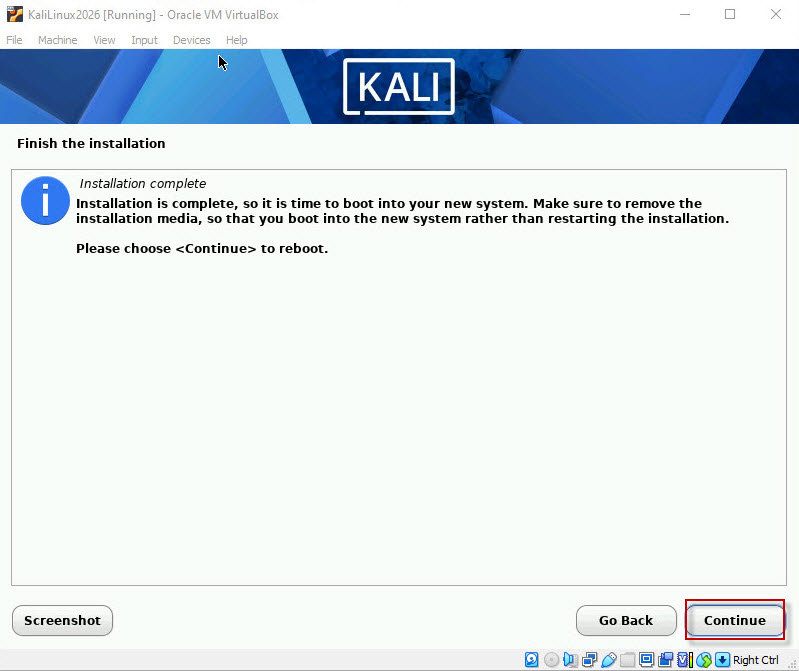
The virtual machine will restart.
After rebooting, you should see the Kali Linux login screen.
Log in using the username and password created during installation.
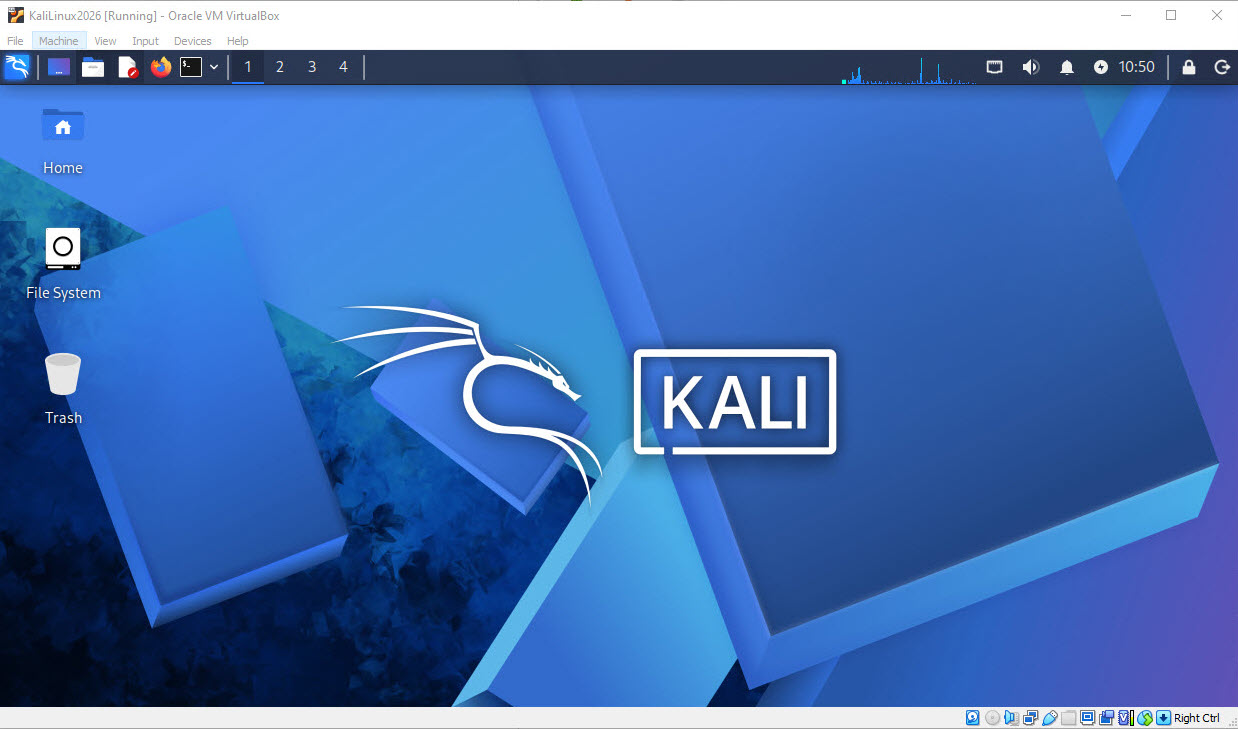
You have now successfully installed Kali Linux 2026.2 as a virtual machine in Oracle VirtualBox.
Step 13: Update Kali Linux
After logging in, open the Terminal and update the package information:
sudo apt update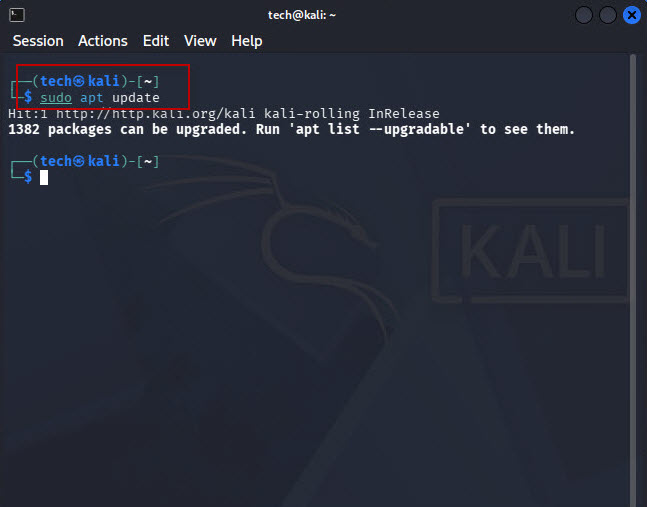
You can then upgrade installed packages with:
sudo apt upgradeIf prompted, enter your user password and allow the update process to complete.
Keeping Kali Linux updated helps ensure that installed packages receive the latest available updates.
Step 14: Configure Shared Clipboard and Drag and Drop
You can configure VirtualBox to make it easier to exchange text and files between your Windows host and Kali Linux VM.
First, shut down the Kali Linux virtual machine.
In VirtualBox Manager:
Select KaliLinux2026 → Settings → General → AdvancedSet:
- Shared Clipboard: Bidirectional
- Drag’n’Drop: Bidirectional
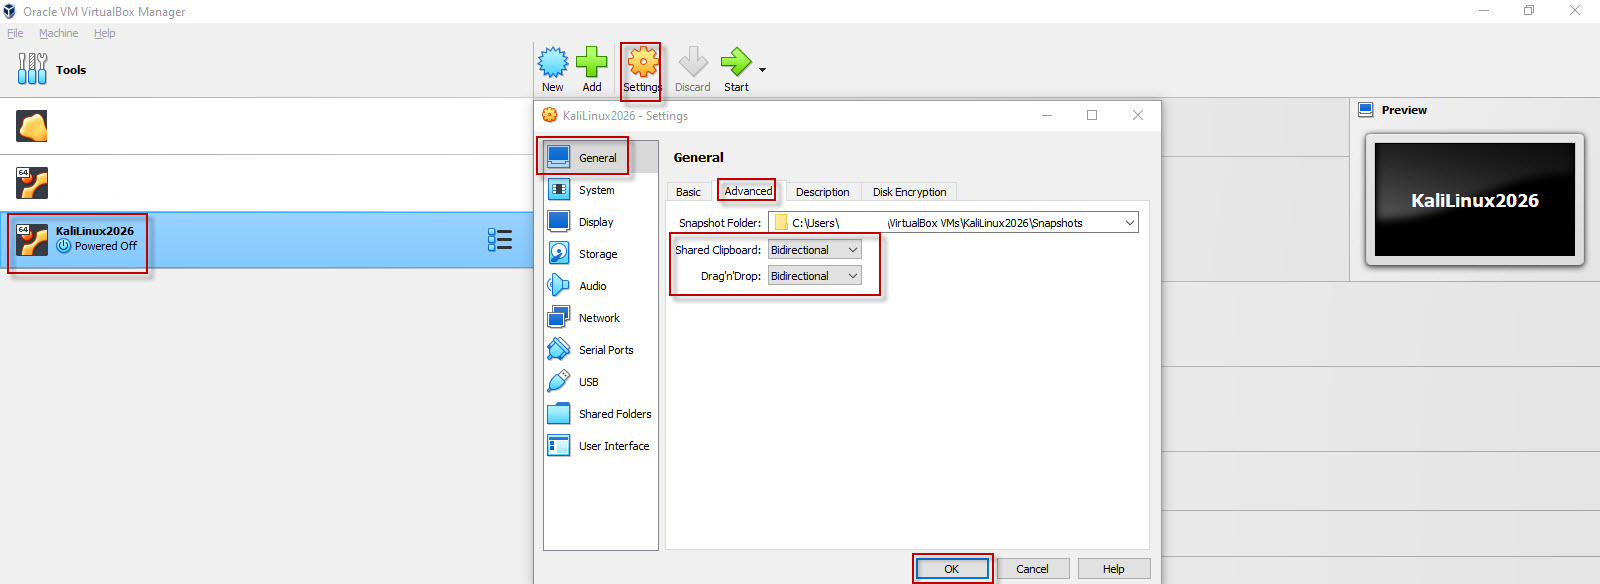
This allows supported copy-and-paste and drag-and-drop operations between the host and guest operating systems.
Step 15: Check the Boot Order
Open the VM settings and go to:
Settings → System → MotherboardUnder Boot Order, make sure Hard Disk is placed above other boot devices when you want the installed Kali Linux system to boot from its virtual disk.
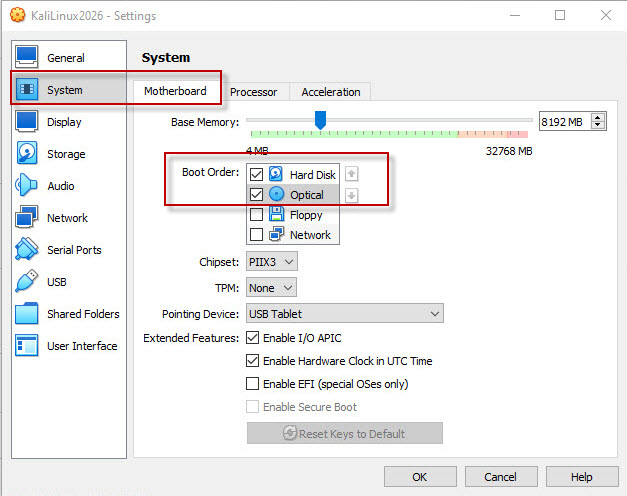
Click OK to save the settings.
Step 16: Increase Video Memory
You can also configure the virtual display settings.
Go to:
Settings → Display → ScreenSet Video Memory to: 128 MB
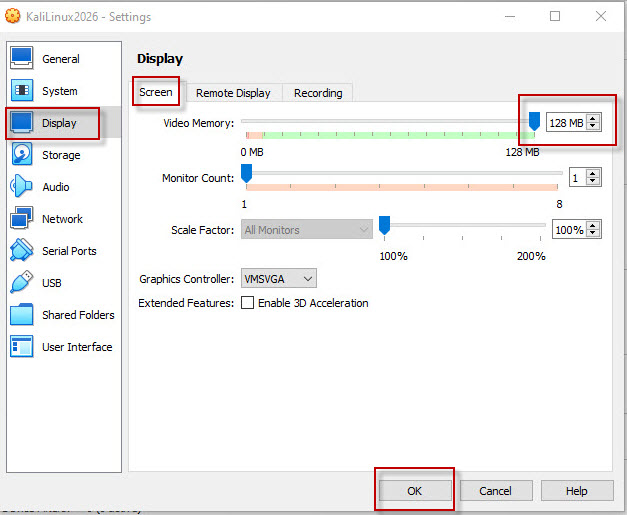
Click OK to save the configuration.
Conclusion
You have now installed Kali Linux 2026.2 on Oracle VirtualBox and configured several useful VM settings.
The basic process involves downloading the Kali Linux ISO, creating a VirtualBox VM, allocating RAM and CPU resources, creating a virtual hard disk, completing the Kali Linux installation, and configuring VirtualBox features such as shared clipboard, drag and drop, boot order, and video memory.
Once the installation is complete, you can use Kali Linux in your isolated virtual environment for penetration testing, vulnerability assessment, cybersecurity labs, and security research.
For security testing practice, Kali Linux provides many tools that can be used in authorized lab environments. Always perform penetration testing only on systems and applications for which you have permission.