

Creating a new administrator account in Windows is useful when you want to manage your PC securely, troubleshoot system issues, or provide administrative access to another user without sharing your primary account. Windows 11 offers multiple ways to create a new administrator user, whether you prefer using Command Prompt, Computer Management, or the Settings app.
In this tutorial, you will learn three simple methods to create a new administrator user in Windows 11
Prerequisites
- Windows 11 installed
- Logged in using an existing Administrator account
- Administrator privileges to create new users
Method 1: Create an Administrator User Using Command Prompt
Using Command Prompt is one of the quickest ways to create a new administrator account.
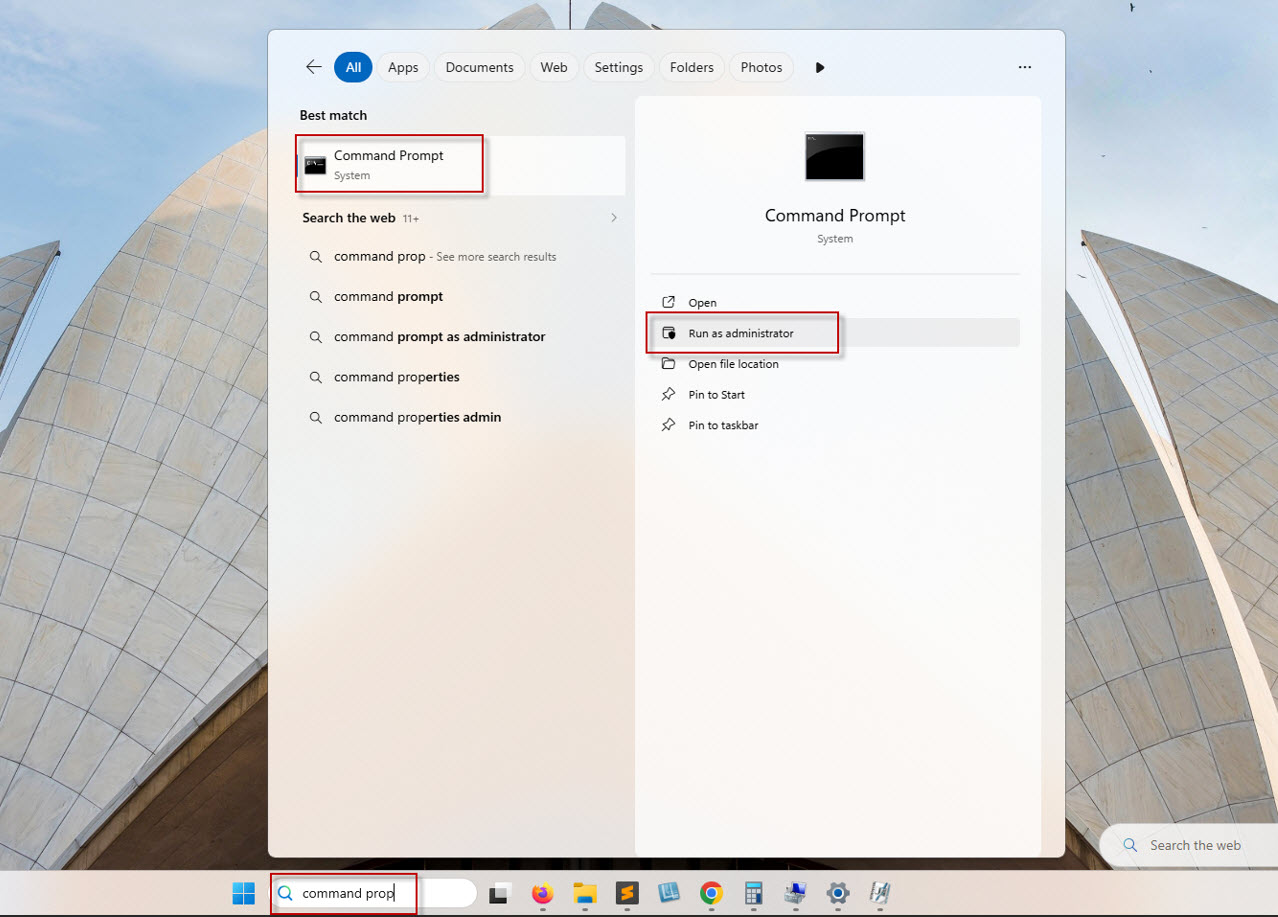
Step 1: Open Command Prompt as Administrator
- Click the Windows Search bar.
- Type Command Prompt.
- Click Run as administrator from the right panel.
- Click Yes when the User Account Control (UAC) prompt appears.
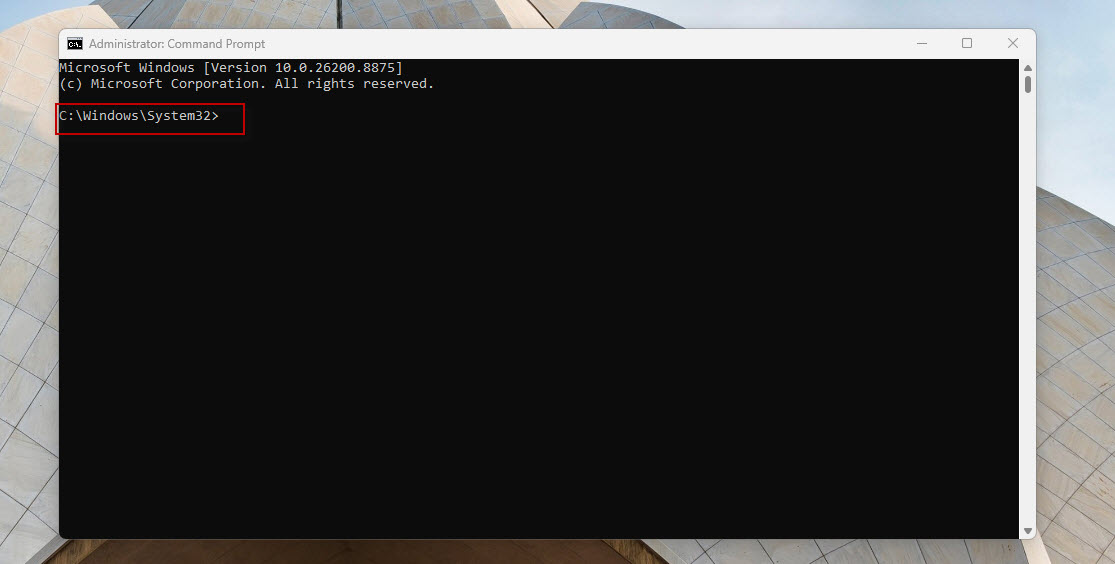
You should now see the Command Prompt running as Administrator.
Step 2: View Existing Users
Execute the following command:
net user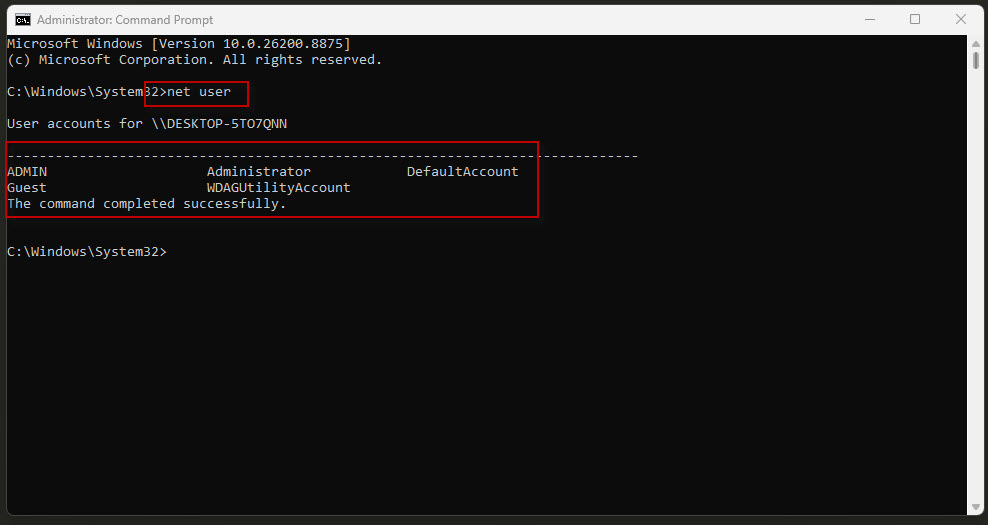
The command displays all existing local user accounts on your computer.
Example:
C:\Windows\System32>net userStep 3: Create a New User
Use the following syntax:
net user <username> <password> /add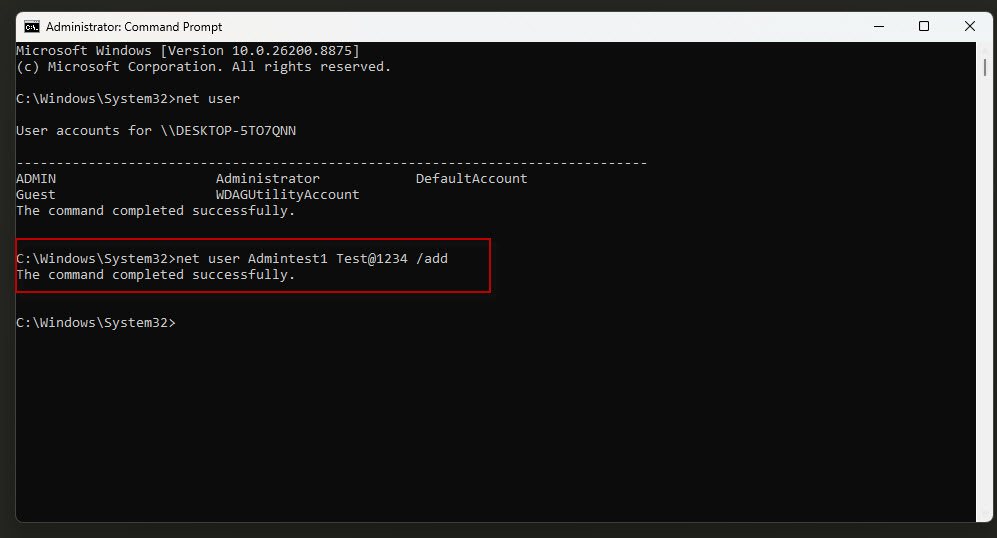
Example:
net user Admintest1 Test@1234 /addIf the command executes successfully, you’ll see: The command completed successfully.
Step 4: Verify the User
Run:
net user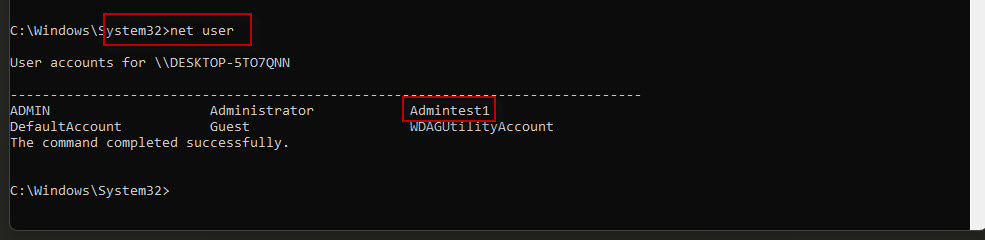
You should now see the newly created user: Admintest1
At this stage, the account is still a Standard User.
Step 5: Grant Administrator Privileges
Run the following command:
net localgroup administrators Admintest1 /add
After successful execution, you’ll receive: The command completed successfully.
Your new user is now an Administrator.
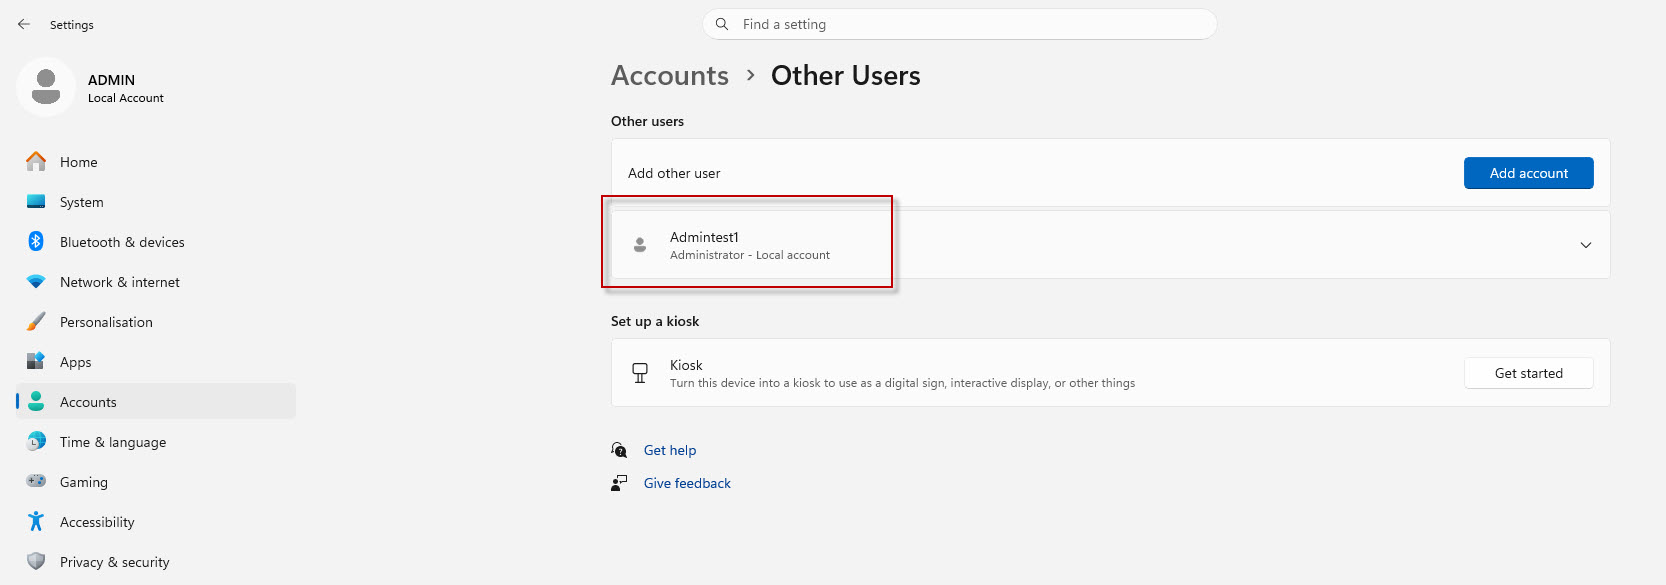
Step 6: Verify the Administrator Account
To confirm the account type:
- Open Settings.
- Click Accounts.
- Select Other users.
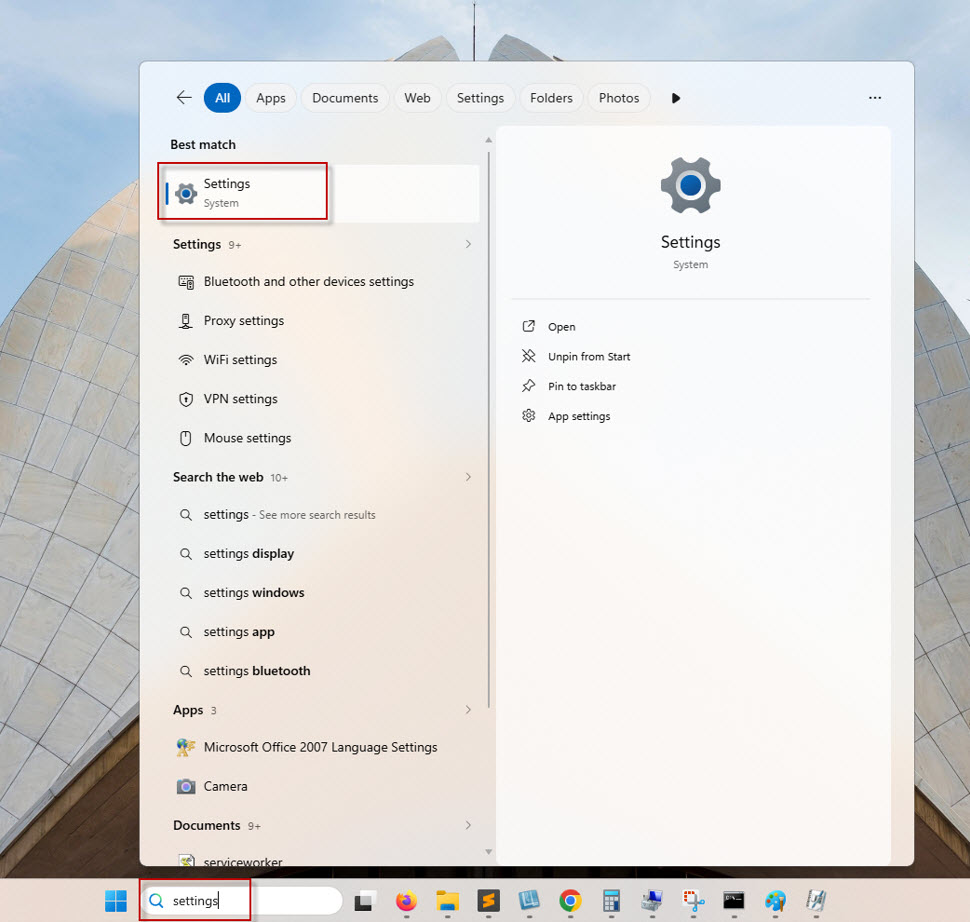
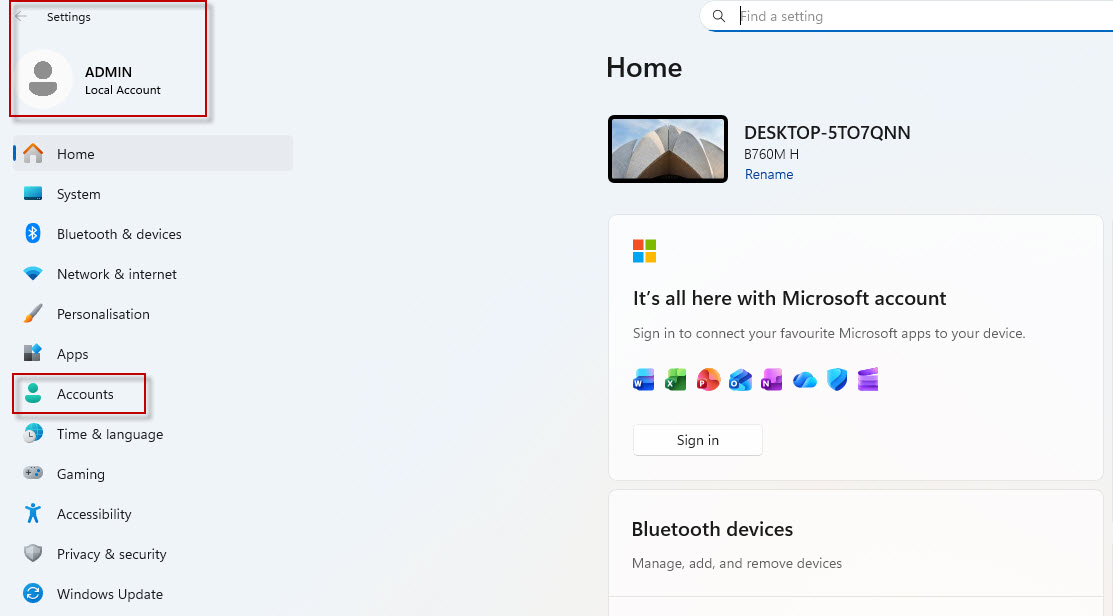
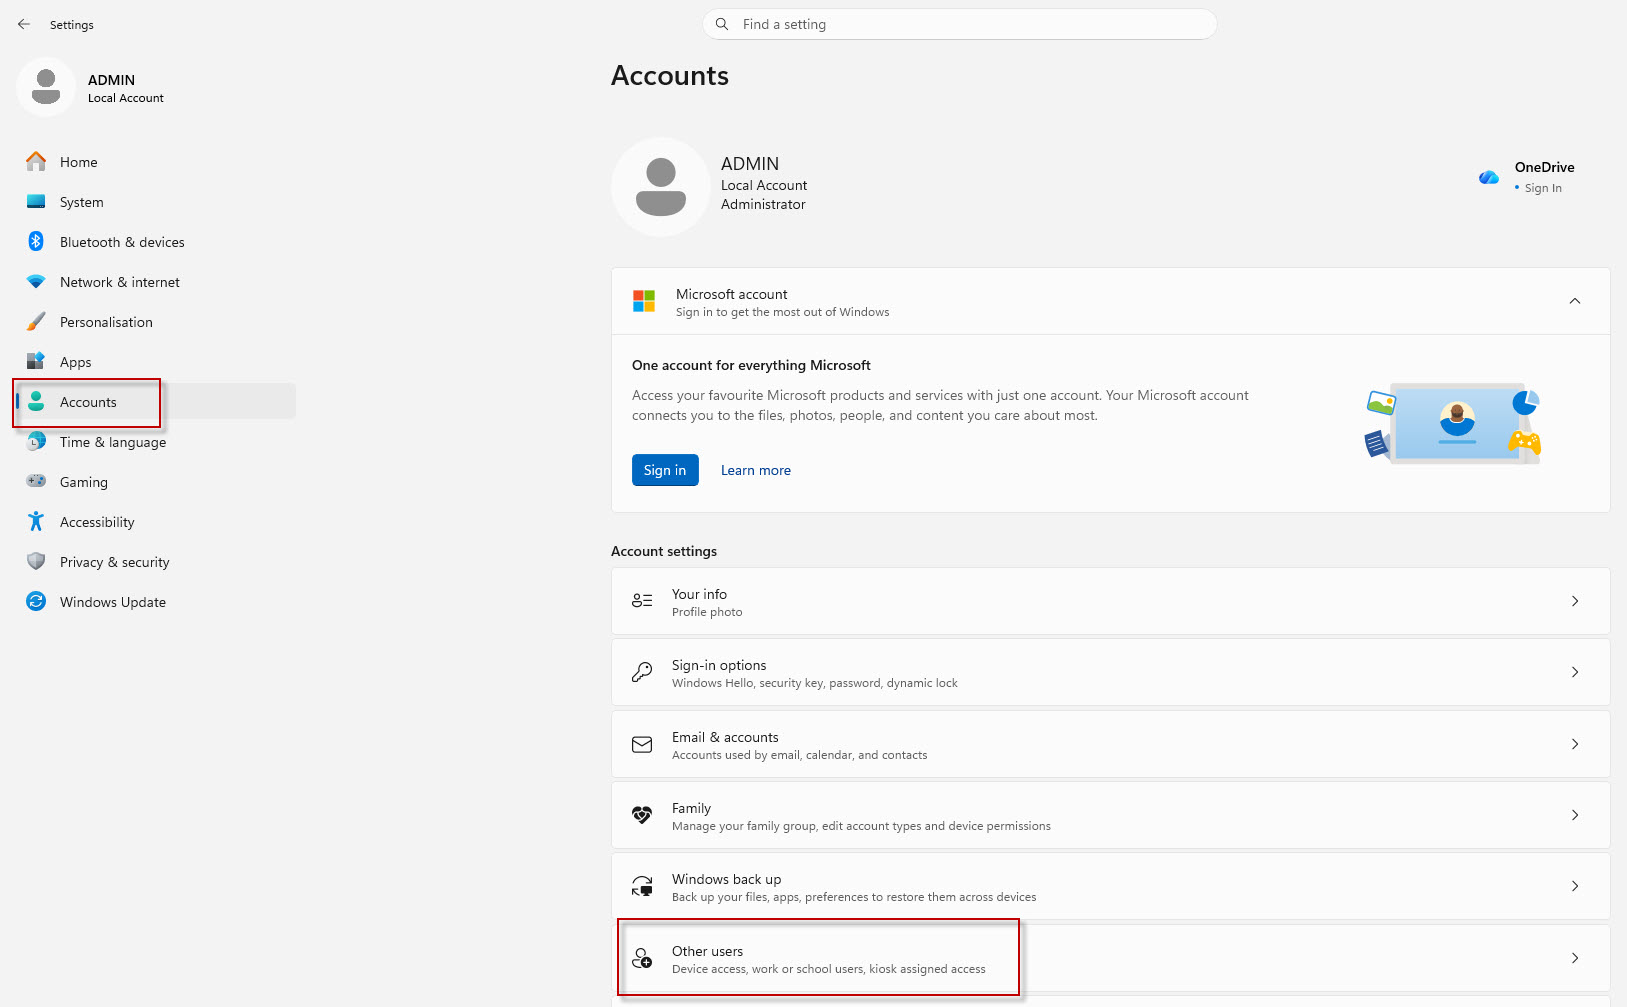
You will see Admintest1 listed as an Administrator.
Method 2: Create an Administrator User Using Computer Management
This graphical method is ideal for users who prefer not to use the command line.
Step 1: Open Computer Management
You can open it in either of these ways:
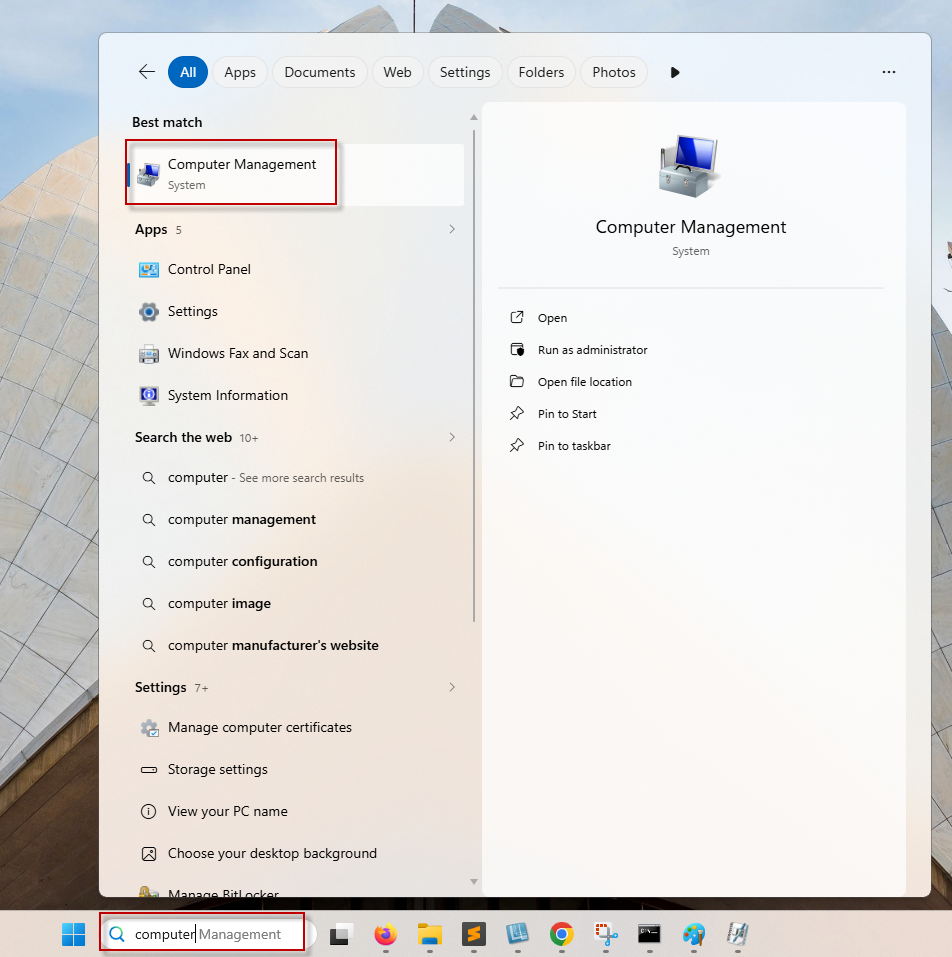
Method 1
Search for Computer Management from the Windows Search bar and open it.
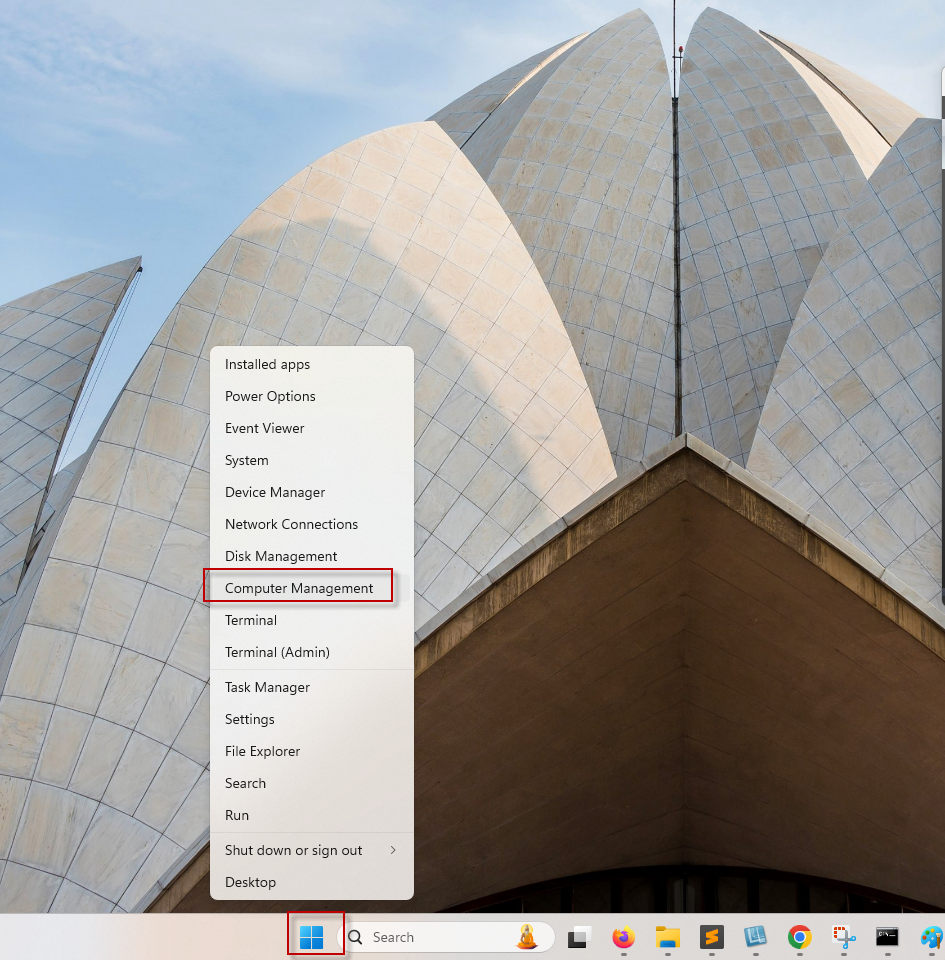
Method 2
- Right-click the Start button.
- Select Computer Management.
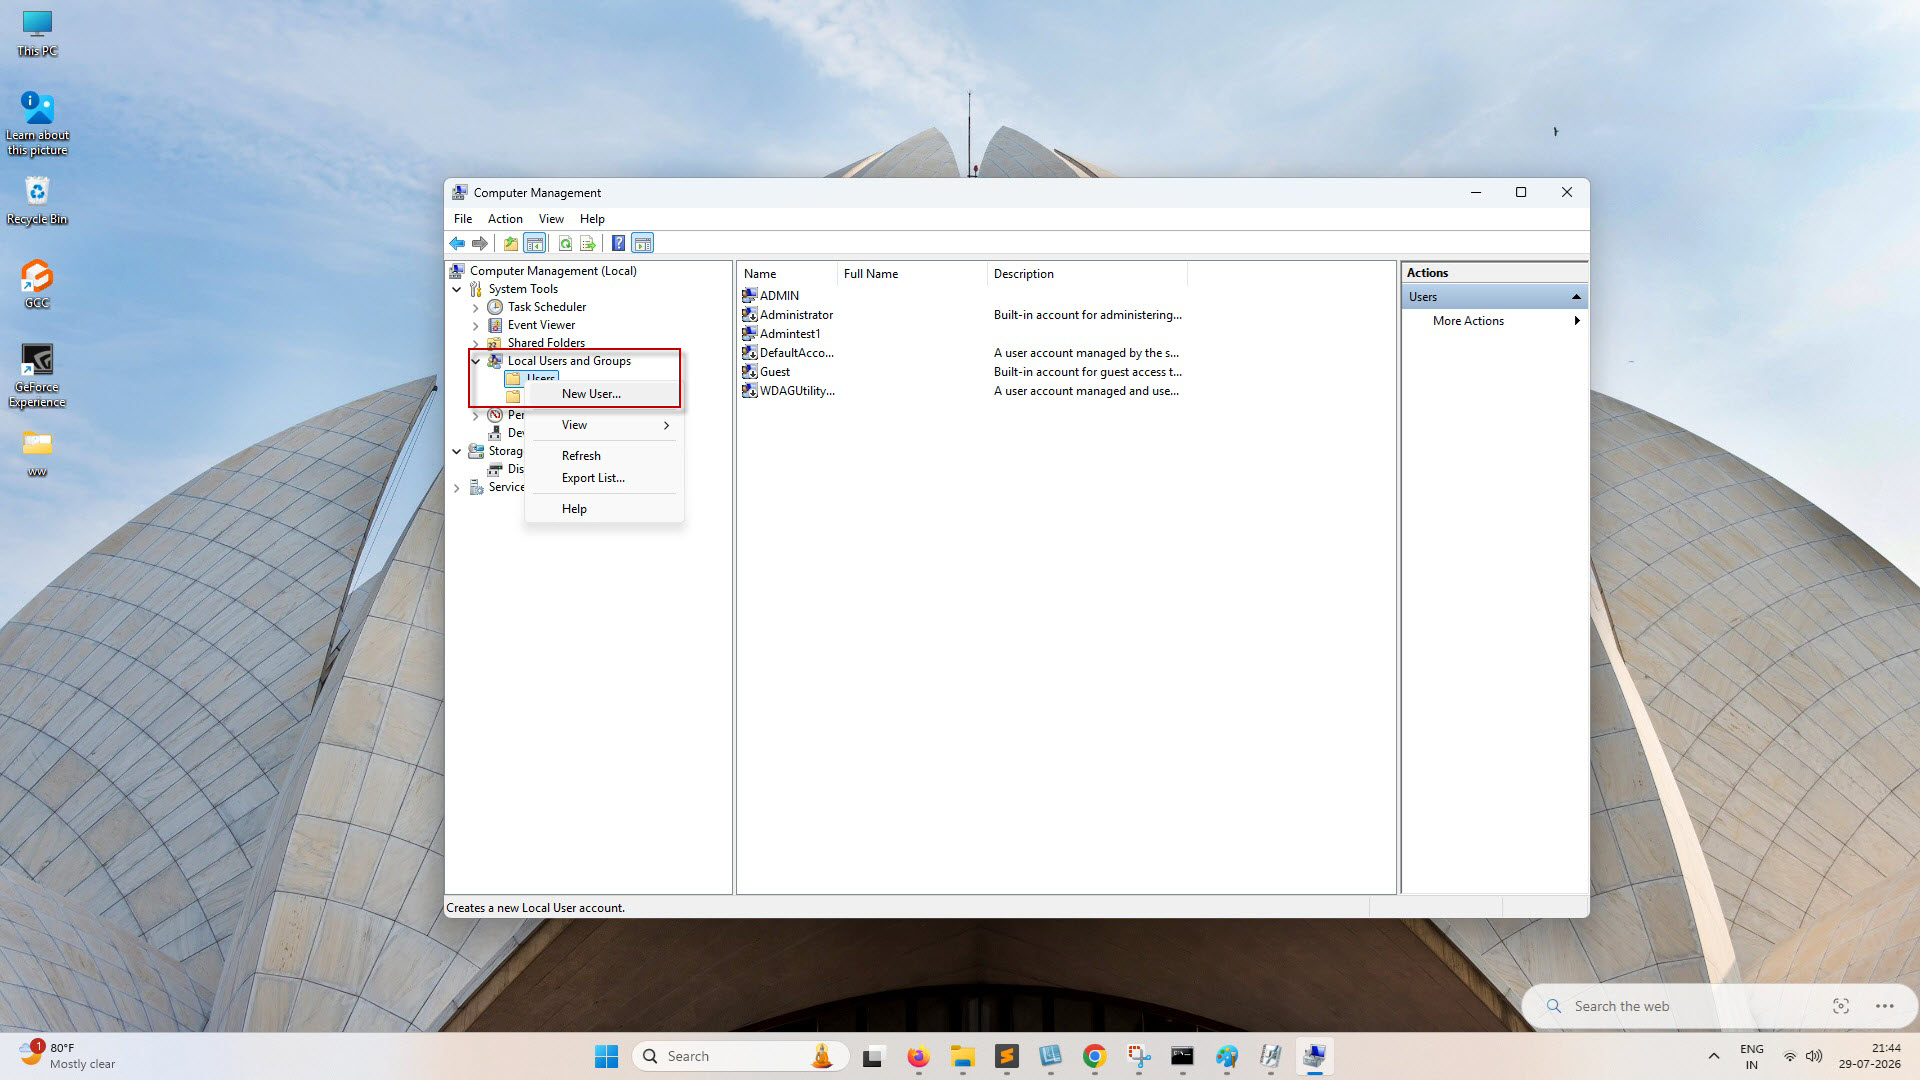
Step 2: Navigate to Users
Go to:
System Tools > Local Users and Groups > UsersRight-click Users and select: New User
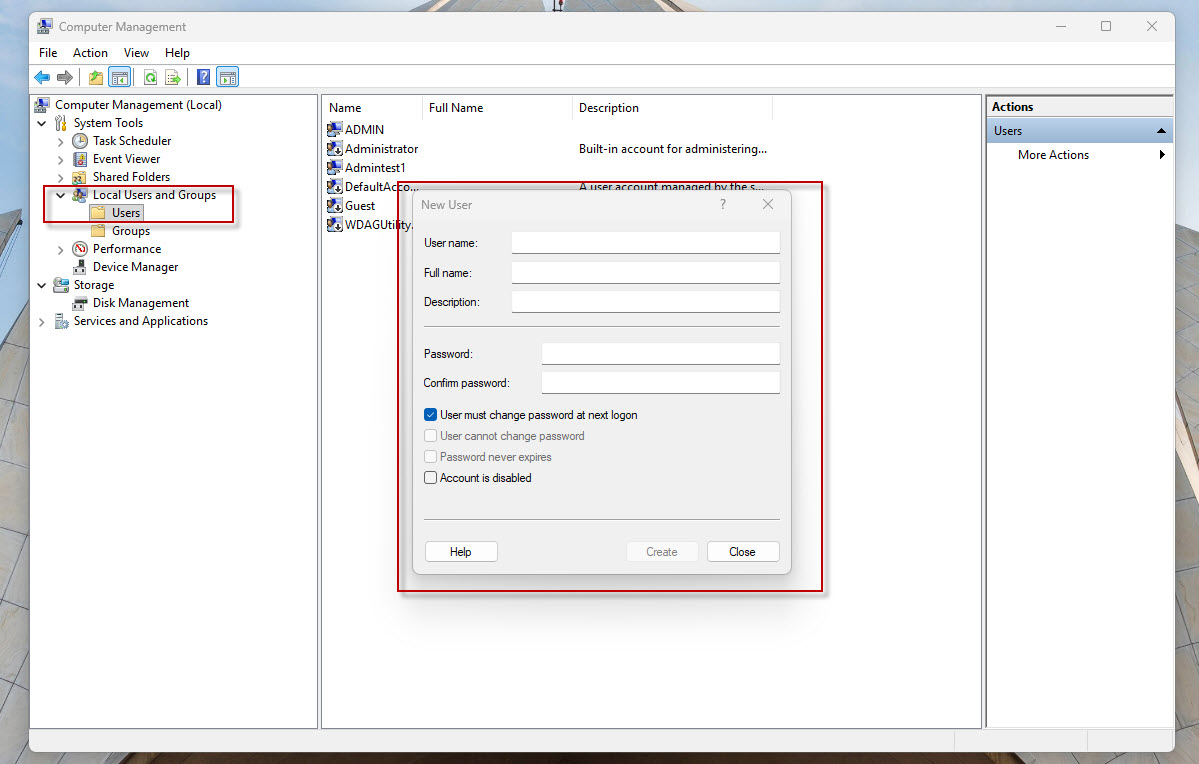
Step 3: Create the User
Fill in the required details:
- Username
- Password
- Confirm Password
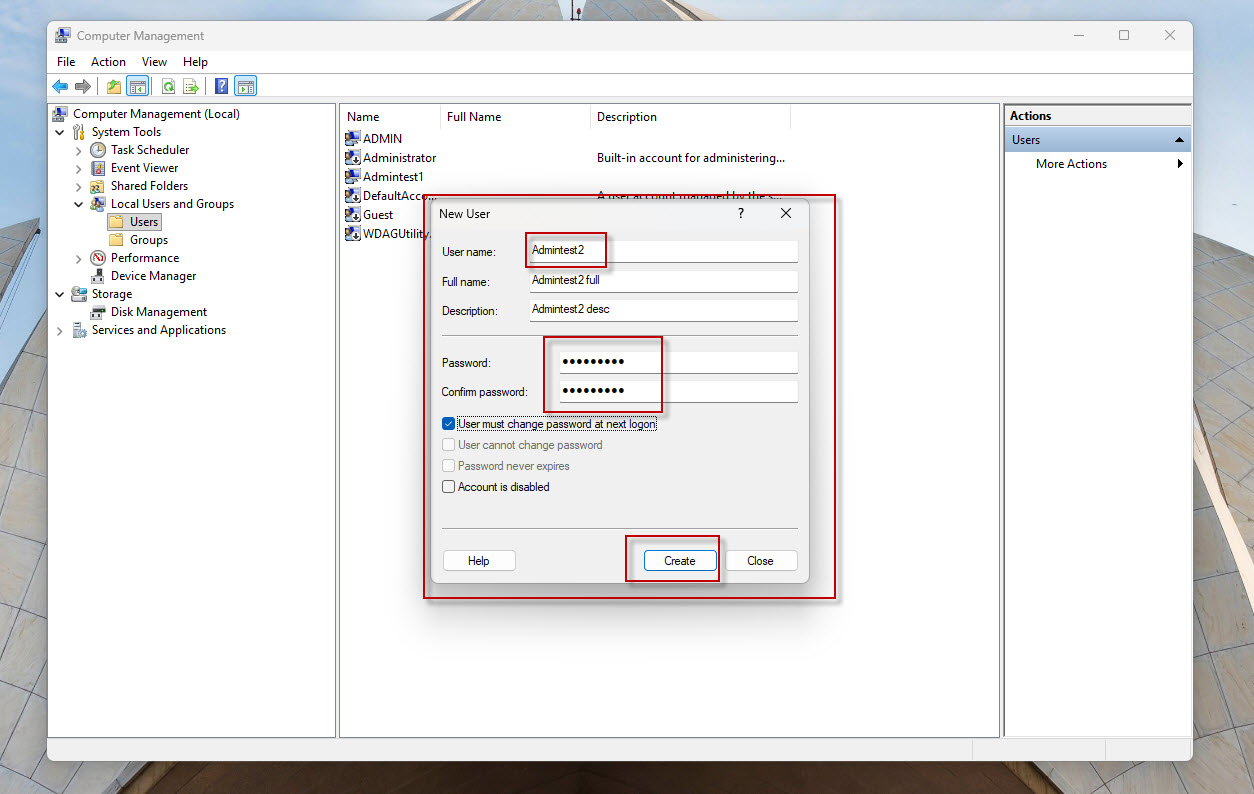
Choose the password options according to your requirements.
By default, Windows selects:
- User must change password at next logon
Click Create.
Your new user (for example, Admintest2) will now appear in the Users list.
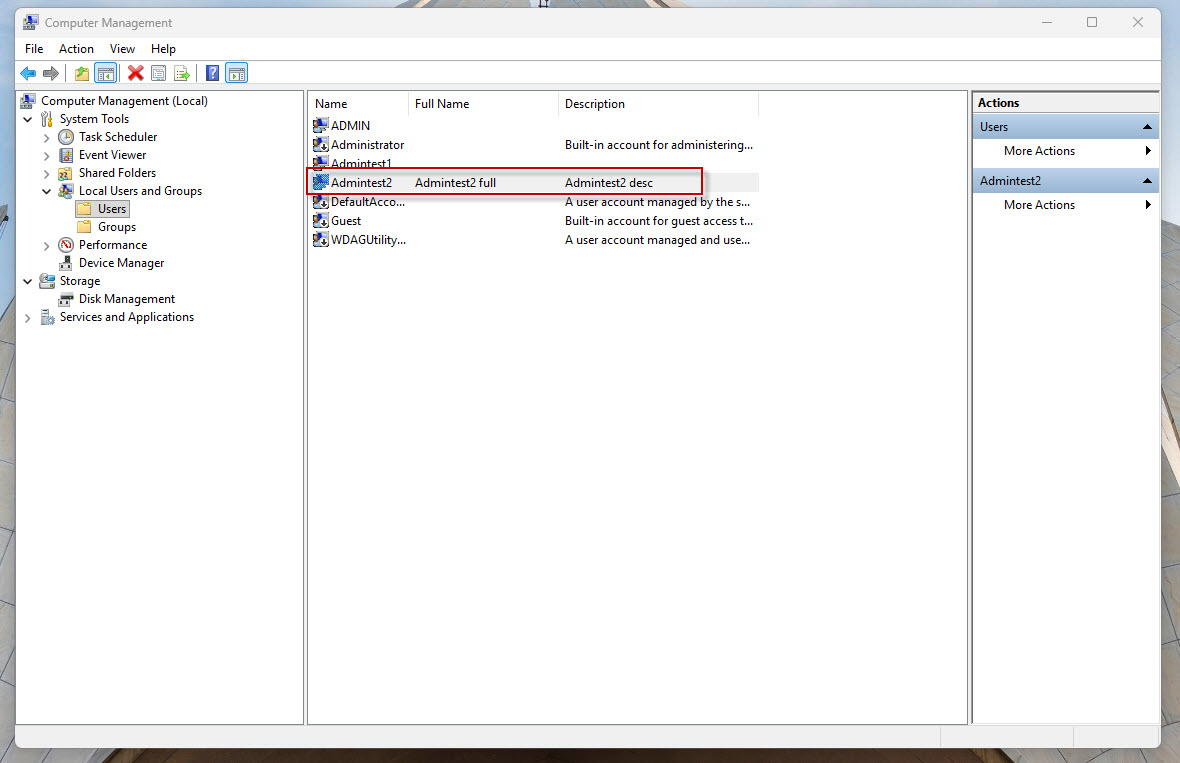
Step 4: Assign Administrator Privileges
- Right-click Admintest2.
- Select Properties.
- Open the Member Of tab.
- Click Add.
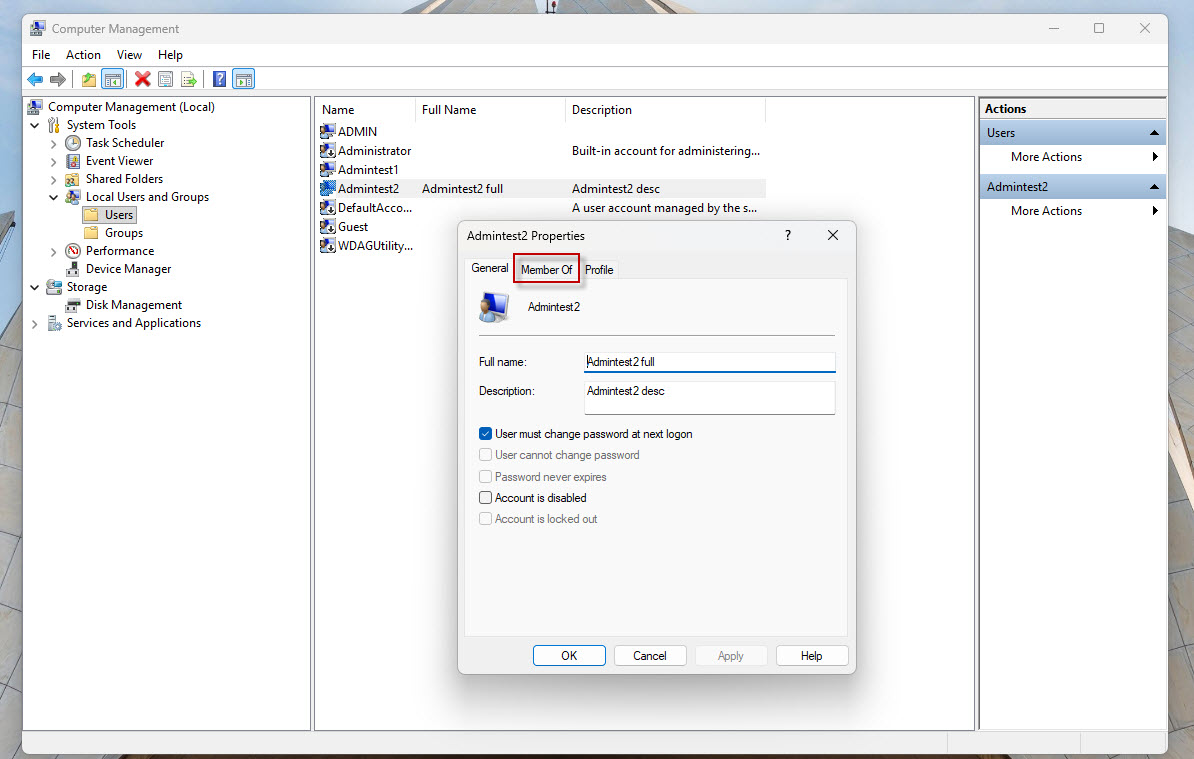
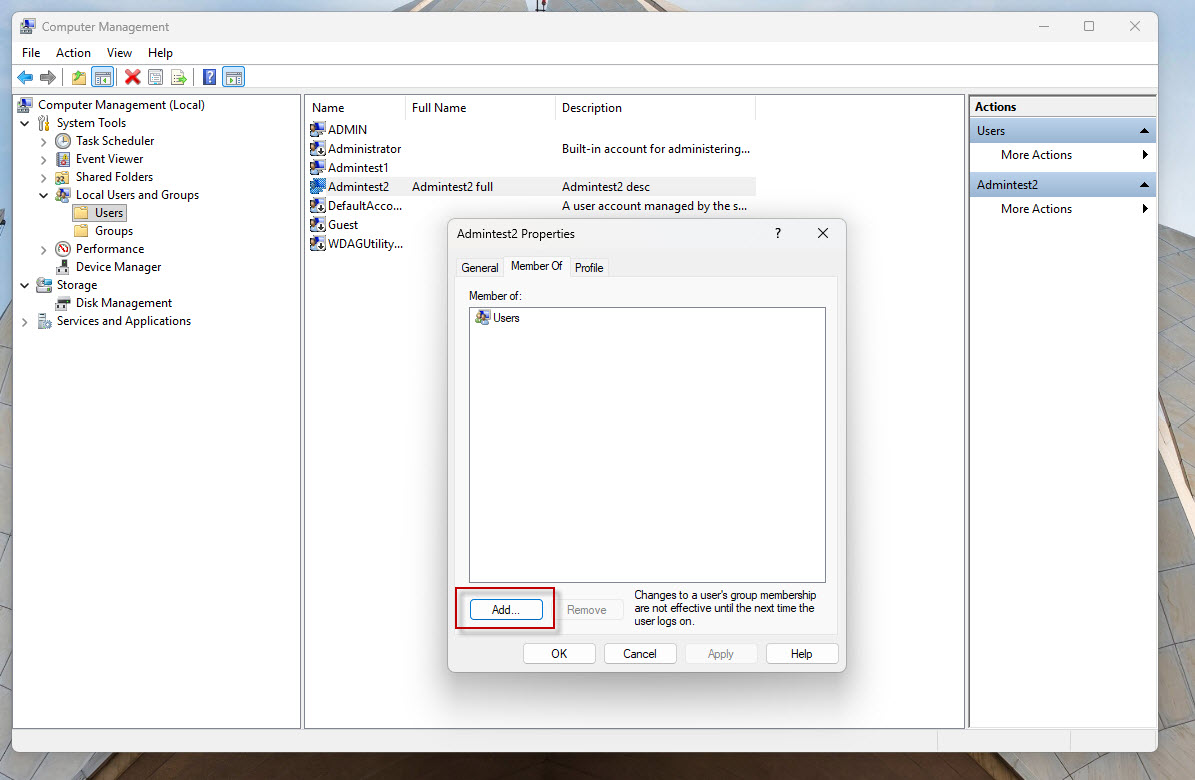
Enter: Administrators
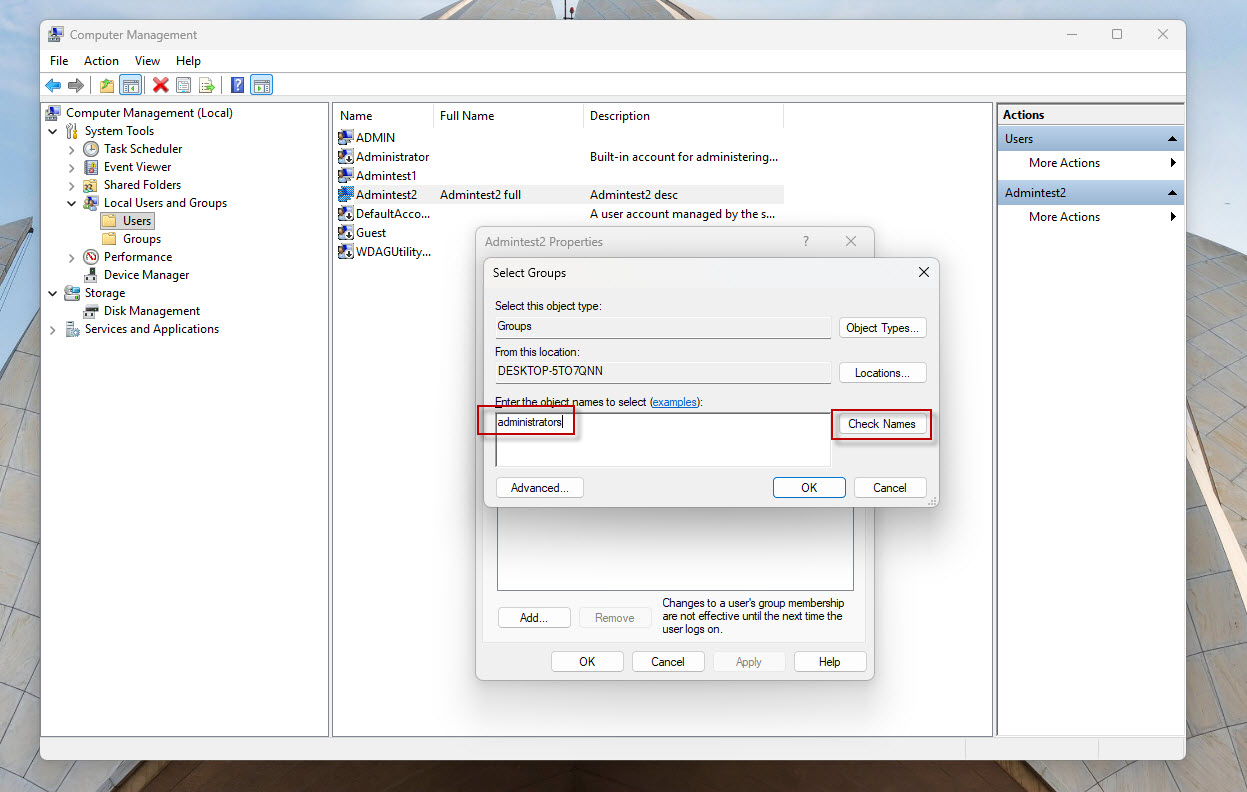
Click Check Names.
Windows automatically resolves the group name.
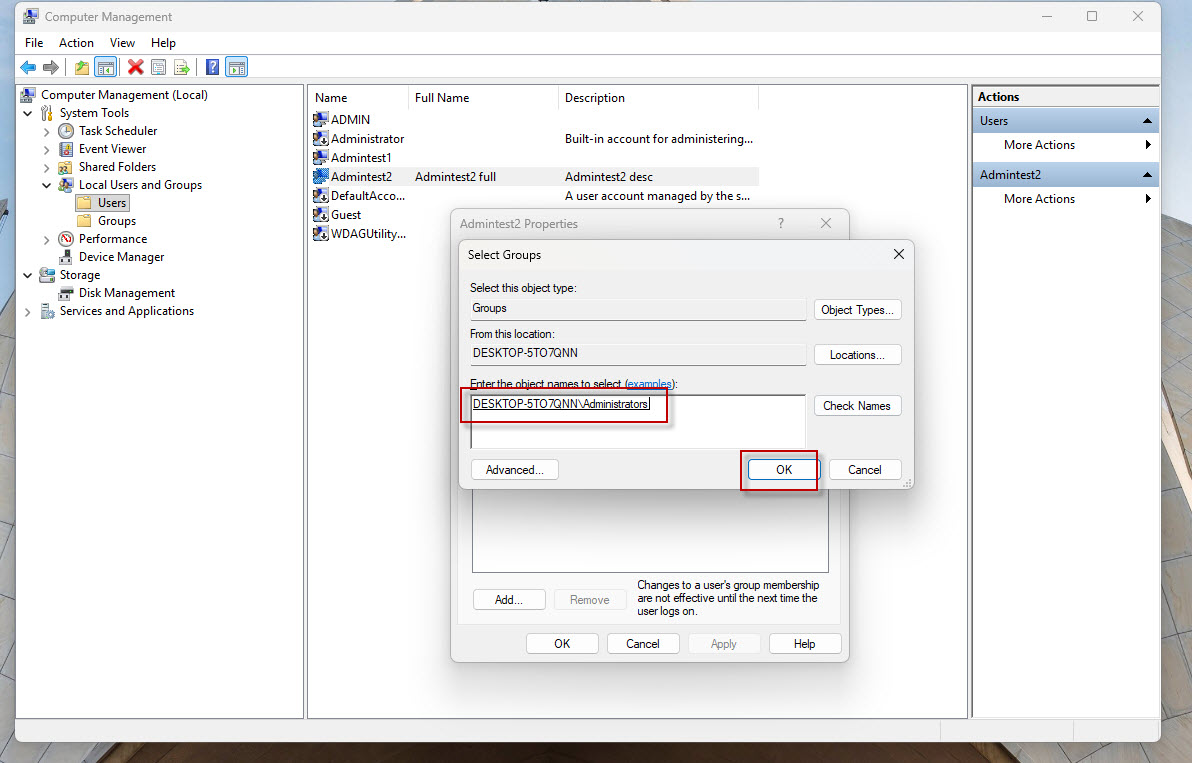
Click: OK
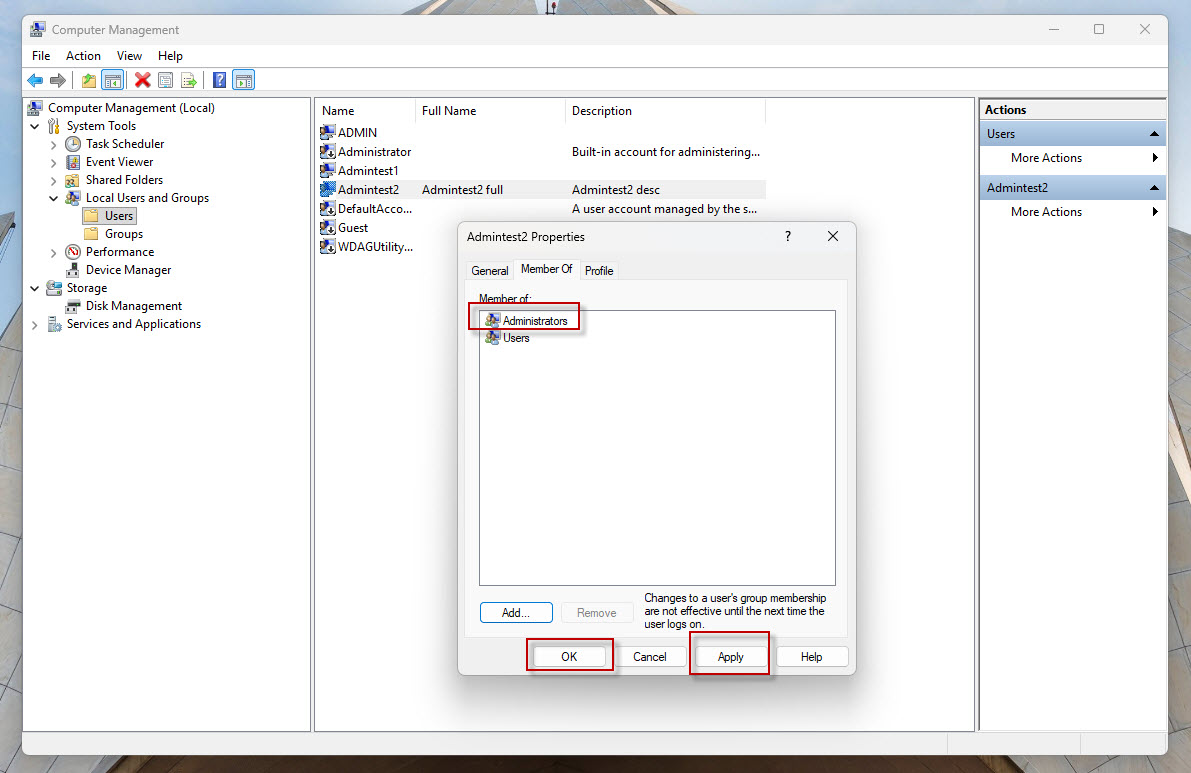
Click: Apply and OK
The user is now a member of the Administrators group.
Step 5: Verify the Account
Navigate to:
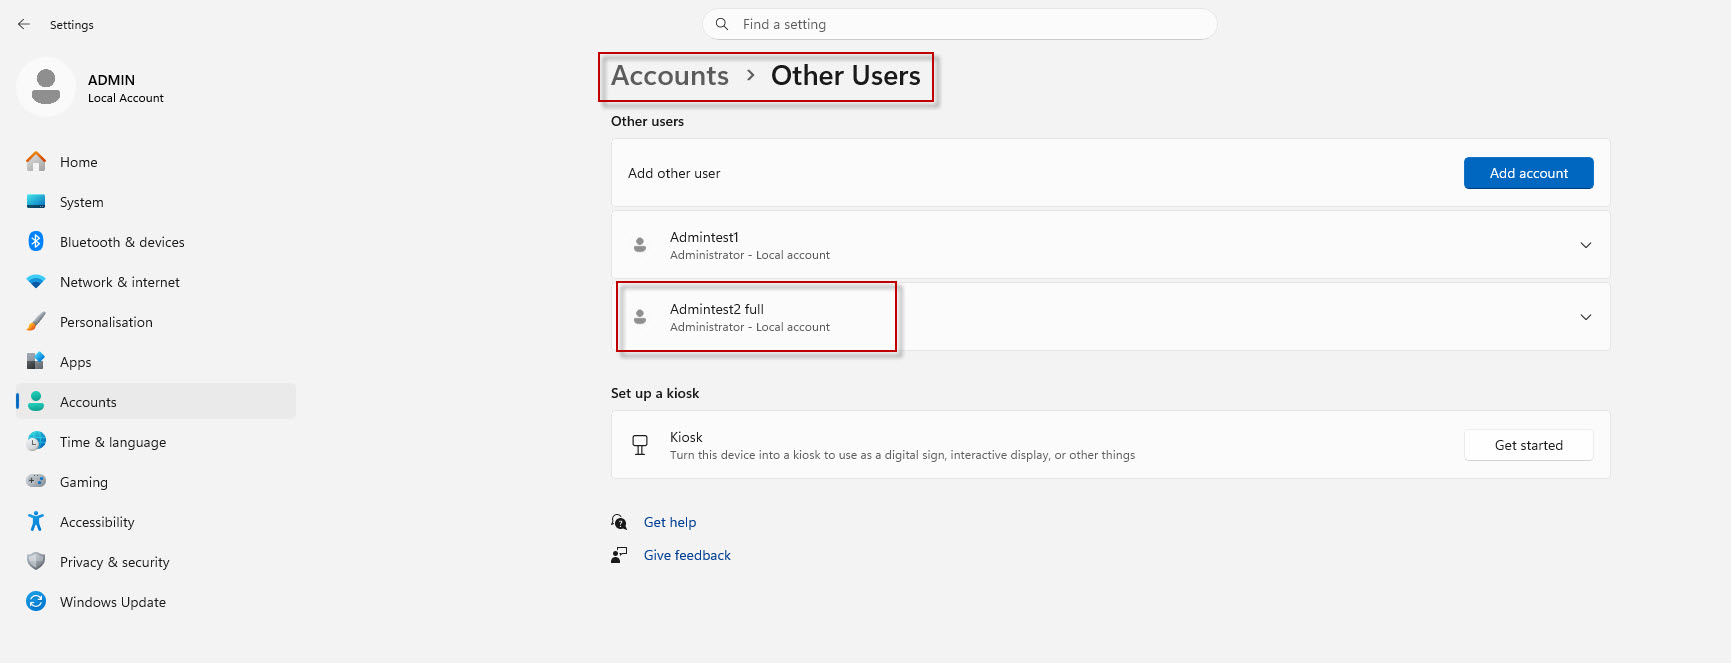
Settings → Accounts → Other users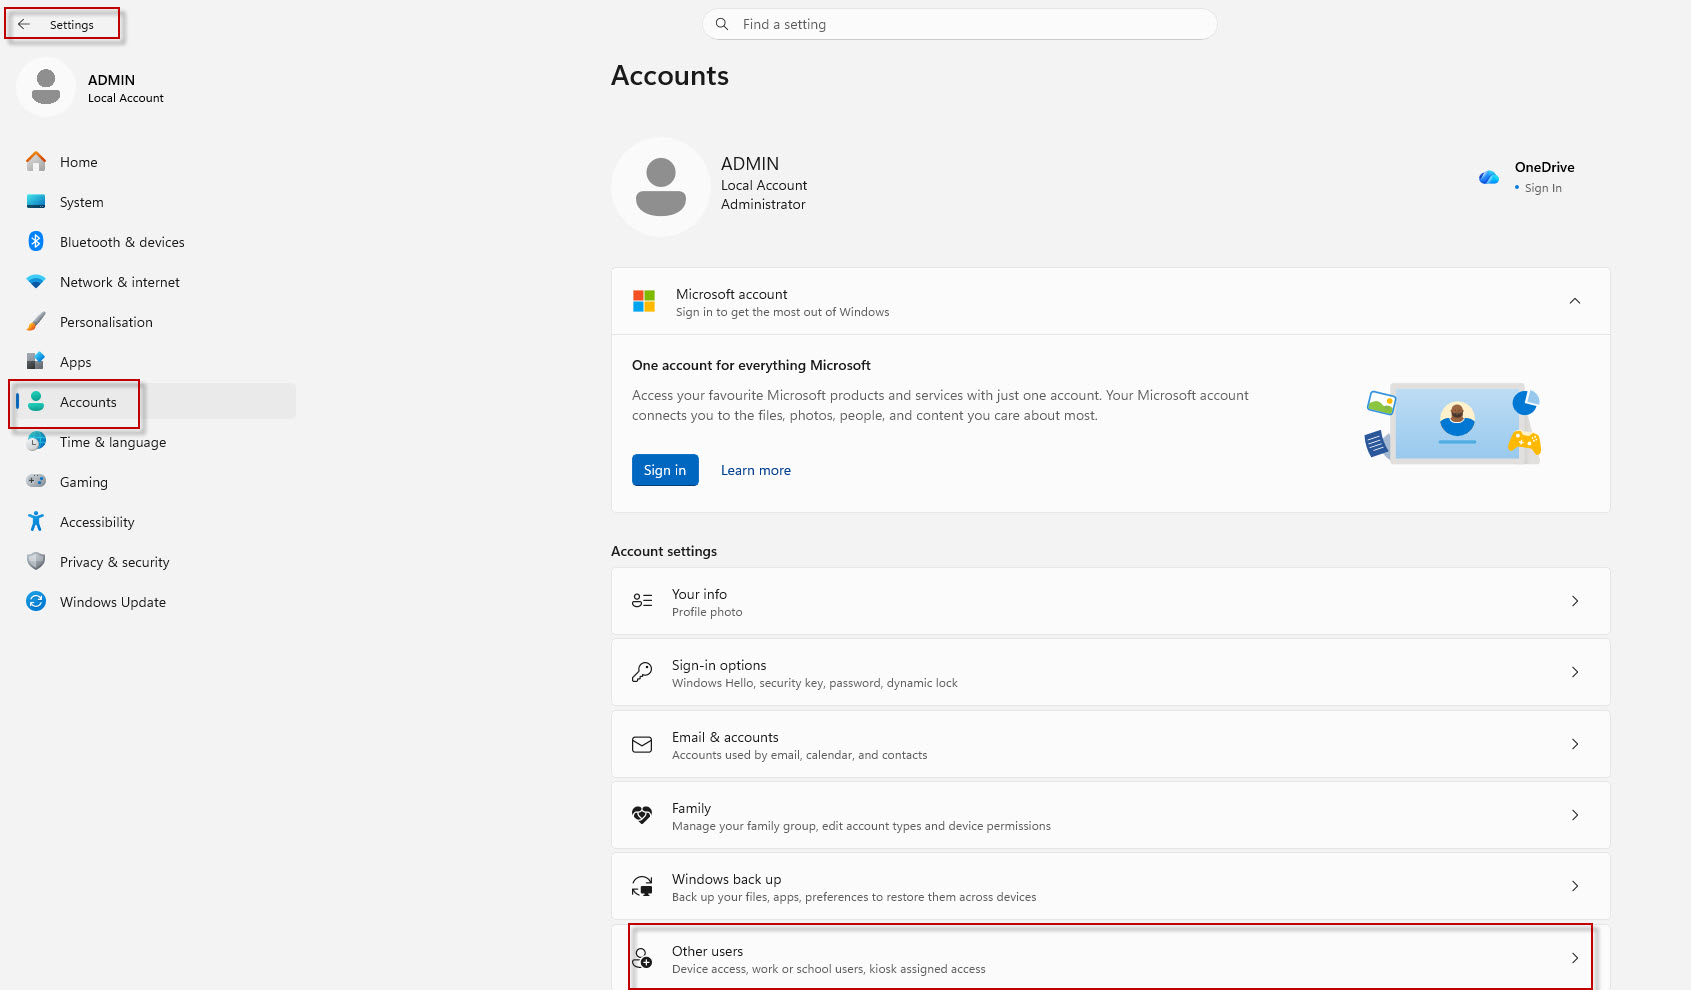
You should now see Admintest2 displayed as an Administrator.
Method 3: Create an Administrator User Using Windows Settings
This is the easiest method for beginners.
Step 1: Open Settings
Open: Settings
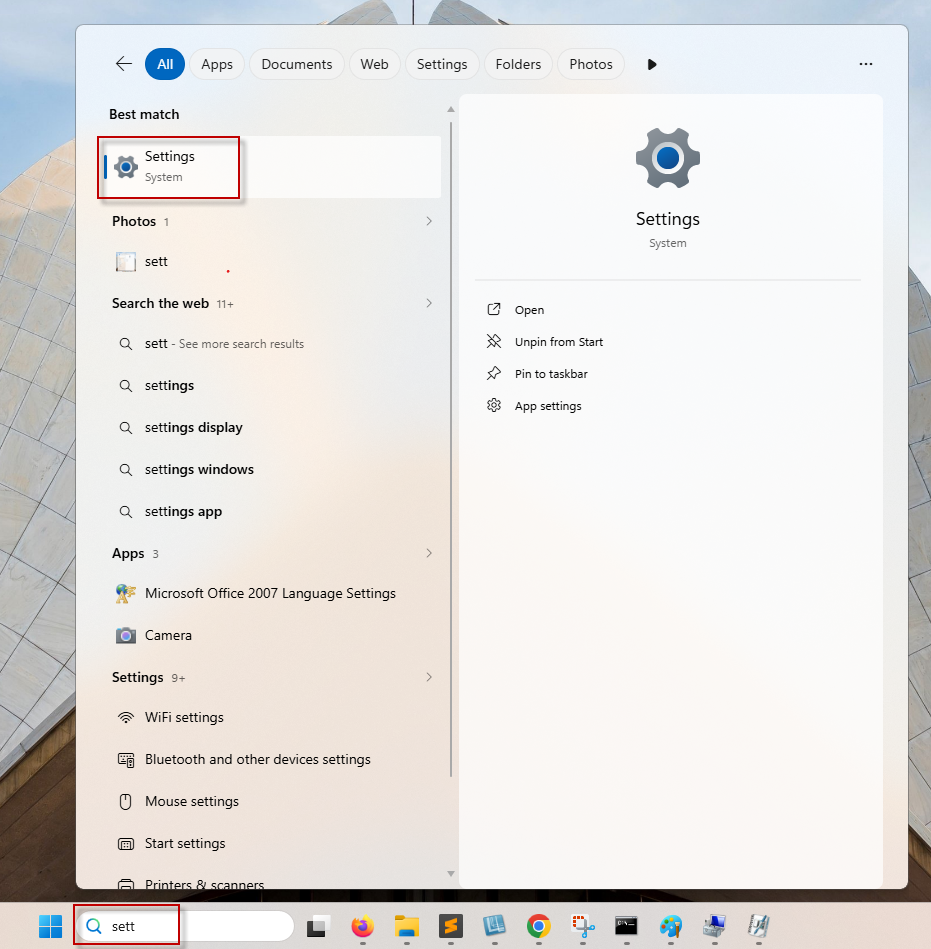
Navigate to:
Accounts → Other users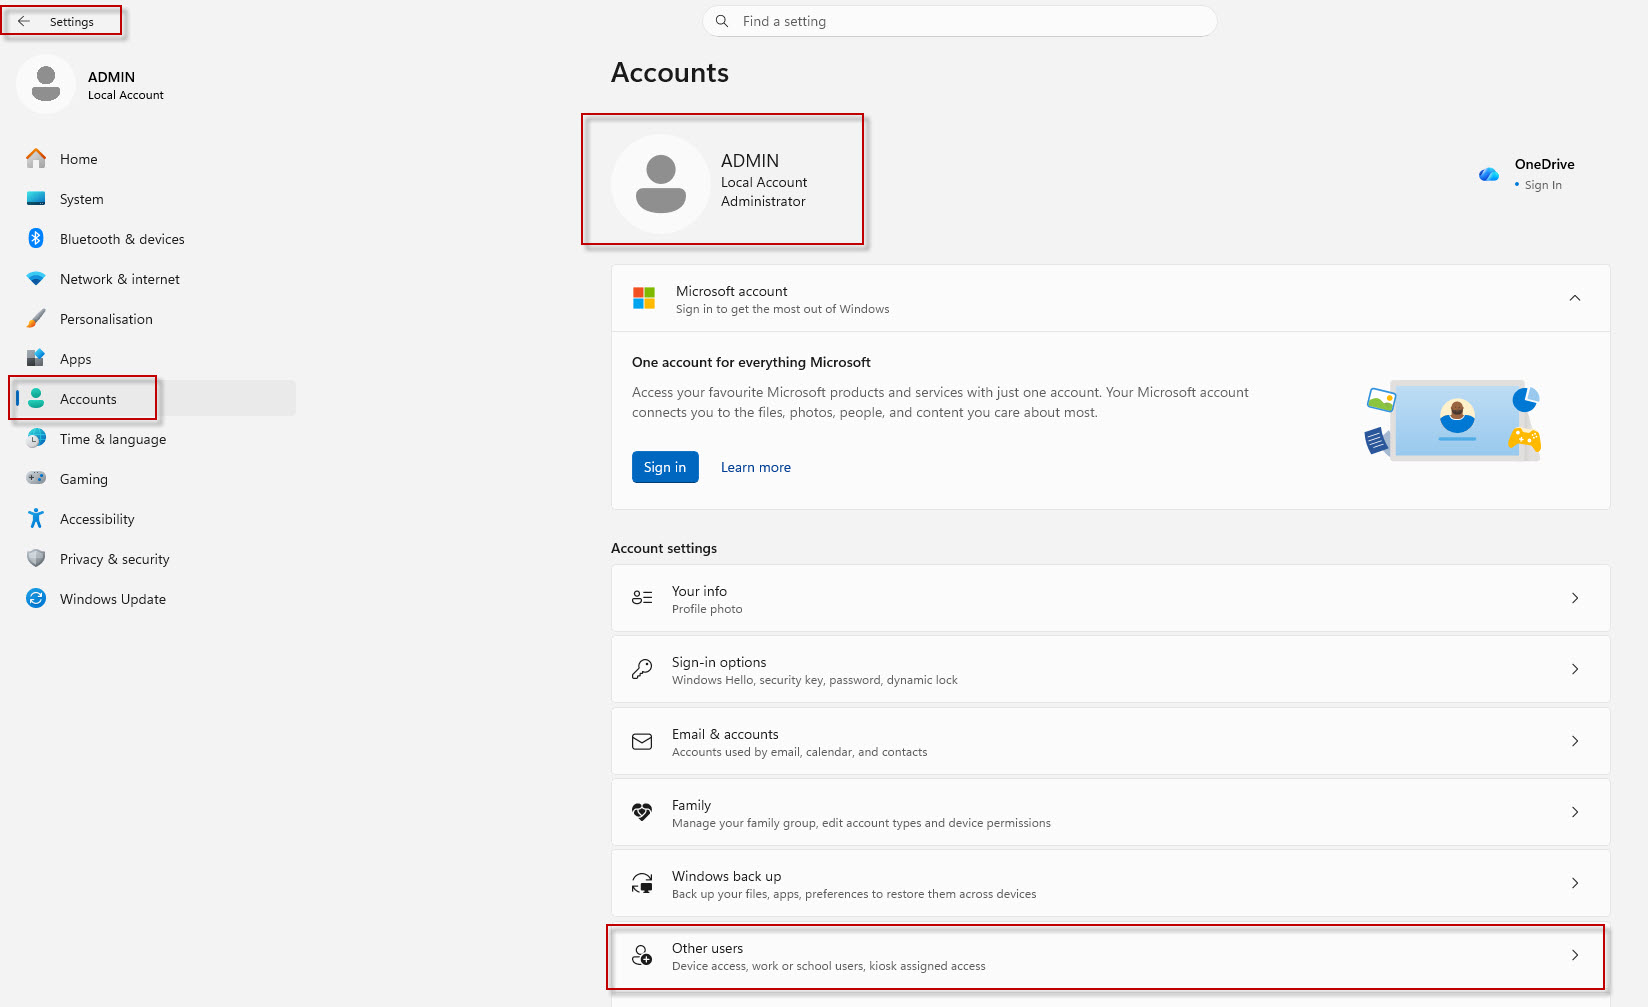
Step 2: Add a New Account
Click: Add account
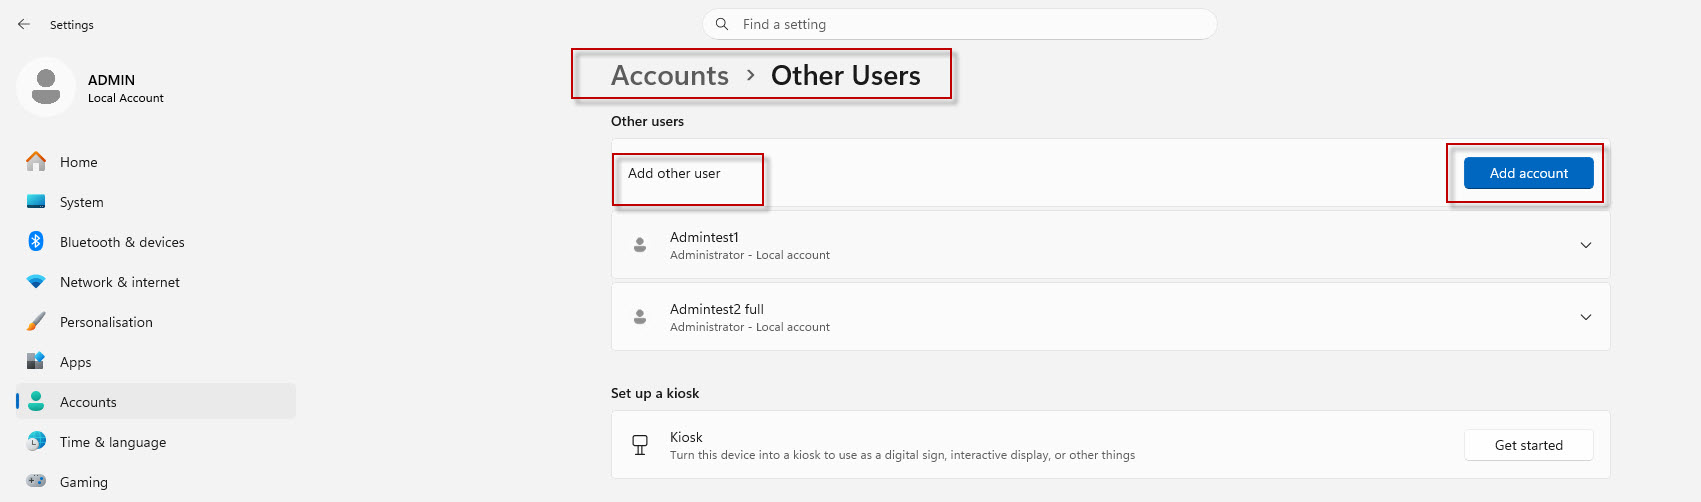
When prompted, select: I don't have this person's sign-in information
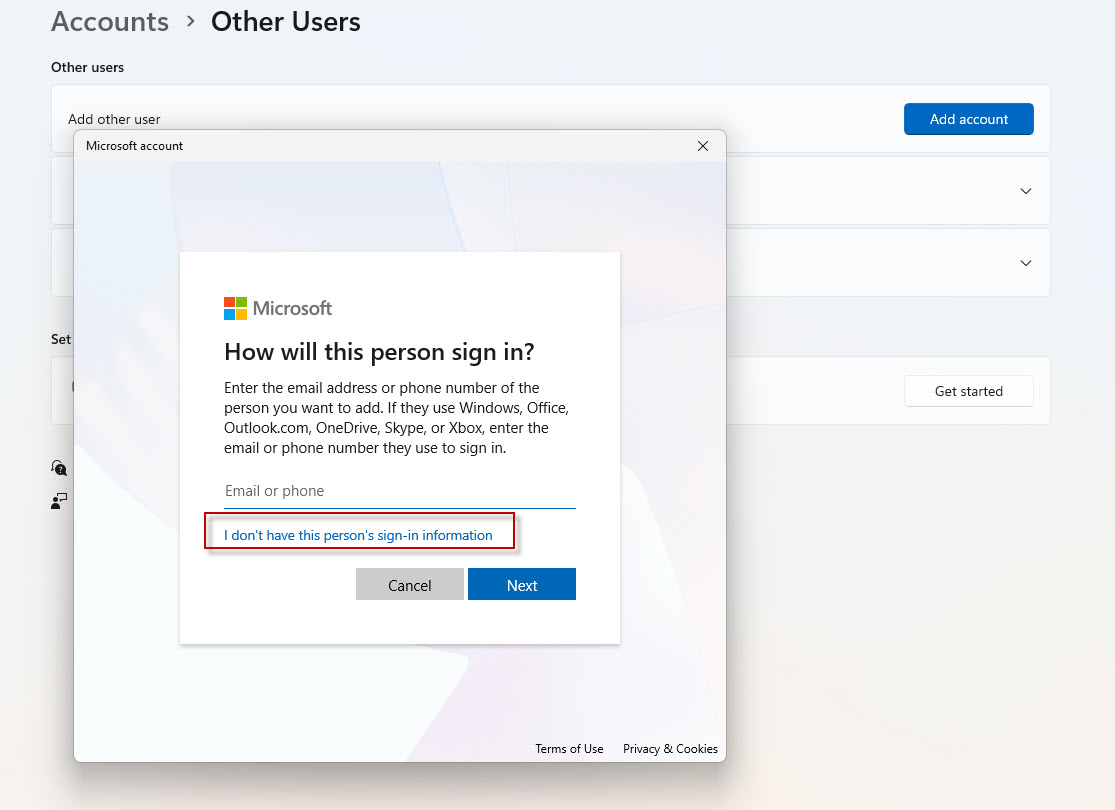
Next, click: Add a user without a Microsoft account
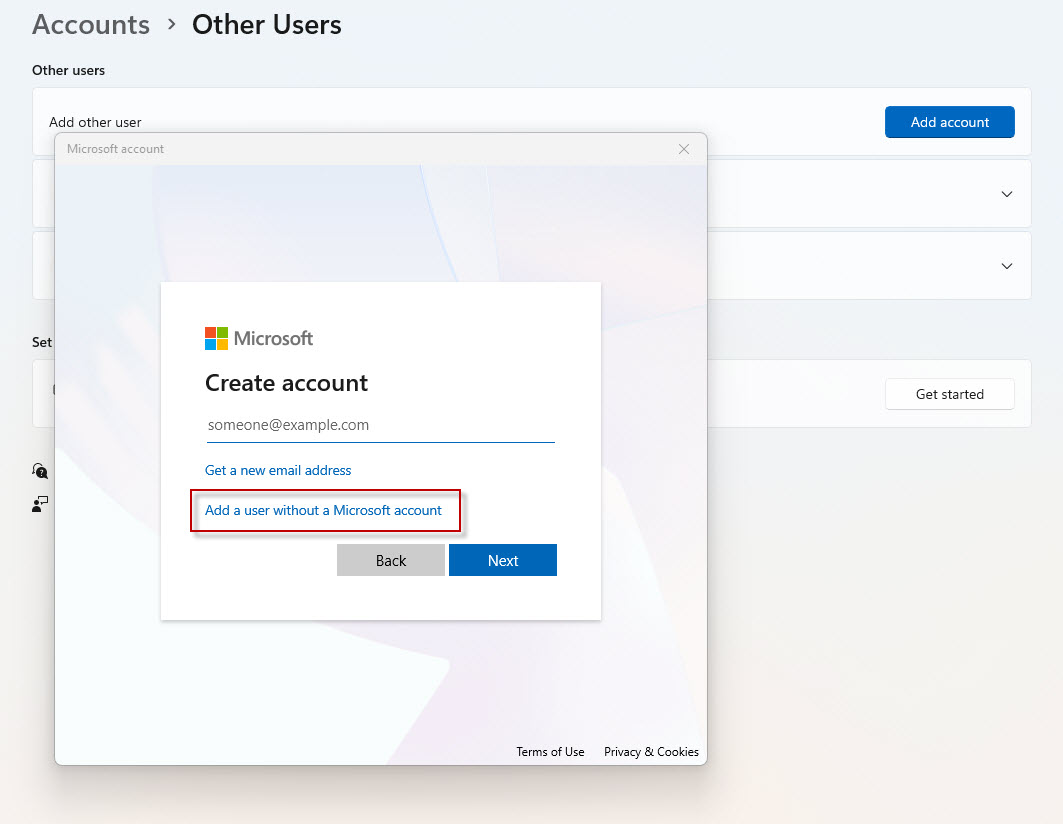
Step 3: Create the Local User
Enter the required information:
- Username
- Password
- Confirm Password
- Security Questions
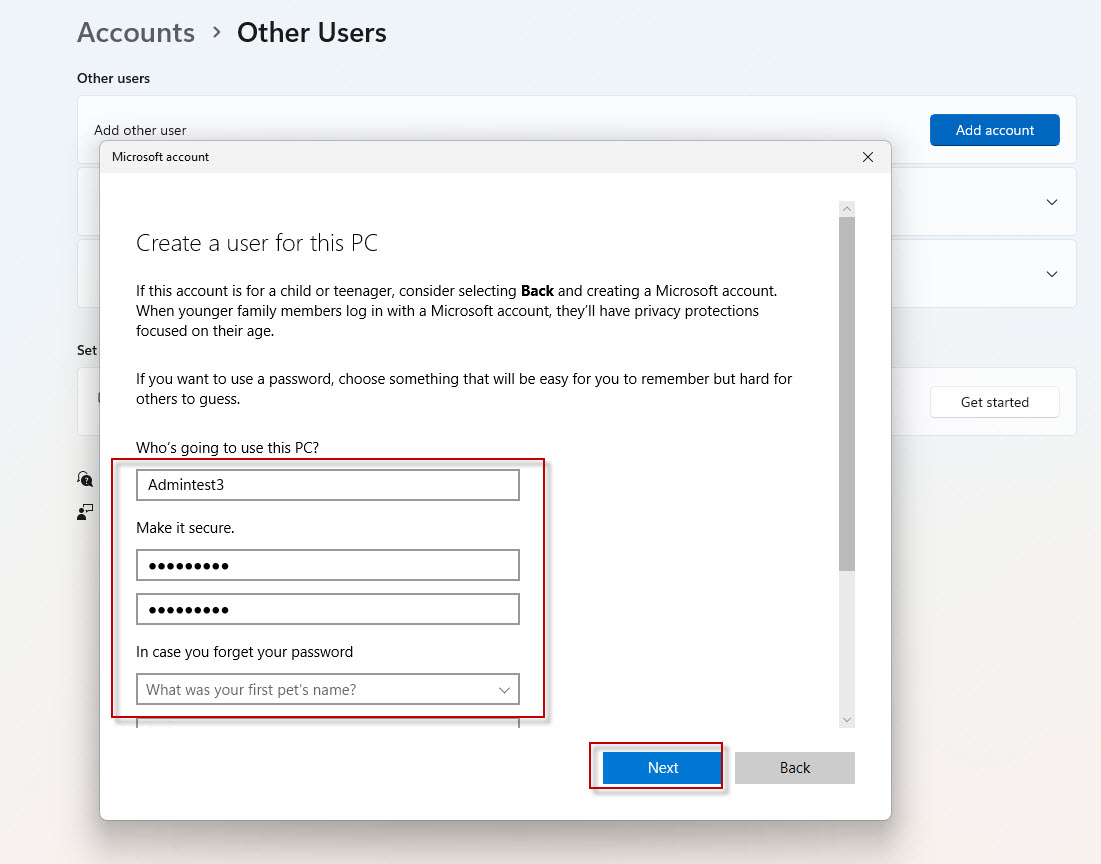
For example: Username: Admintest3
Click Next.
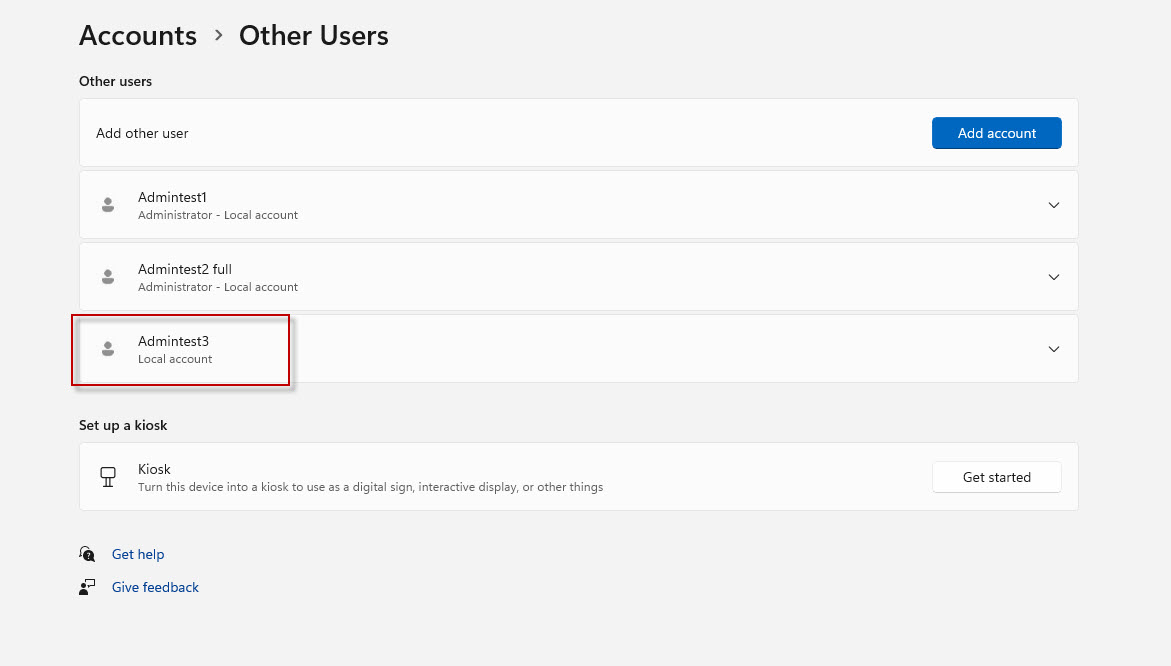
The account is created as a Local Standard User.
Step 4: Change Account Type
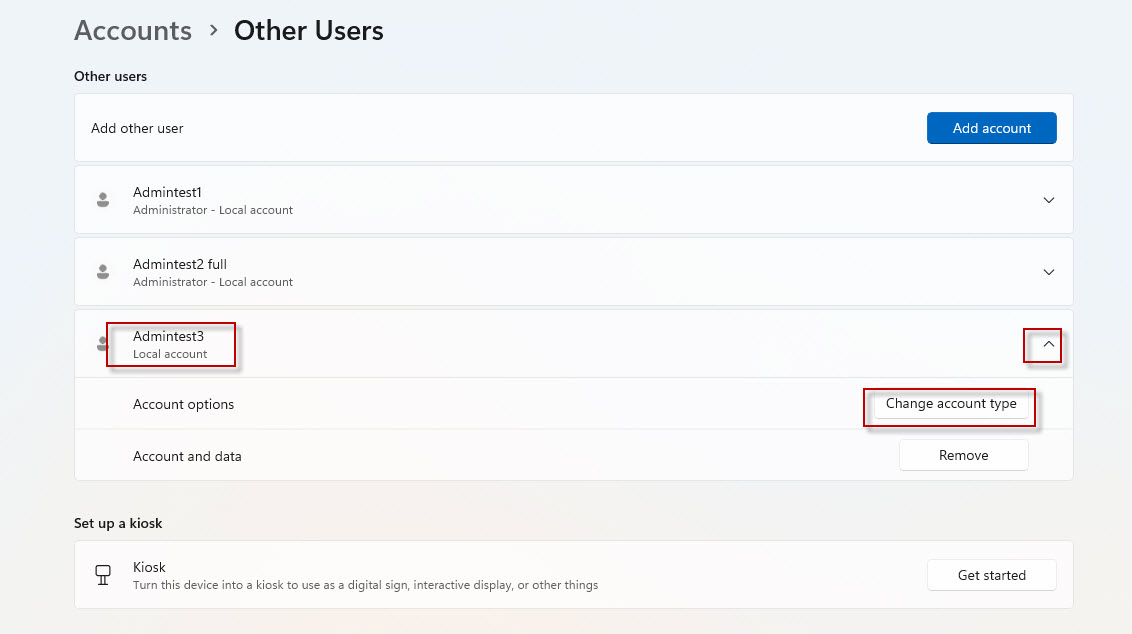
Expand the newly created account.
Click: Change account type
From the drop-down list select: Administrator
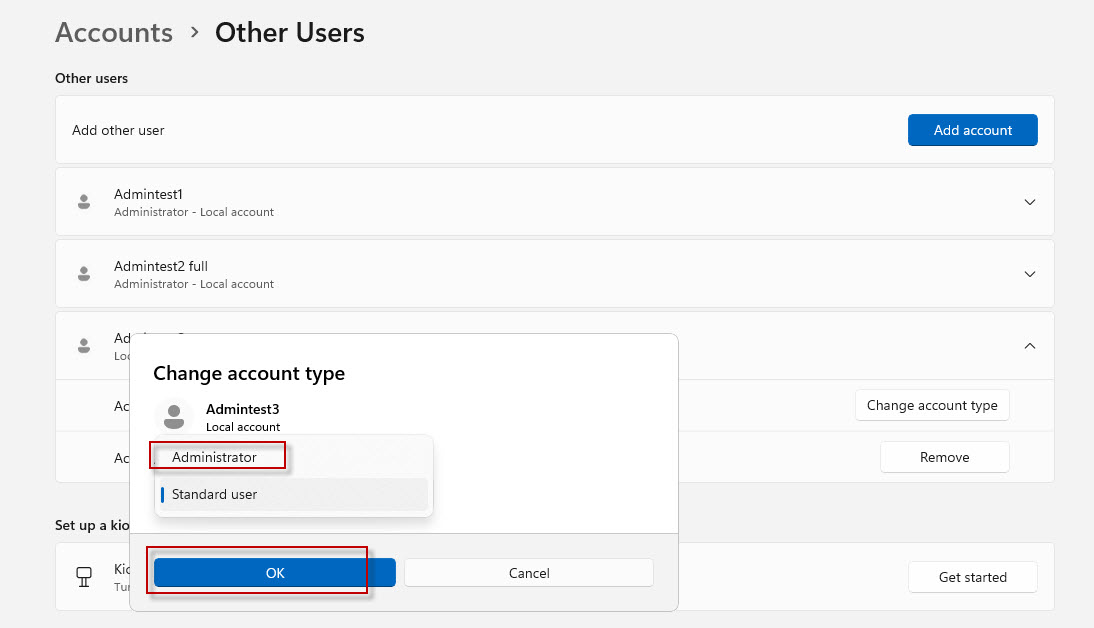
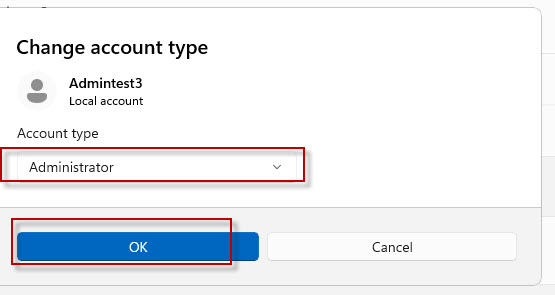
Click OK.
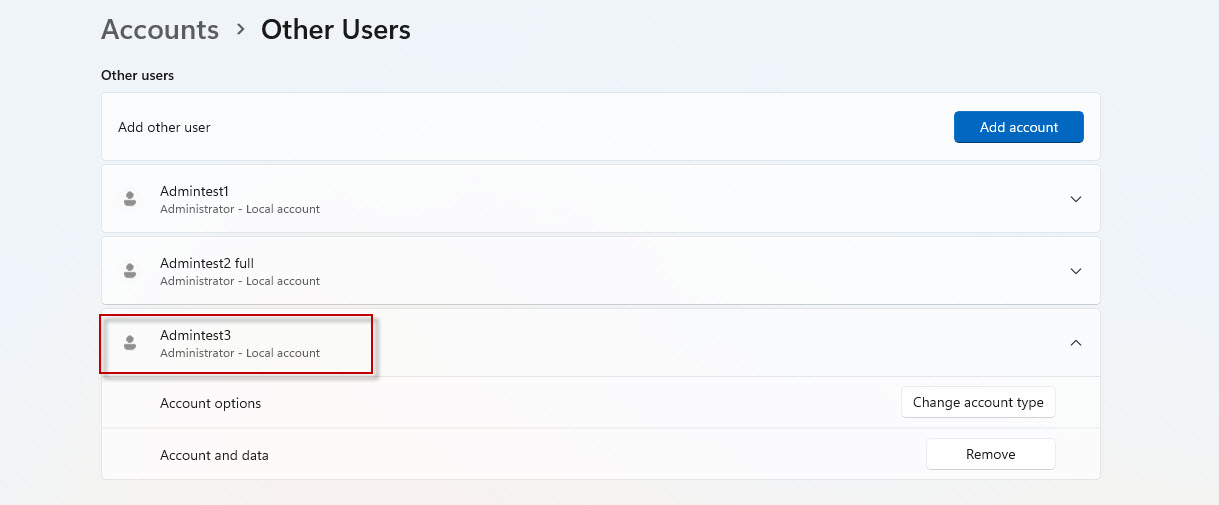
The account is now an Administrator.
Best Practices
- Always use a strong password containing uppercase letters, lowercase letters, numbers, and special characters.
- Create separate administrator accounts for different users instead of sharing one account.
- Remove unused administrator accounts to reduce security risks.
- Keep only trusted users in the Administrators group.
- Regularly review local user accounts and permissions.
Windows 11 provides several simple ways to create an administrator account depending on your preference. The Command Prompt method is ideal for advanced users and administrators, Computer Management offers a graphical interface with more control, and the Settings app provides the easiest experience for beginners. Regardless of the method you choose, always assign administrator privileges carefully and remove unused accounts to keep your system secure.









This Post Has One Comment
Comments are closed.