DirBuster is an essential tool for penetration testers and security professionals, allowing them to uncover hidden directories and files on web servers through brute force techniques. This multi-threaded Java application comes pre-installed in Kali Linux, a popular distribution used for security assessments. In this article, we will explore the features of DirBuster, how to use it effectively, and tips to enhance your scanning experience.
What is DirBuster?
DirBuster is designed specifically for brute forcing directories and file names on web servers and applications. It operates by sending multiple requests simultaneously to uncover hidden paths that may not be directly accessible or visible through standard browsing. With a user-friendly GUI and extensive wordlists, DirBuster makes the process of discovering sensitive information both efficient and straightforward.
Features of DirBuster
- Multi-Threading: DirBuster supports multi-threaded operations, allowing multiple requests to be sent at once. This significantly speeds up the scanning process.
- Pre-Installed in Kali Linux: One of the standout features of DirBuster is that it comes pre-installed in Kali Linux, making it readily accessible for security professionals.
- Customizable Wordlists: DirBuster provides several existing wordlists that can be used to brute force directories and files. Users can also add their own lists to enhance the scanning capability.
- Graphical User Interface (GUI): The GUI simplifies the process of setting up scans, viewing results, and generating reports.
- Multiple Scanning Options: DirBuster offers various scanning methods, including list-based brute force and pure brute force, allowing users to tailor their approach based on specific needs.
How to Start DirBuster
To launch DirBuster in Kali Linux, follow these simple steps:
- Open Kali Linux.
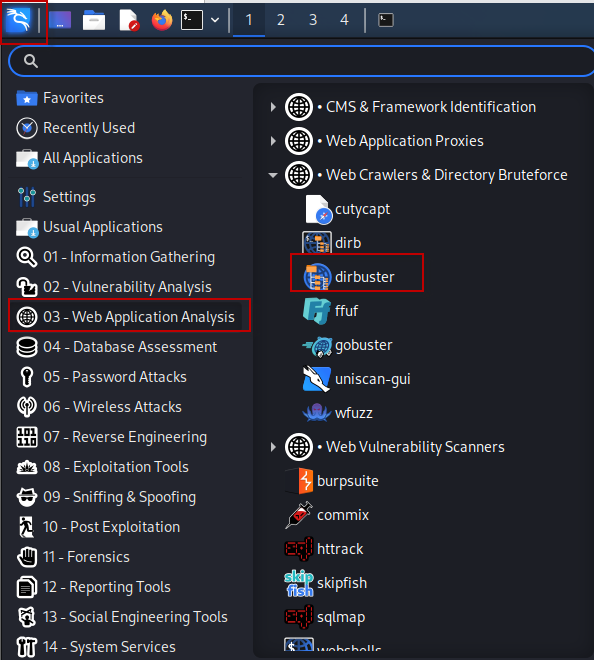
- Navigate to
Applications > Web Application Analysis > Web Crawlers & Directory Bruteforce > Dirbuster.
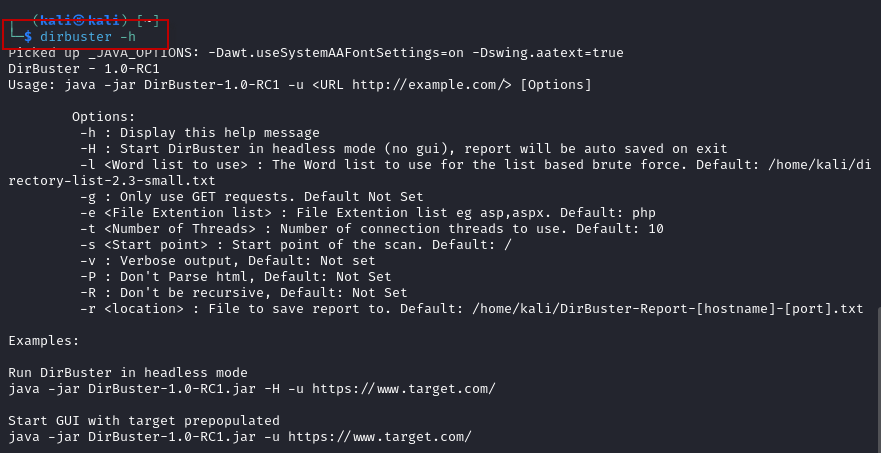
- Alternatively, you can open a terminal and type
dirbuster, then press Enter.

For additional help and command options, you can type dirbuster -h in the terminal.
Configuring DirBuster for Scanning
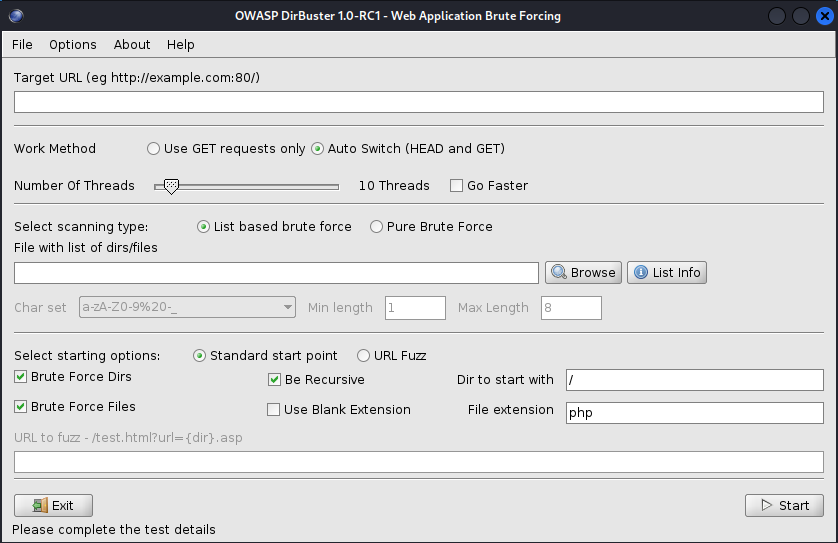
Once you have opened DirBuster, follow these steps to set it up for scanning:
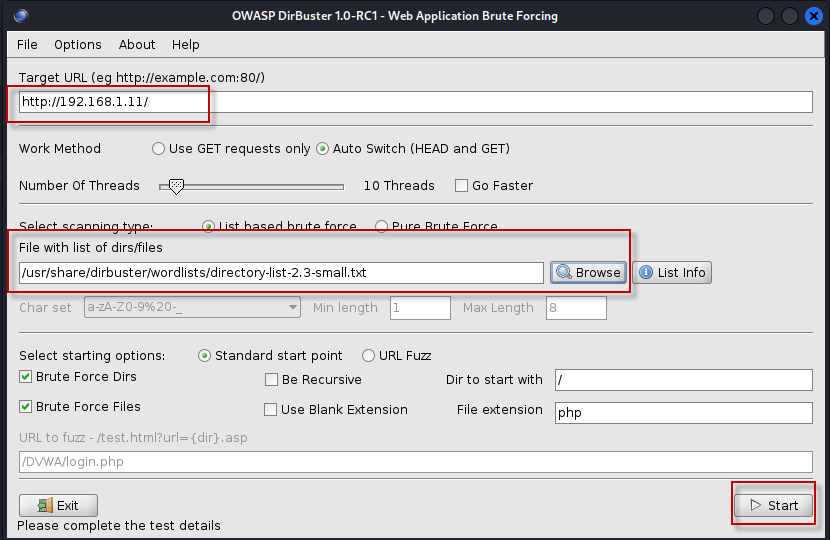
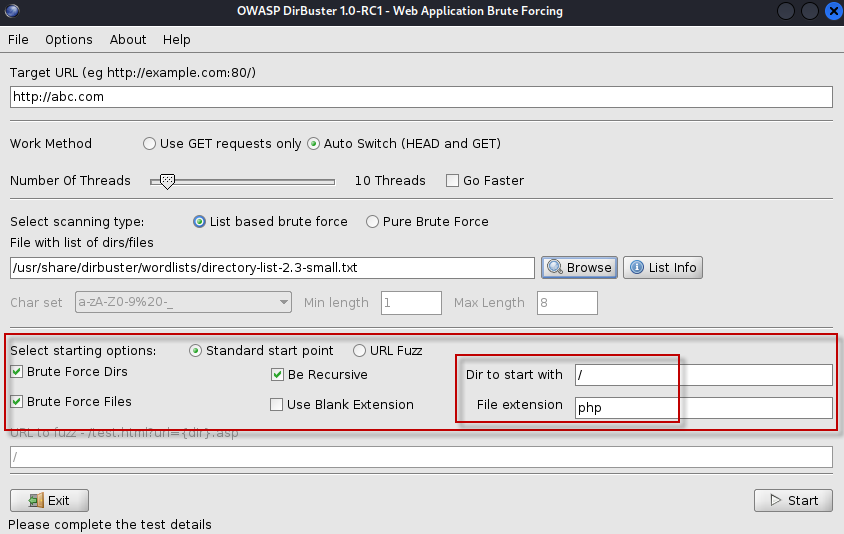
- Set the Target URL: Enter the URL of the target web application you want to scan (e.g.,
http://192.168.1.11/). - Select a Wordlist: Click on the “Browse” button to choose an existing wordlist. A recommended wordlist is
/usr/share/dirbuster/wordlists/directory-list-2.3-small.txt, which provides a good starting point. - Default Settings: The default settings are usually sufficient for a basic scan. However, you can customize them if needed.
- Start the Scan: Click on the “Start” button to begin the scanning process.
Viewing Results
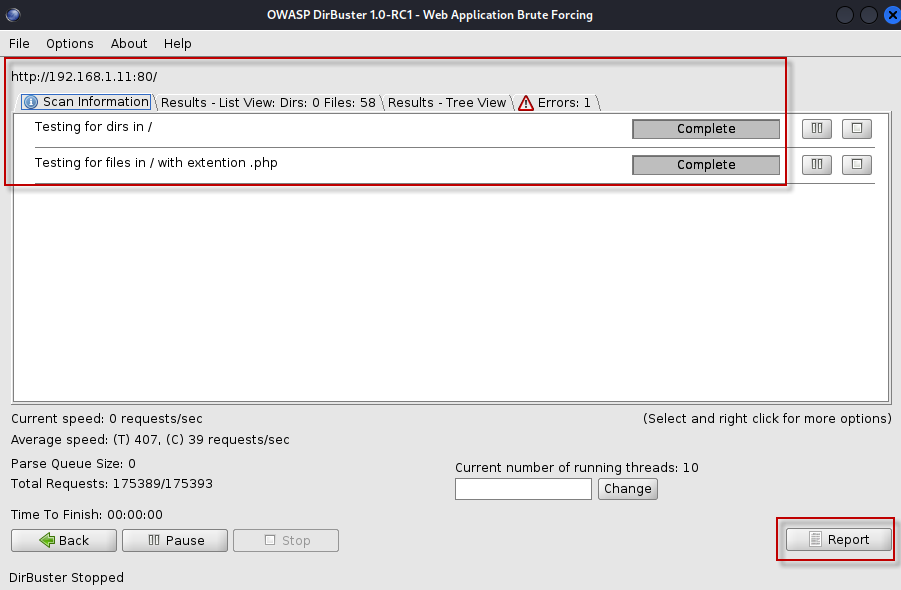
DirBuster offers different ways to view the results of your scan:
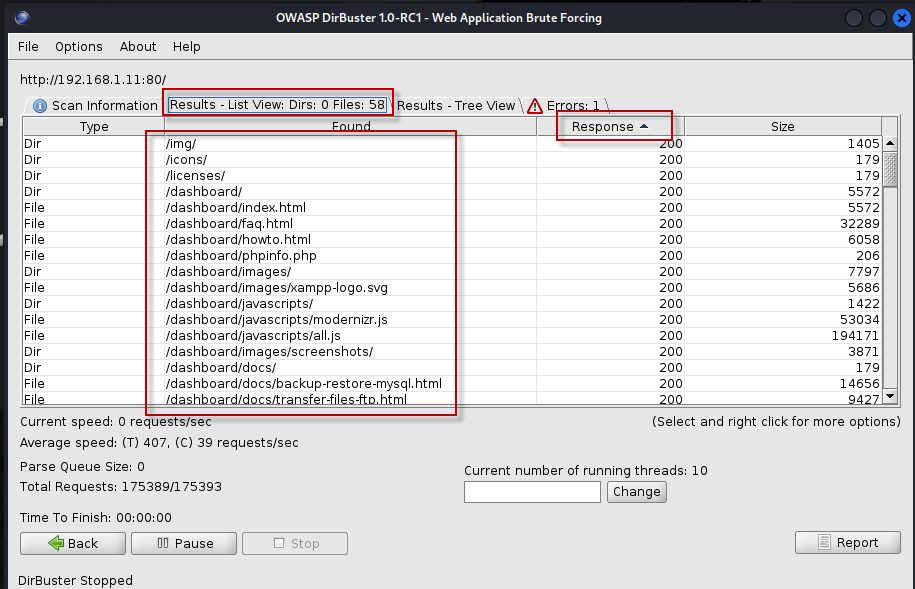
- List View: This view displays the results in a simple list format, showing found directories and files.
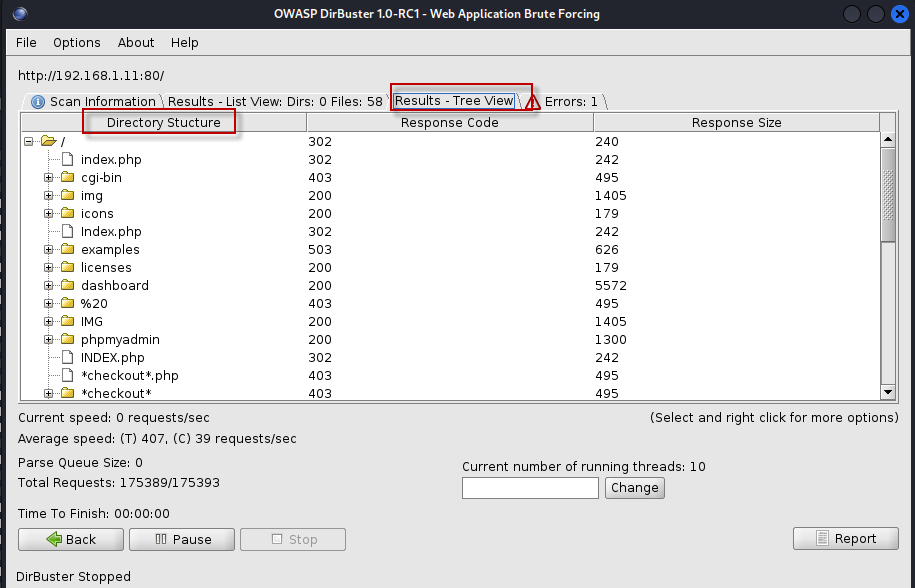
- Tree View: This option provides a hierarchical view of the discovered directory structure, making it easier to navigate through the results.
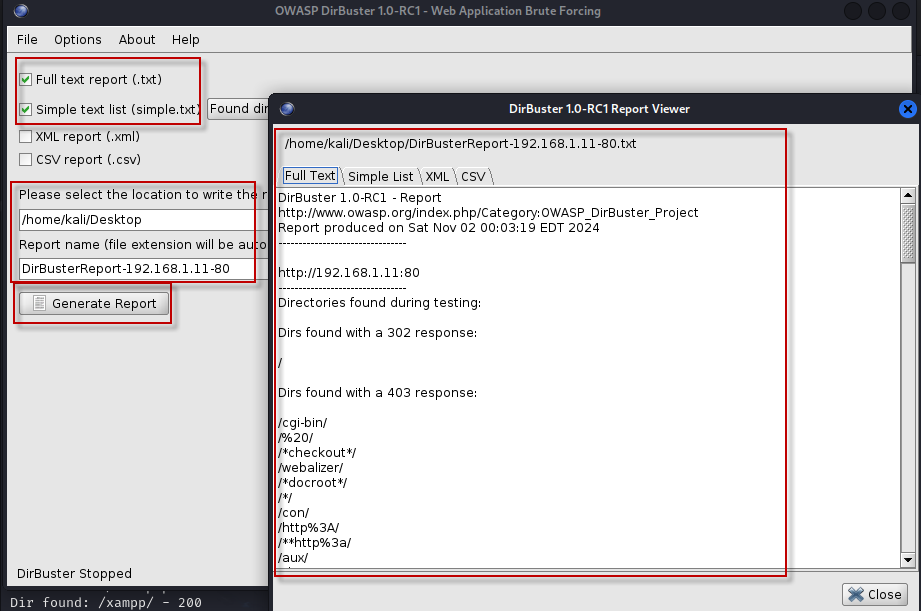
After the scan is complete, you can generate a report of your findings. To do this:
- Click on the “Report” button.
- Select the specific report type by checking the appropriate check boxes.
- Choose a path to save the report.
- Click the “Generate Report” button to create your report.
Advanced Options in DirBuster
DirBuster also comes with various advanced settings that can enhance your scanning experience:
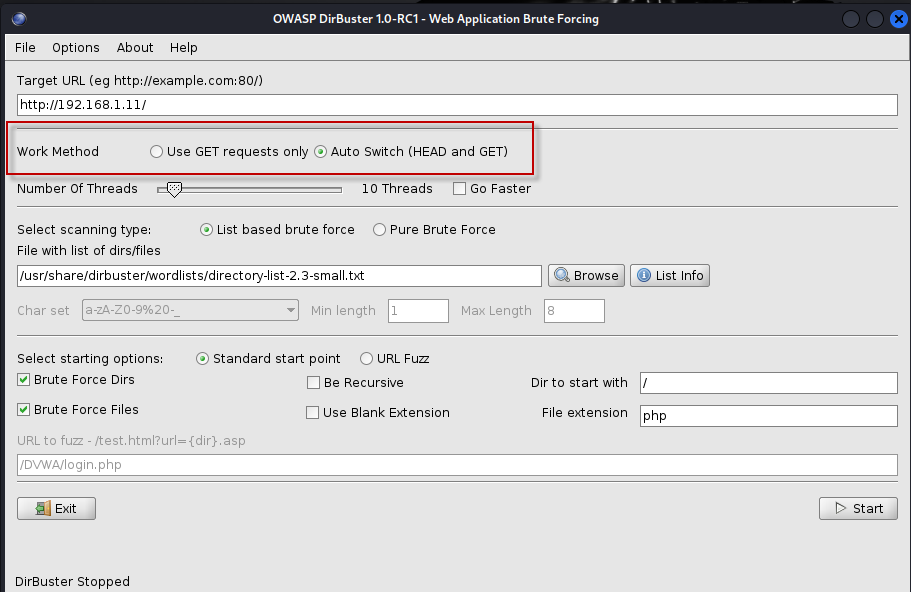
- Work Method: By default, DirBuster uses an auto-switch method that alternates between HEAD and GET requests. You can choose to use only GET requests if preferred.
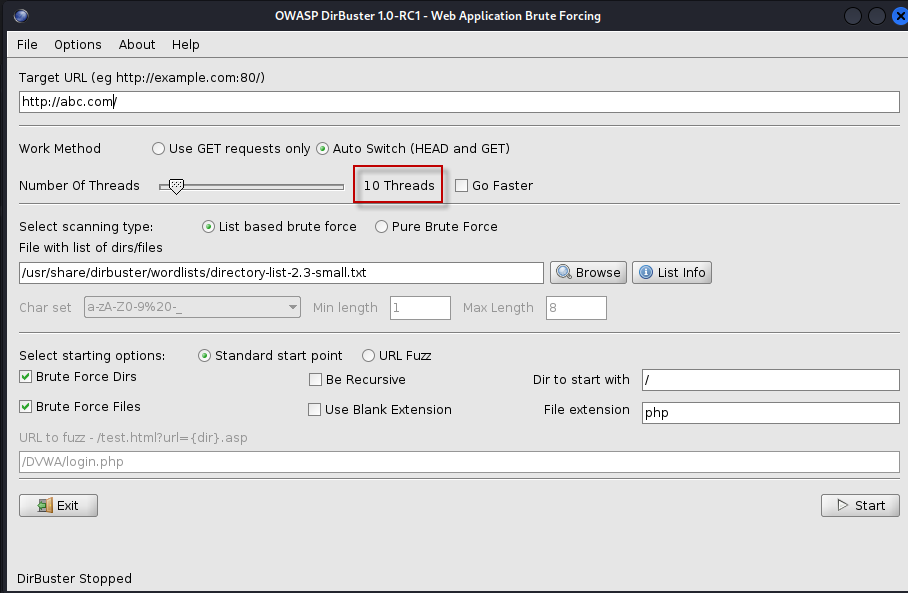
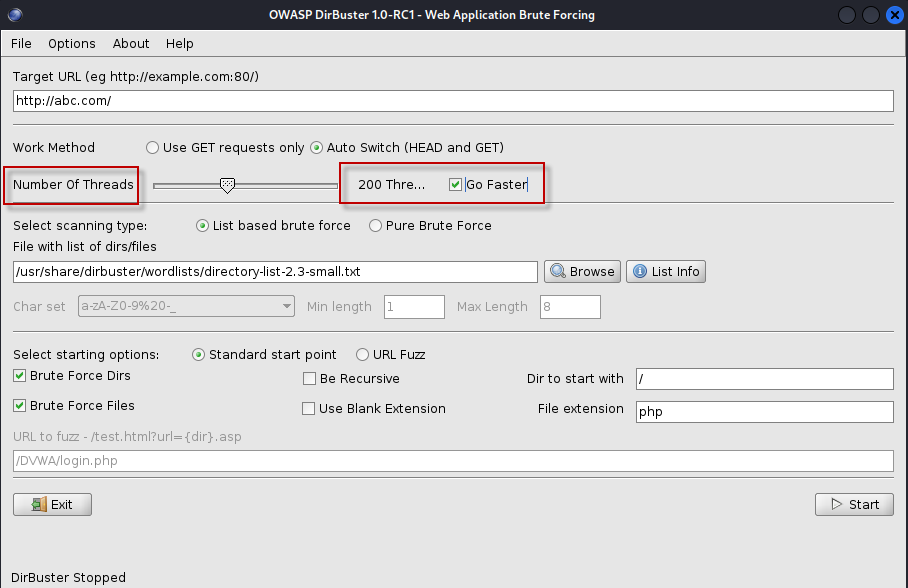
- Number of Threads: The default setting is 10 threads, but you can increase this to speed up the scan. Enabling the “Go Faster” checkbox allows you to use up to 200 threads, further accelerating the process.
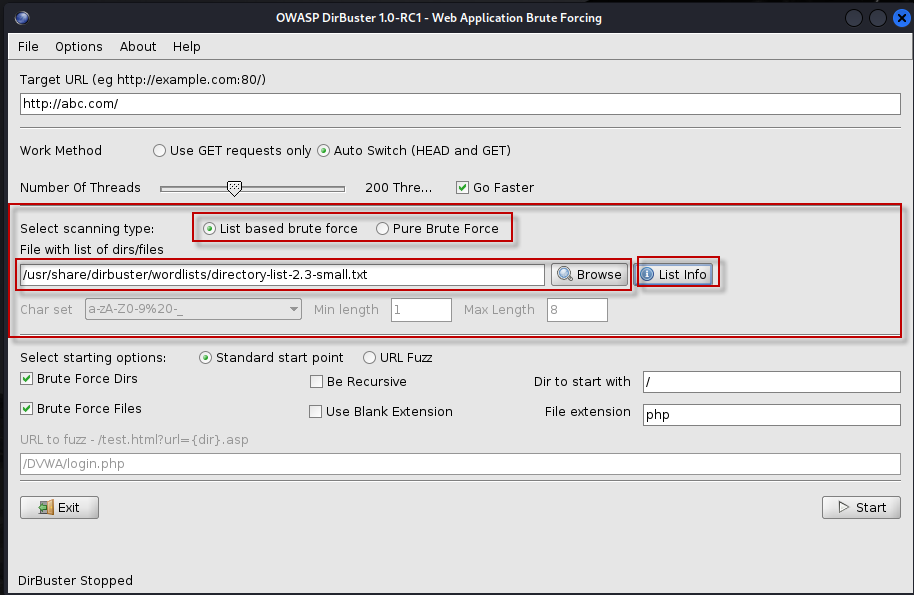
- Scanning Type: You can select between list-based brute force (the default) and pure brute force. The pure brute force option allows for more customizable scanning.

- Starting Options: You can specify a starting point for your scan. For instance, changing the default from
/to/adminwill focus the scan on the/admindirectory. Additionally, you can modify the file extension filter, changing the default.phpto other types, like.txt, to broaden the search.
Tips for Effective Use of DirBuster
- Choose the Right Wordlist: The effectiveness of your scan largely depends on the wordlist you select. For specific applications, consider using tailored wordlists that relate to the technologies or frameworks in use.
- Monitor Your Scans: Keep an eye on the results as they come in. Early findings may indicate how to adjust your scanning parameters for better results.
- Adjust Threads Based on Network Capability: While increasing threads can speed up scans, ensure your network can handle the load. Too many threads can lead to false positives or temporary blocks from the target server.
- Regular Updates: As web technologies evolve, regularly updating your wordlists and DirBuster version can provide better results and more accurate scans.
Conclusion
DirBuster is a powerful tool for anyone involved in web security testing, providing a straightforward way to discover hidden files and directories. By leveraging its multi-threading capabilities and customizable options, security professionals can efficiently perform directory brute force attacks. Whether you’re a seasoned pentester or just starting, DirBuster is a must-have tool in your cybersecurity arsenal. With proper configuration and usage, you can uncover vulnerabilities that might otherwise remain hidden.
